


Introduction
In this guide, we will embark on a journey to demystify the process of setting up a web server and hosting your very own website.
Hosting your website opens up a world of possibilities. Unlike shared hosting, where multiple websites share the same server resources, or managed hosting, which might limit your customization options, having your web server grants you the freedom to:
Setting up a web server and hosting your website gives you full control over your website's configuration, data, and resources. It allows you to customize the server environment to suit your specific needs. Here's an overview of the steps involved in setting up a web server and hosting your own website:
What Does it Mean to Host a Website?
Hosting a website means that you put your website files on a special computer called a server. This computer makes your website files publicly accessible on the internet, so anyone can visit it. For other people around the world to see the website, these special computers have a particular set of software installed. This software is called a web server. A web server’s basic job is to receive incoming requests and respond by sending the requested page to the user’s browser.
Pre-requisites
A GitHub account to store the source code.
one server/machine :
Apache2 web server installed.
Let's start -->
Step 1: Get the source code of the web server
https://github.com/Akshay-aan/My-host-website.git
Step 2: Make the server ready for deployment purposes
Create ec2 instance for deployment purposes. An instance can be t2-micro, 1 CPU, 1 GiB Memory, and ports 80, 22, and 443 are open to allow incoming traffic

Step 3: Install Apache Web Server
Just follow the commands given below and you get it installed on your machine.
$ sudo apt update && sudo apt upgrade
$ sudo apt install apache2
$ apche2 -v
$ sudo service apache2 start

During the installation process of the Apache2 web server, a dialog box or message window appears on the user's screen, prompting them to take action. To proceed with the installation, the user should simply press the "Enter" key and continue with the installation process.

To check the status of the Apache2 server, use the following command in the terminal with administrative privileges:
sudo service apache2 status
Executing this command will display the current status of the Apache2 server, indicating whether it is running, stopped, or experiencing any issues.

Step 4: Access your Apache2 server on
http://[ec2 instance public ip]/

This is the default welcome page used to test the correct operation of the Apache2 server after installation on Ubuntu systems. If u can read this page it means that the Apache HTTP server installed at this site is working properly. You should replace /edit this file located at /var/www/html/index.html before hosting your own website on the server.
Step 5: Edit or Add an Index.html file
Now we need to prepare website files. This includes creating the website's design, layout, and content using HTML, CSS, and other relevant technologies. Once your website is ready, you'll need to upload these files to the hosting server.
Navigate to the directory "/var/www/html" using the command:
cd /var/www/htmlList the files present in that directory using the "ls" command. You will see the file named "index.html".
Remove the "index.html" file using the following command with administrative privileges (sudo):
sudo rm index.html
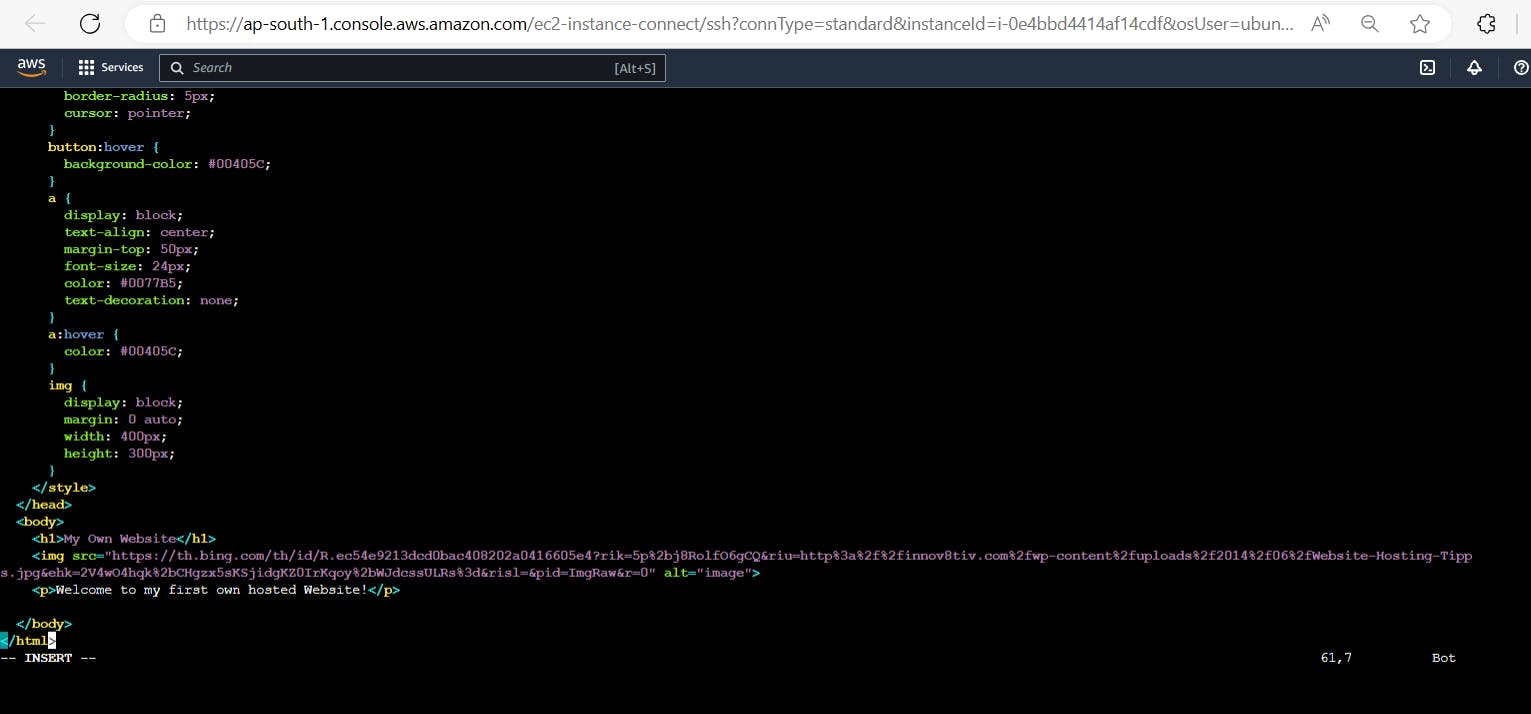
- Create a new "index.html" file and open it for editing using the text editor "vim" with administrative privileges:
sudo vim index.html
- Insert the desired code into the "index.html" file.
<!DOCTYPE html>
<html>
  <head>
    <meta charset="UTF-8">
    <title>My Own Website</title>
    <style>
      body {
        background-color: black;
        color: white;
        font-family: Arial, sans-serif;
      }
      h1 {
        font-size: 36px;
        text-align: center;
        margin-top: 50px;
      }
      p {
        font-size: 24px;
        text-align: center;
        margin-top: 50px;
      }
      button {
        display: block;
        margin: 50px auto;
        padding: 10px 20px;
        font-size: 24px;
        background-color: #0077B5;
        color: white;
        border: none;
        border-radius: 5px;
        cursor: pointer;
      }
      button:hover {
        background-color: #00405C;
      }
      a {
        display: block;
        text-align: center;
        margin-top: 50px;
        font-size: 24px;
        color: #0077B5;
        text-decoration: none;
      }
      a:hover {
        color: #00405C;
      }
      img {
        display: block;
        margin: 0 auto;
        width: 400px;
        height: 300px;
      }
    </style>
  </head>
  <body>
    <h1>My Own Website</h1>
    <img src="https://th.bing.com/th/id/R.ec54e9213dcd0bac408202a0416605e4?rik=5p%2bj8RolfO6gCQ&riu=http%3a%2f%2finnov8tiv.com%2fwp-content%2fuploads%2f2014%2f06%2fWebsite-Hosting-Tips.jpg&ehk=2V4wO4hqk%2bCHgzx5sKSjidgKZ0IrKqoy%2bWJdcssULRs%3d&risl=&pid=ImgRaw&r=0" alt="image">
    <p>Welcome to my first own hosted Website!</p>
  </body>
</html>
- Now perform the command
service apache2 restarton your ec2 server
Step 6: Launching Your Website
Access your website hosted on an EC2 instance using its public IP address. To do this, open a web browser and enter the following URL:
http://[ec2_instance_public_ip]/Once the website loads, refresh the web page to ensure you are viewing the most recent version of the site.
The website should now display your existing content, and the default "test page" should no longer be visible.
To customize the content displayed on your website, modify the "index.html" file. This file contains the main content shown on your website.
After making changes to the "index.html" file and saving them, the website will now display the updated content that you have added.

summary:
This guide empowers you to set up a web server and host your website, providing control, security, scalability, and customization for a compelling online presence.
Happy Learning!
Stay tuned for my next blog. I will keep sharing my learnings and knowledge here with you.
Let's learn together! I appreciate any comments or suggestions you may have to improve my blog content.
Thank you,
Akshay Nazirkar