

What is VPC
A VPC (Virtual Private Cloud) is a virtual network in the cloud that allows you to launch and run Amazon Web Services (AWS) resources in a logically isolated environment.
VPC is a virtual network dedicated to your AWS (Amazon Web Services) account. It provides an isolated section of the AWS Cloud where you can launch and run AWS resources. With a VPC, you have control over various networking aspects, including IP address ranges, subnets, route tables, and security settings. It allows you to create a logically isolated environment in the cloud that mirrors a traditional on-premises data center.
What is VPC Peering
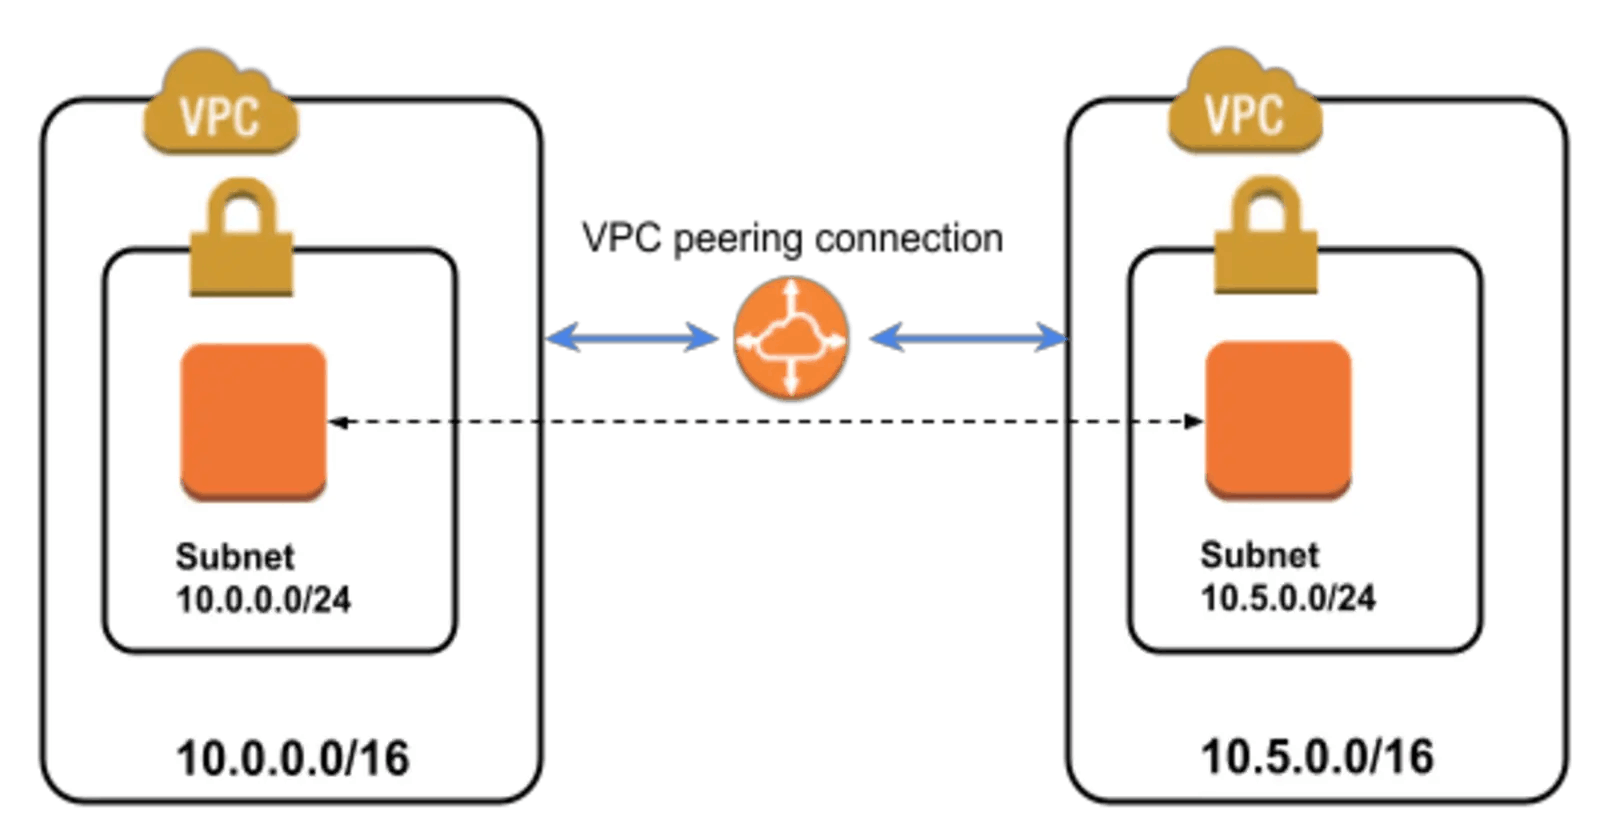
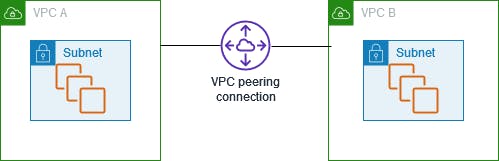
VPC Peering is a networking connection between two VPCs that enables them to communicate with each other as if they were within the same network. This allows you to connect VPCs in the same AWS region, enabling the exchange of traffic directly between them. VPC peering simplifies network architecture and can be useful for scenarios where you have resources distributed across multiple VPCs, and you need them to interact efficiently.
Pre-requisites:
AWS Free Tier Account
Let,s Dive into the Handson Part
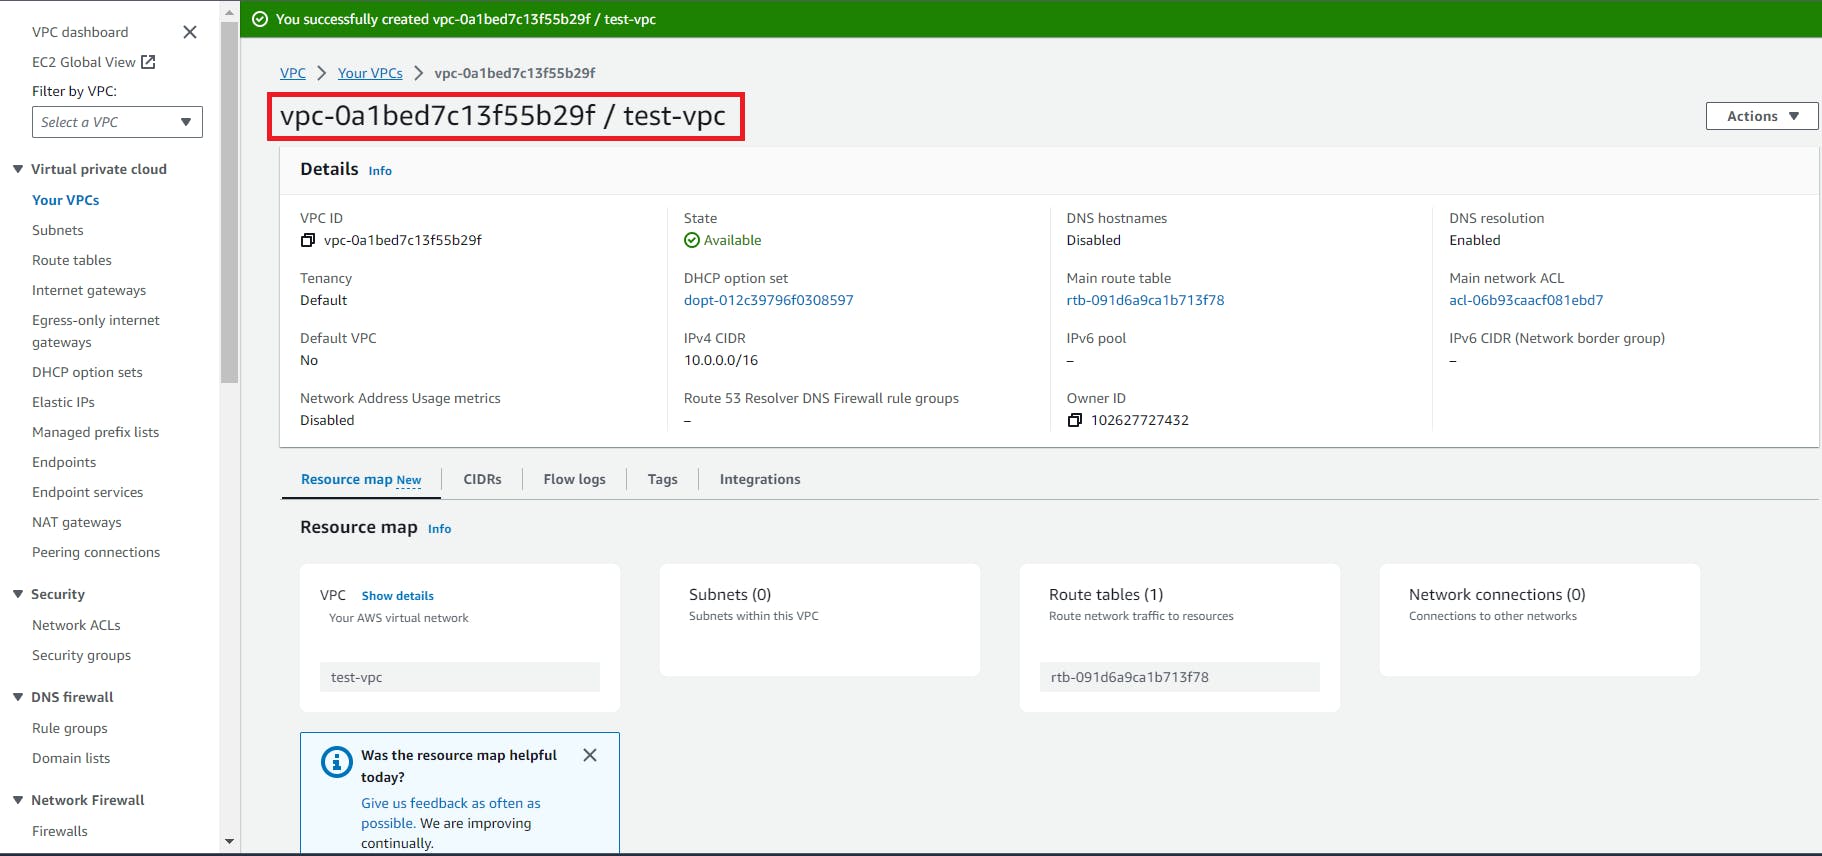
Step1: Create a first VPC named test-vpc
1. Go to the AWS Console and search for VPC
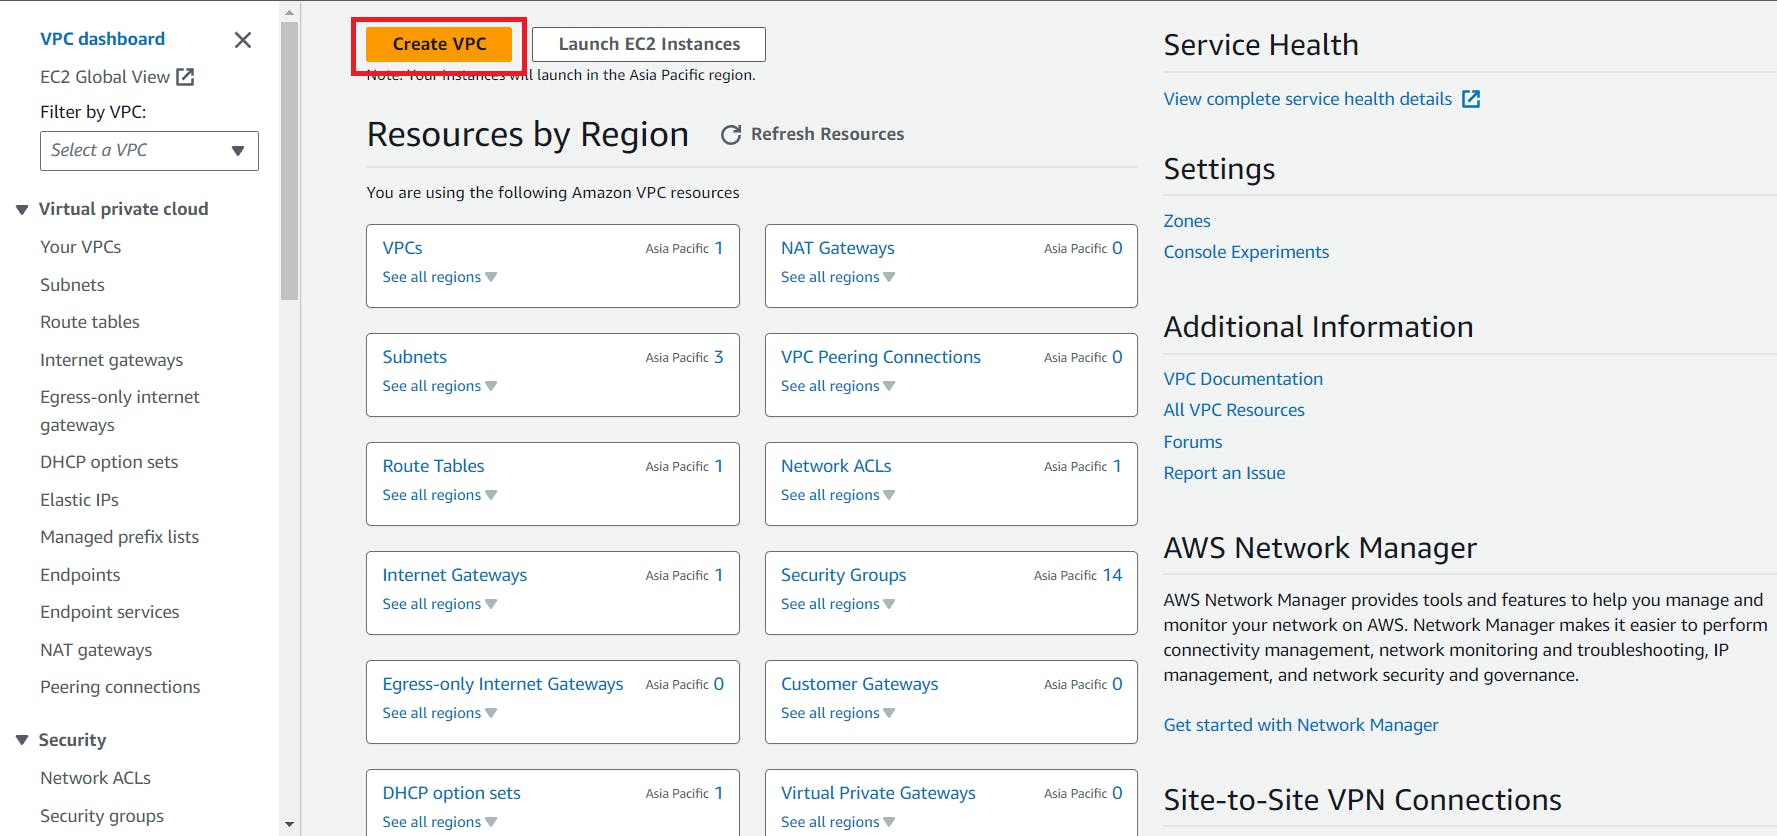
Create a VPC using below steps
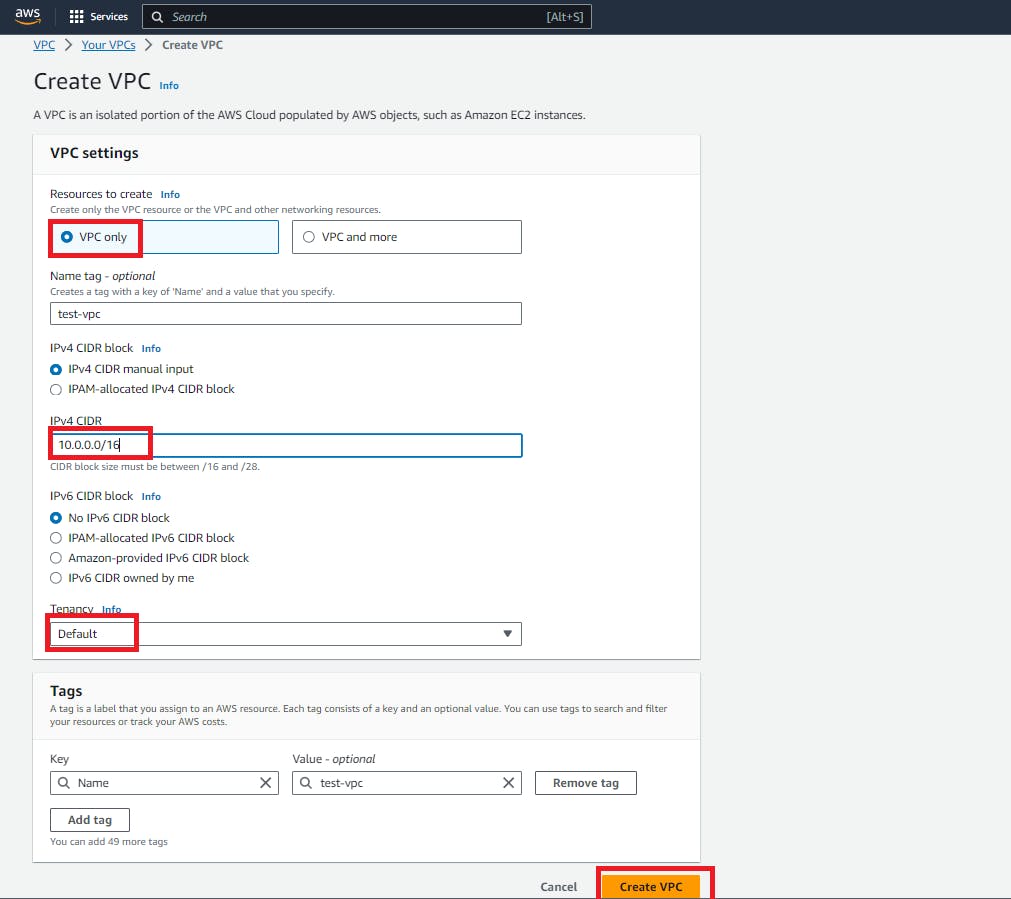
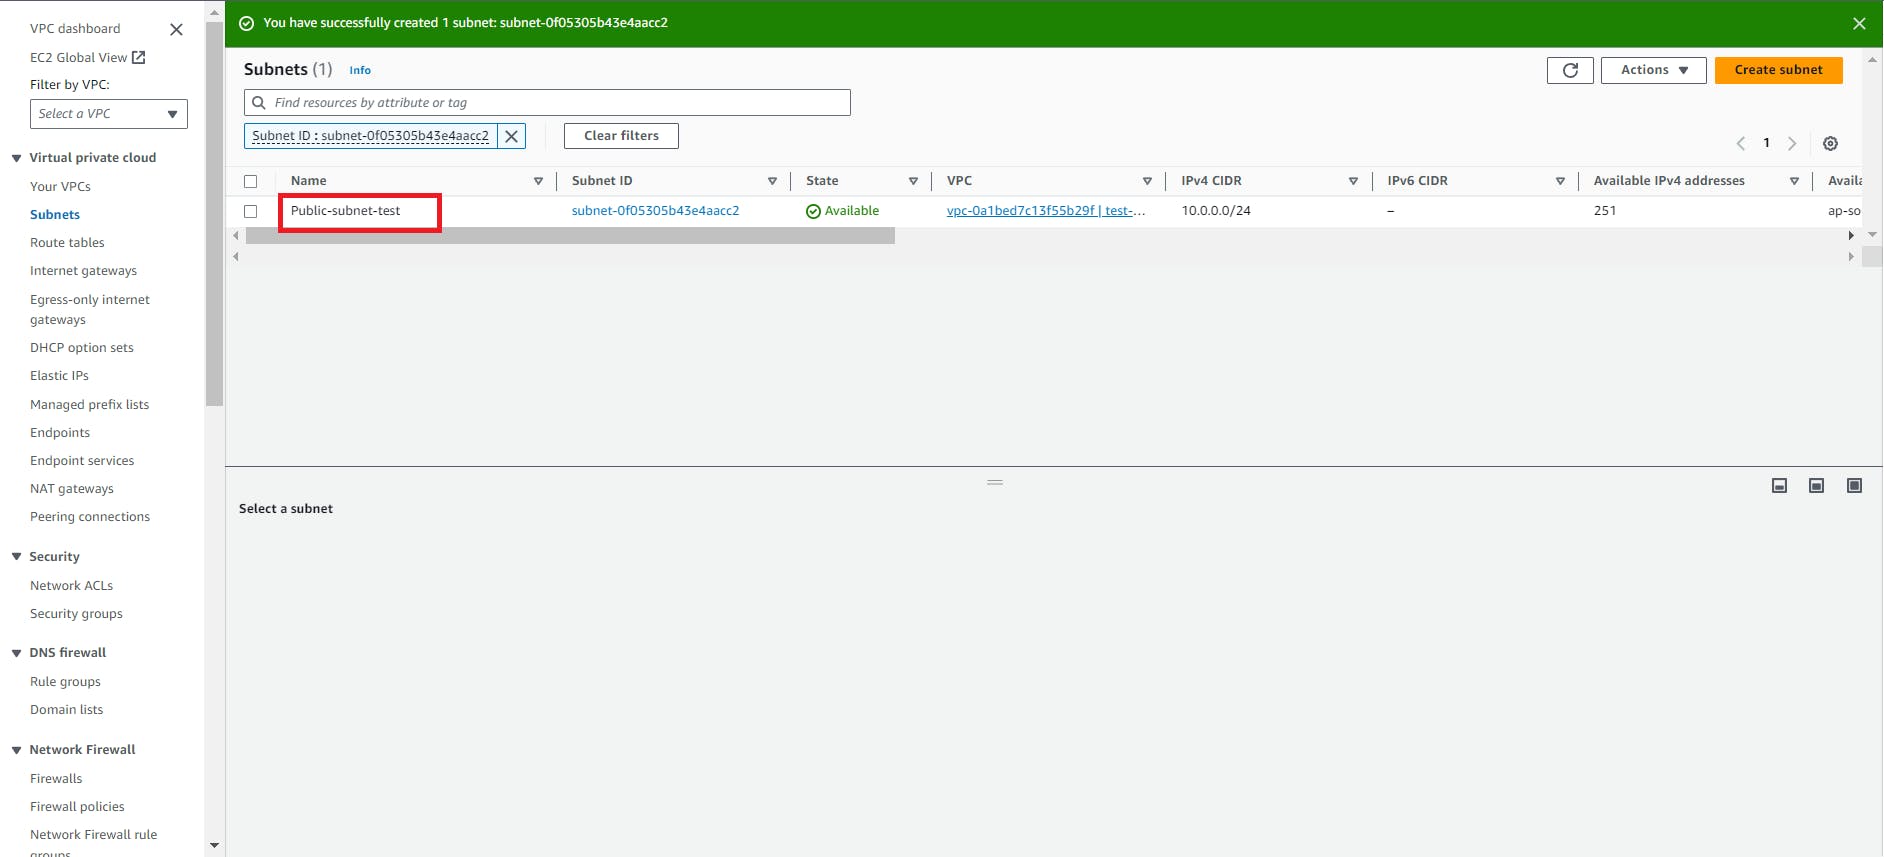
Here we created a VPC successfully
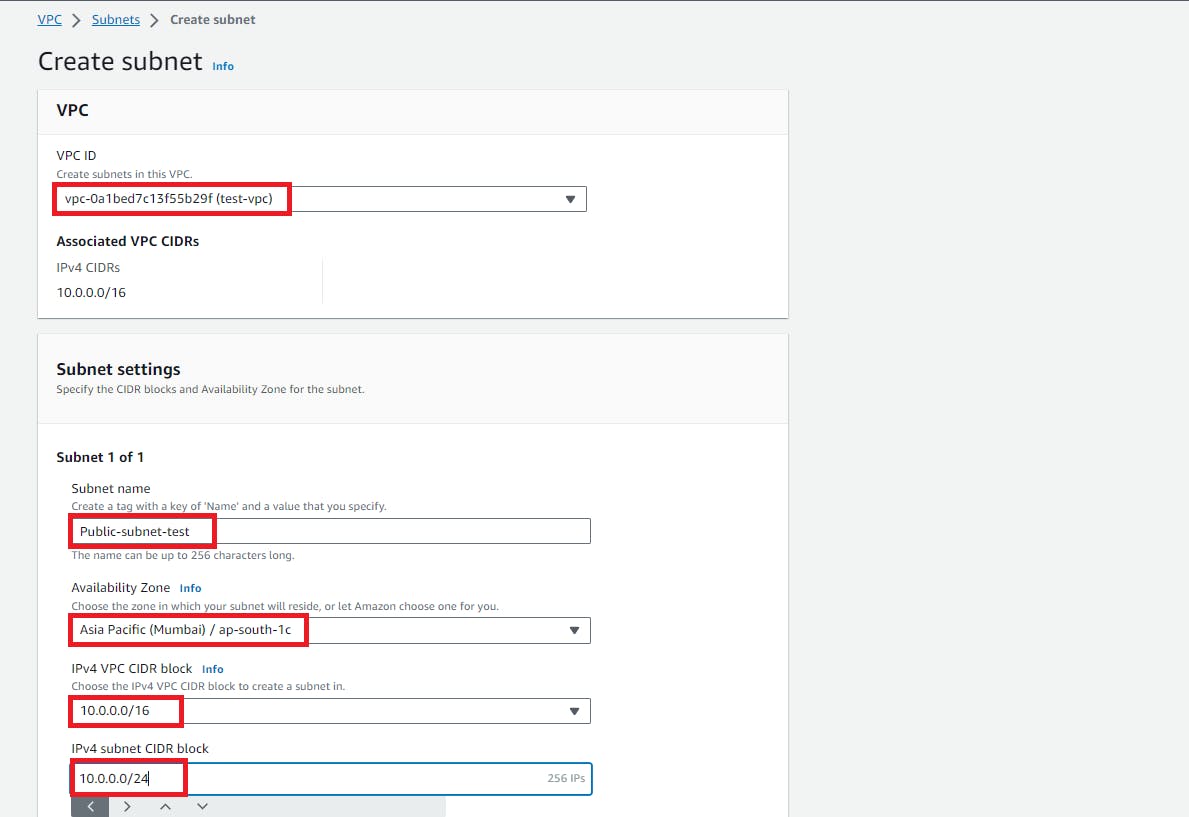
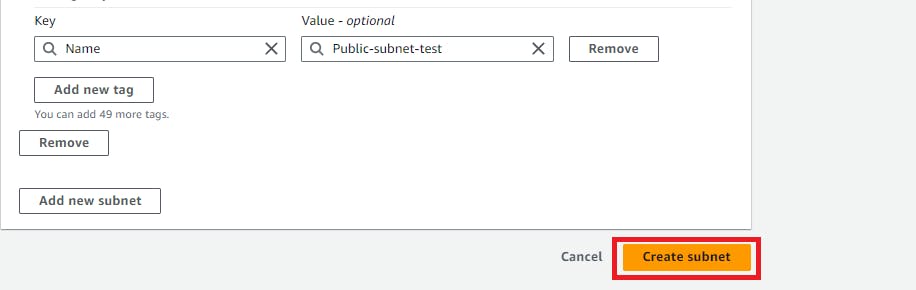
2. Now here we have to create a subnet inside test-vpc
Subnet: Subnet divide the CIDR block range for different availability zones. subnets are associated with specific availability zones.
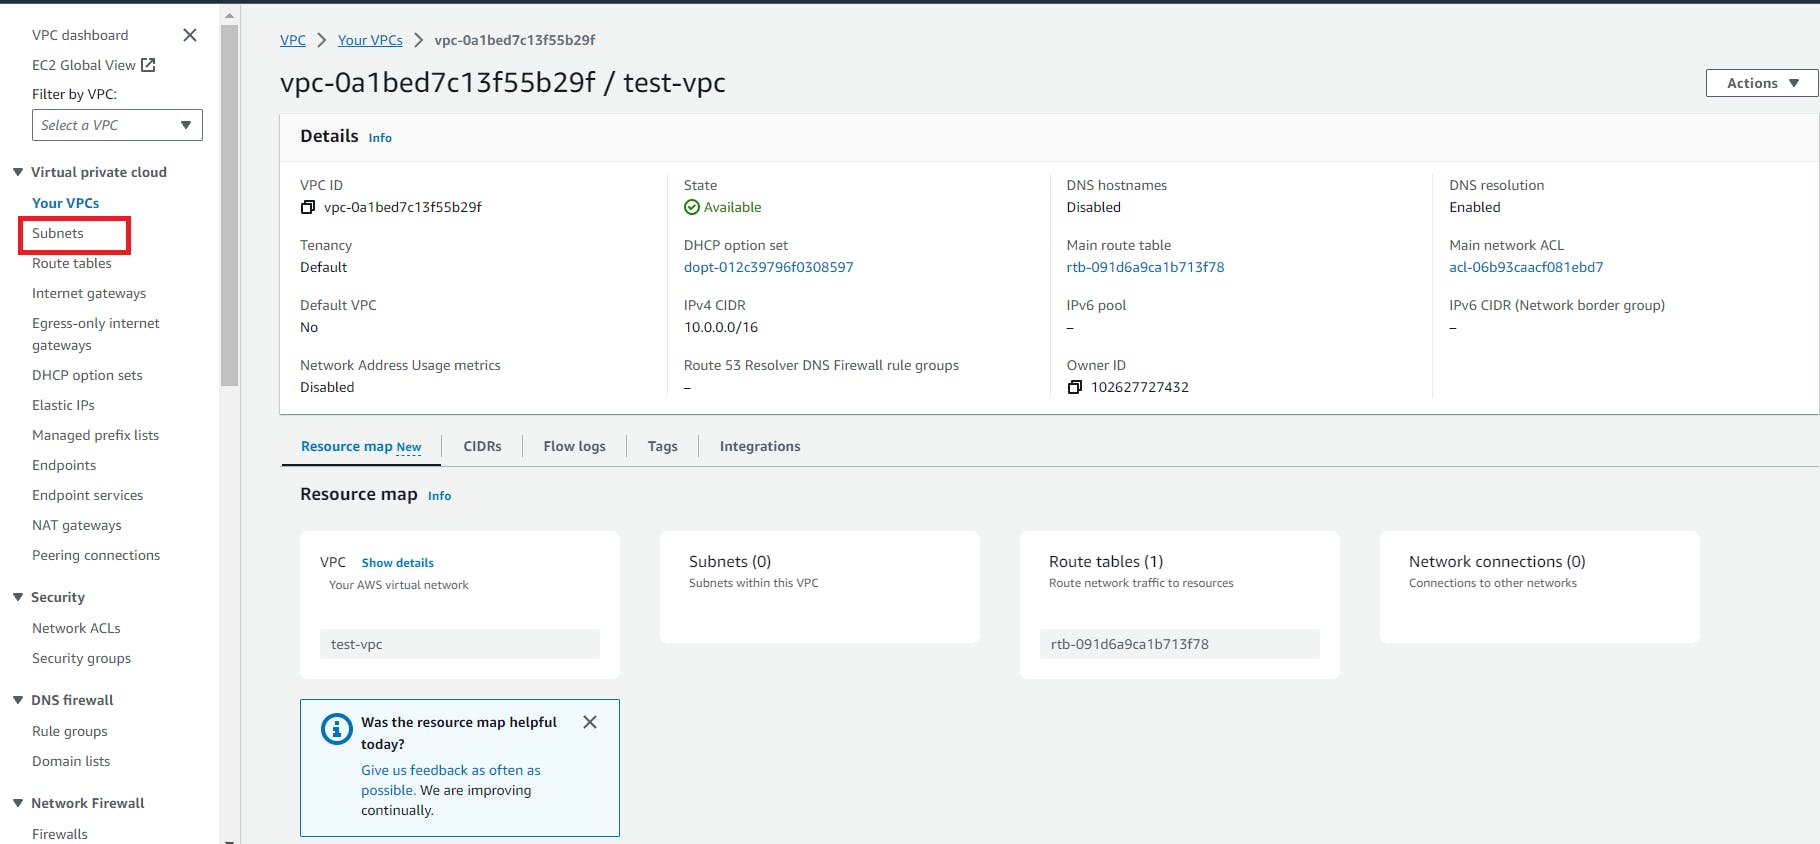
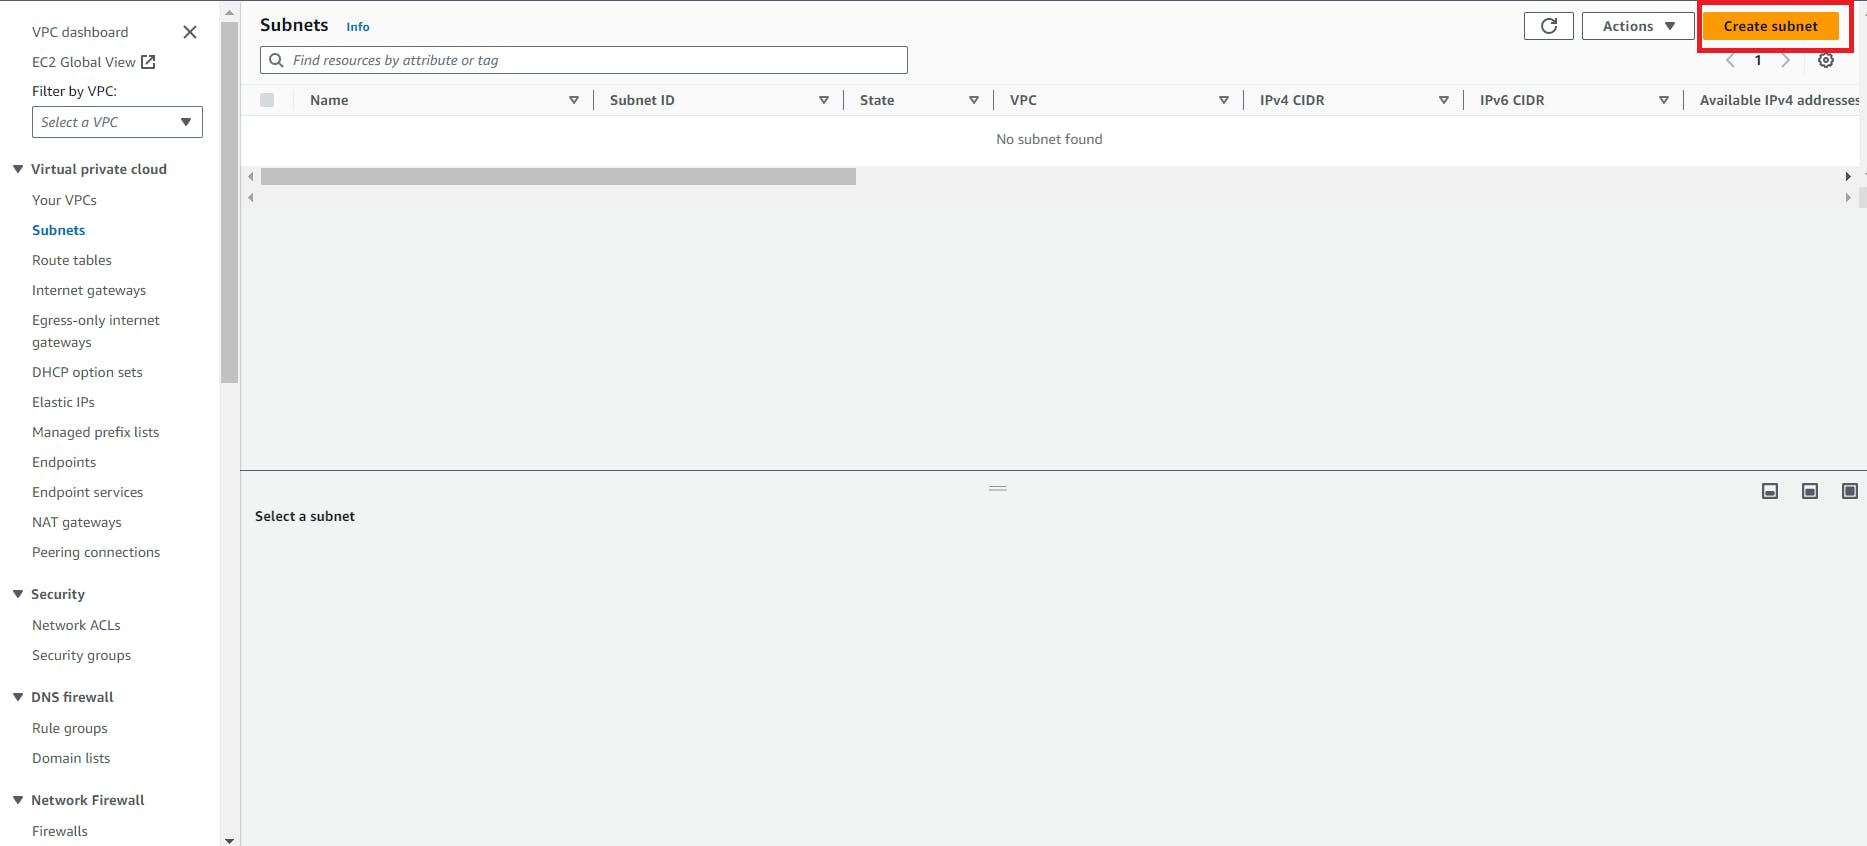
create a subnet
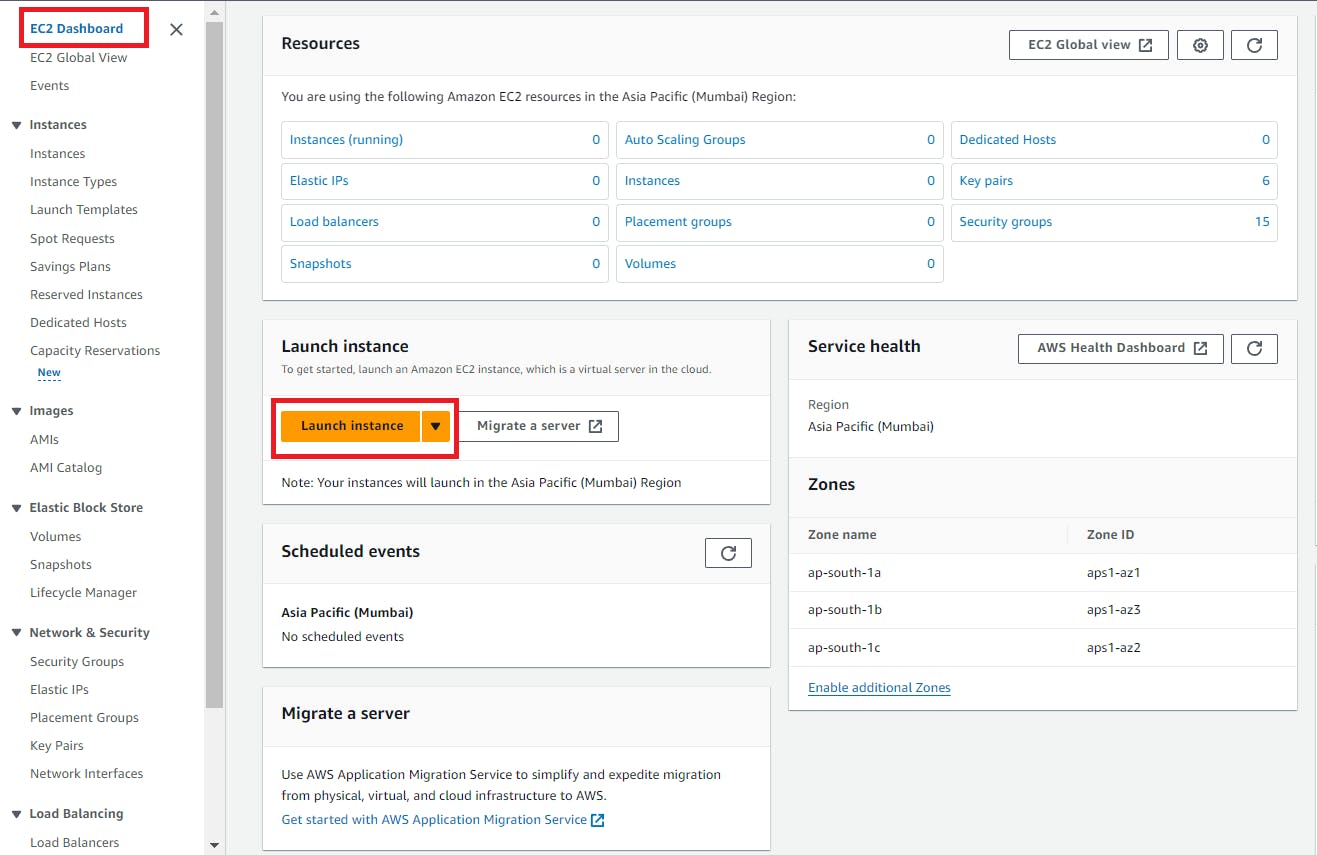
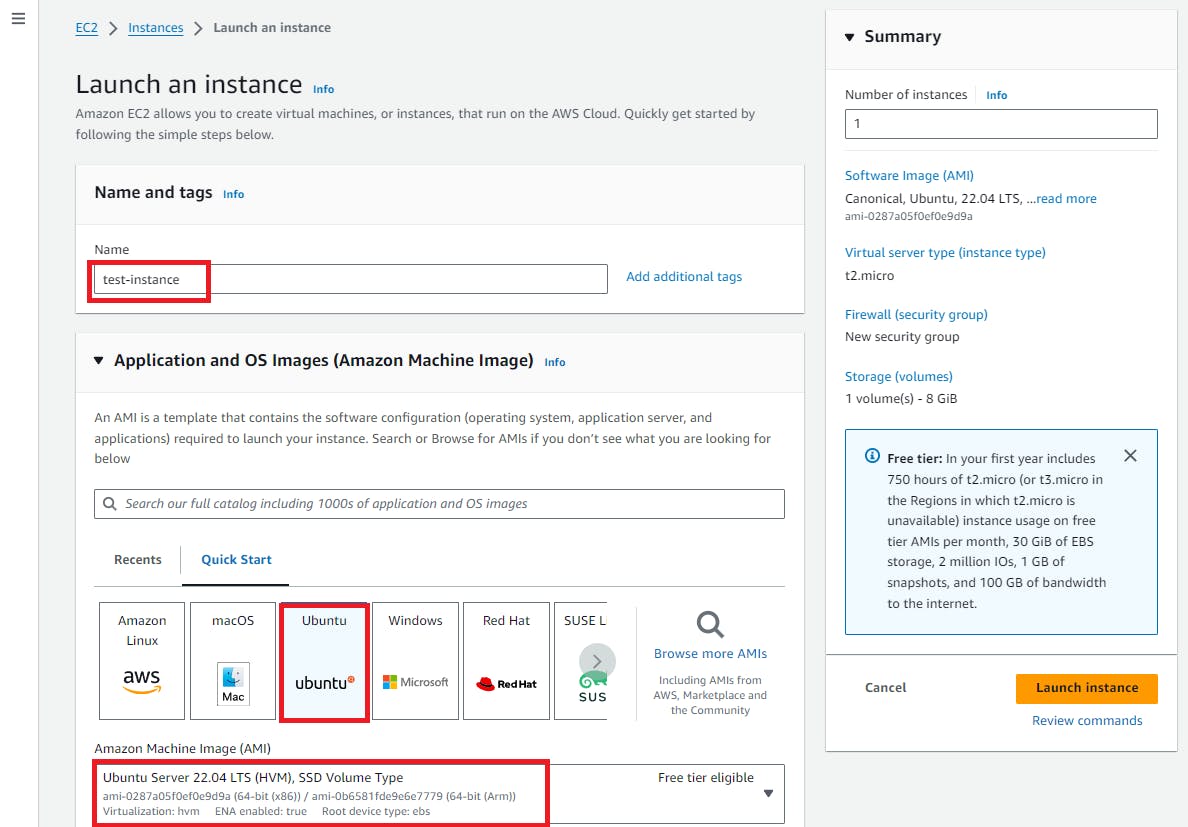
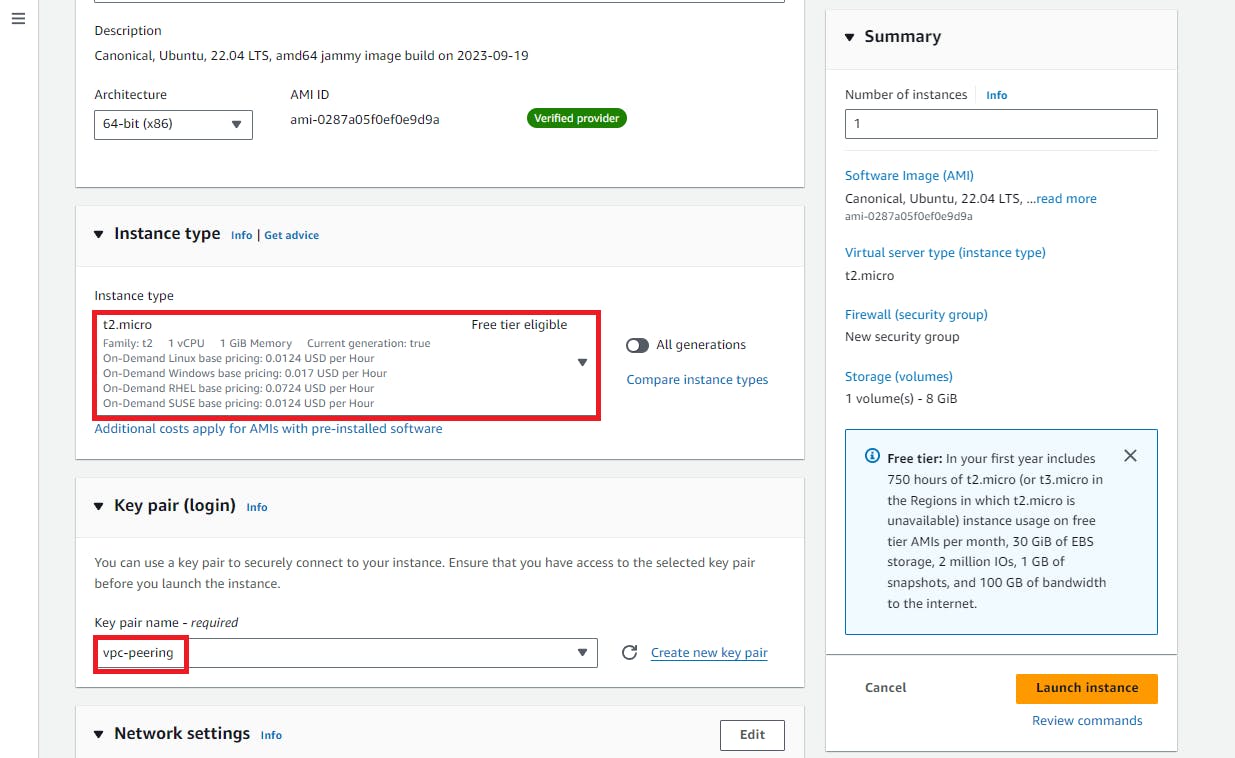
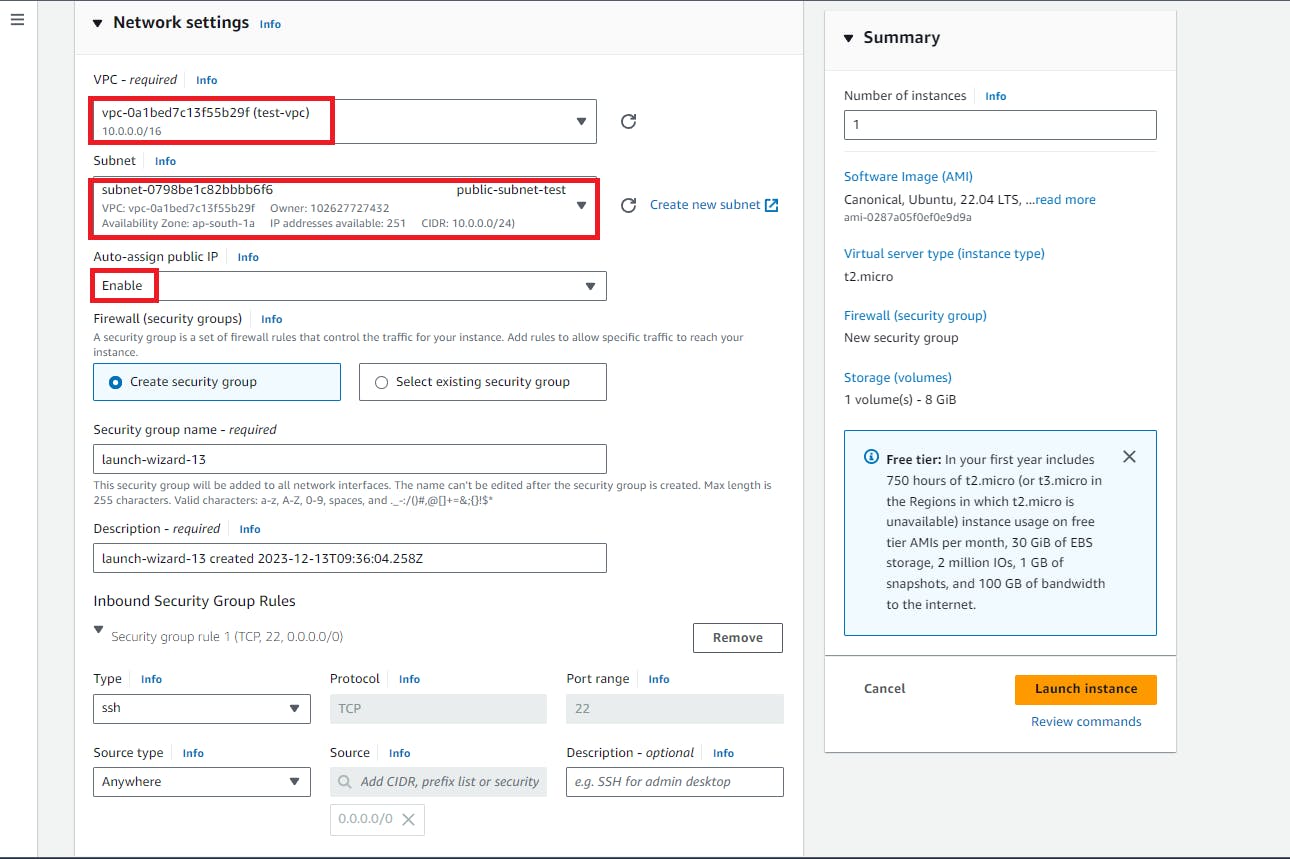
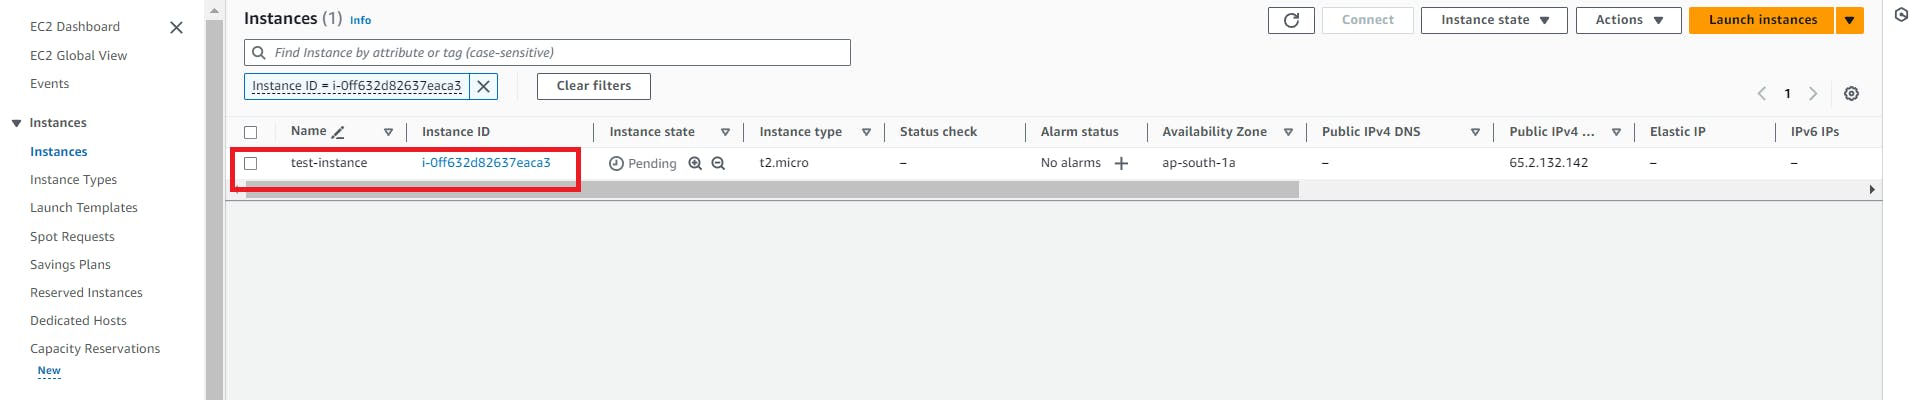
3. Now we need to create an Ec2 Instance to add inside the subnet

4. Here, If we want to connect this instance through ssh then we are unable to connect that instance
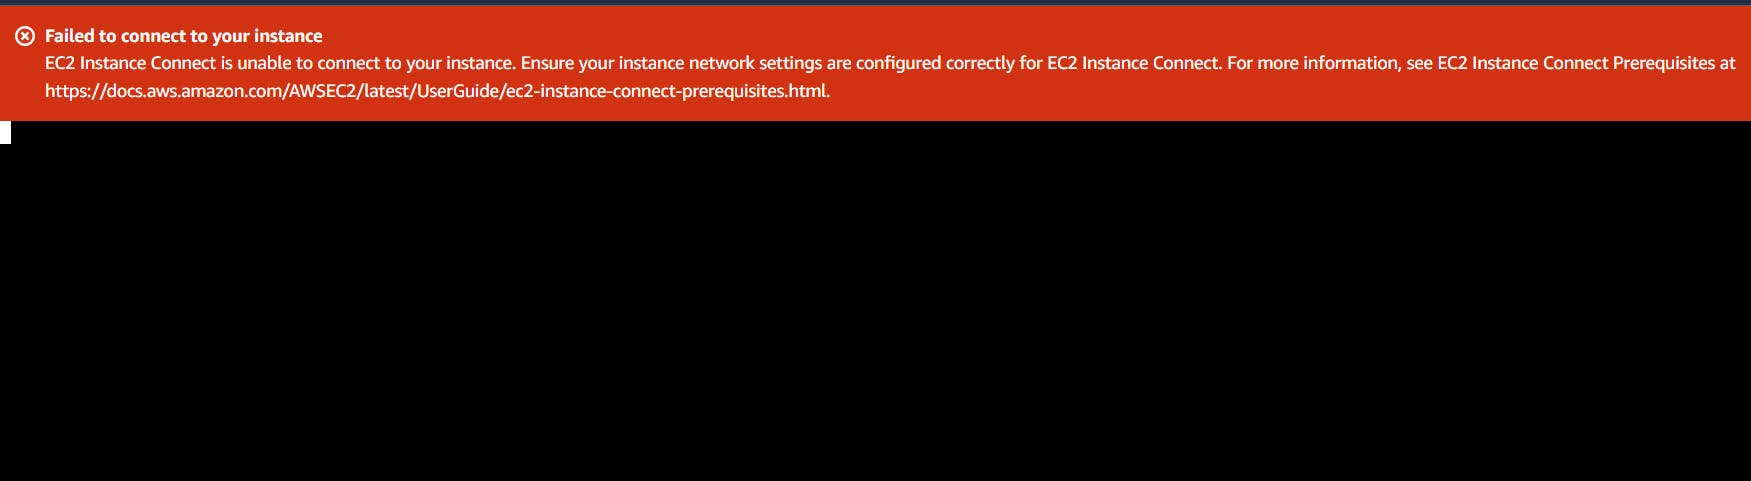
This instance became private because of vpc and subnet, so we want to make that instance private by attaching internet gateway and route table.
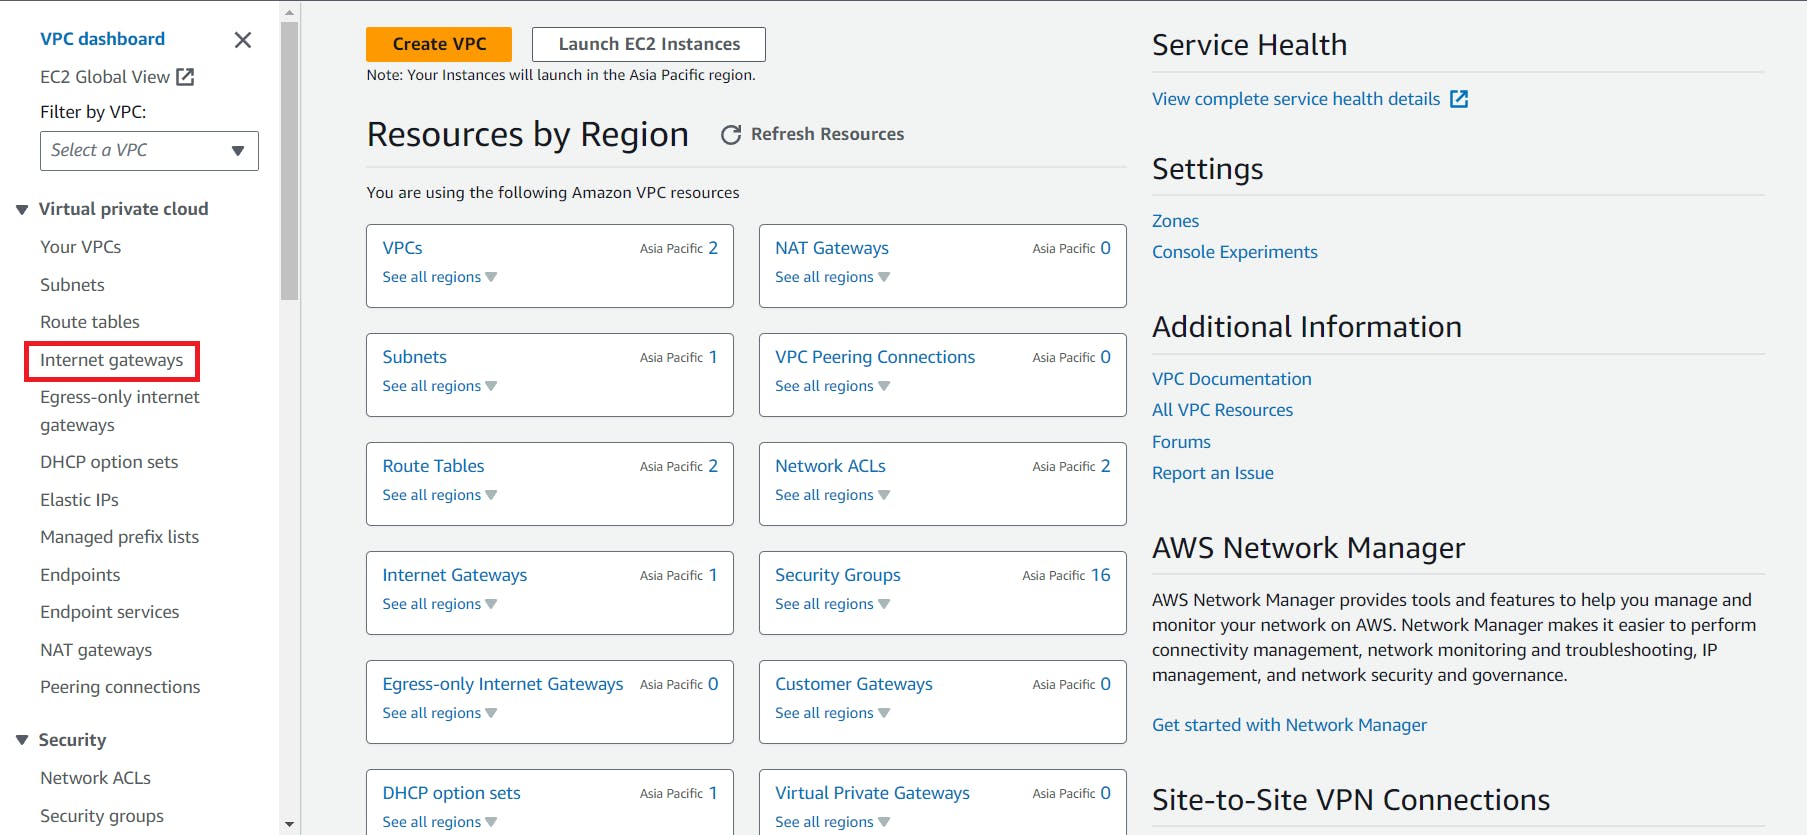
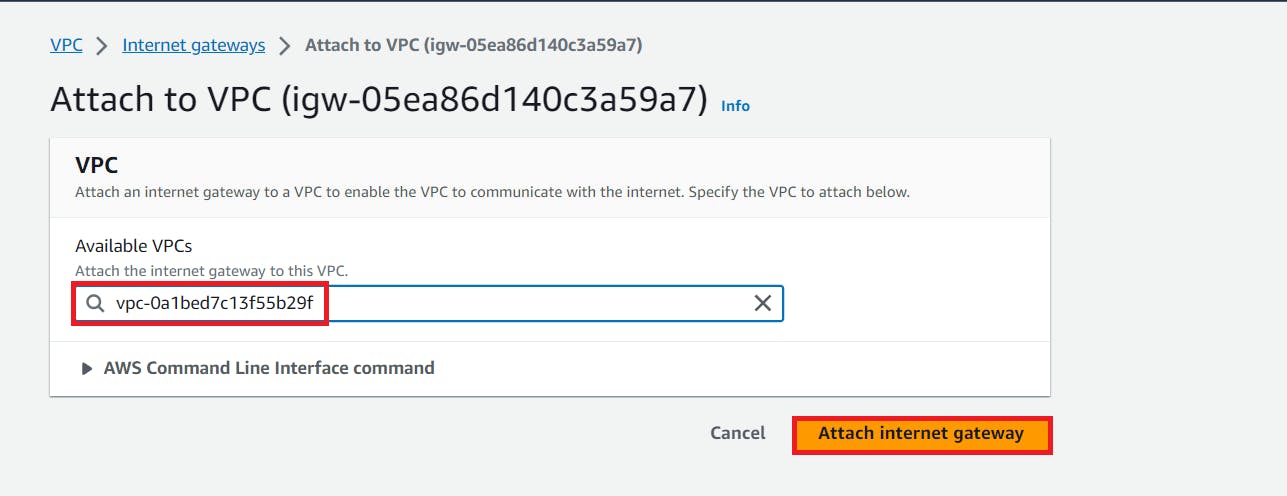
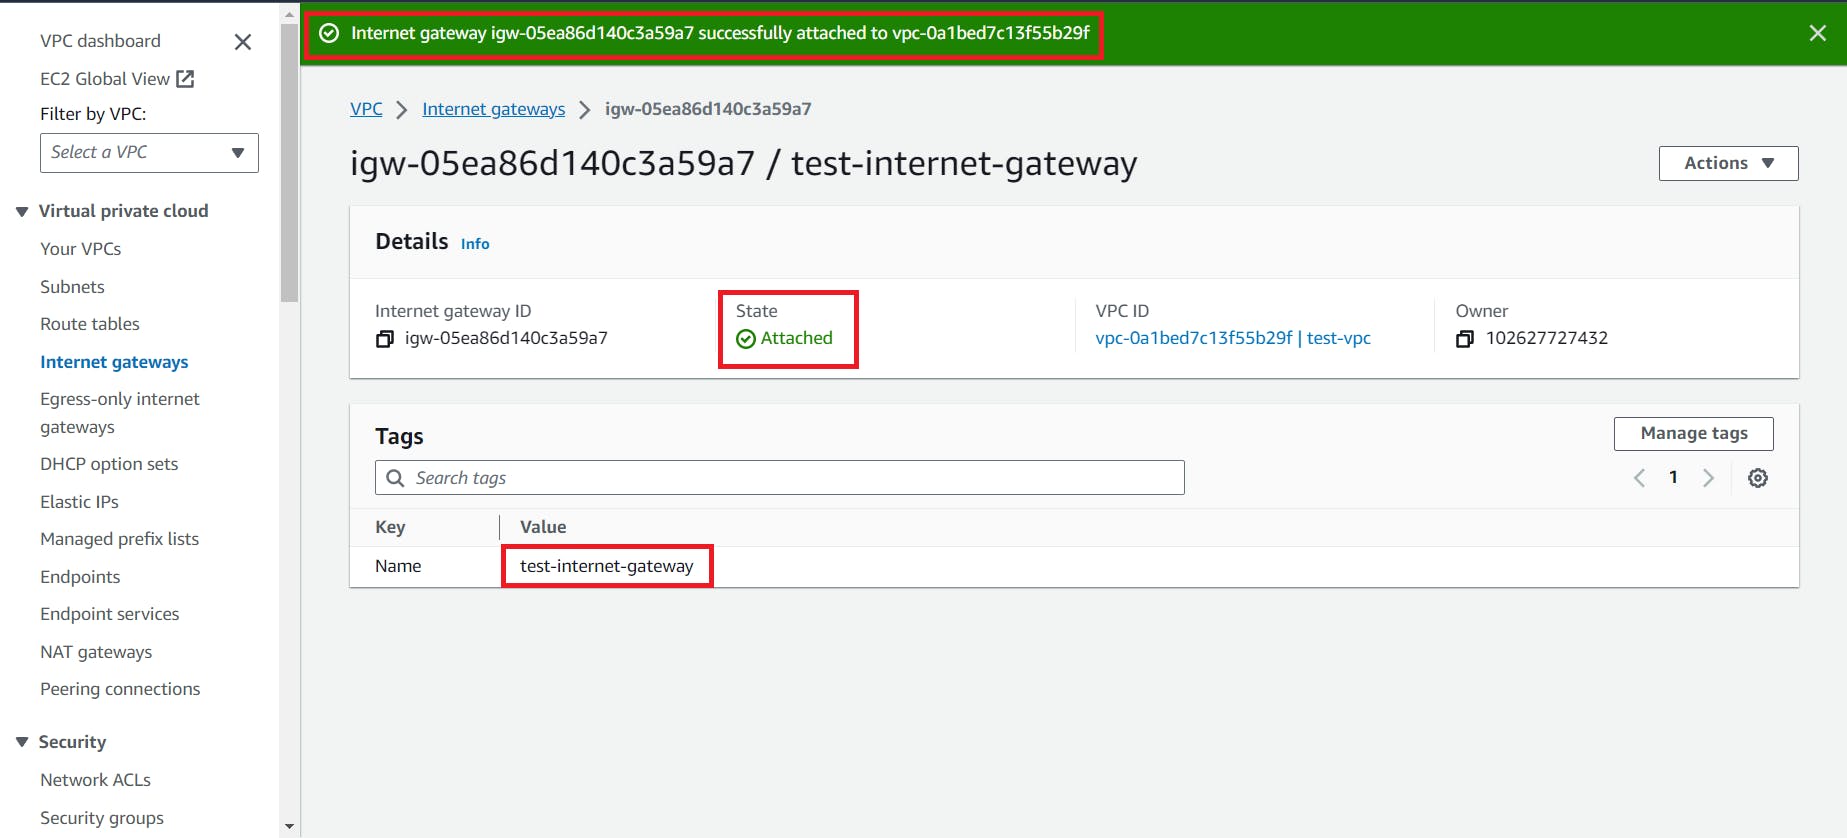
5. Now go to the VPC dashboard again and search for Internet Gateway
Internet Gateway: Used to convert normal/private subnet into public inside a VPC or enable communication between instance in a VPC and internet. Route traffic to and from internet through Internet Gateway
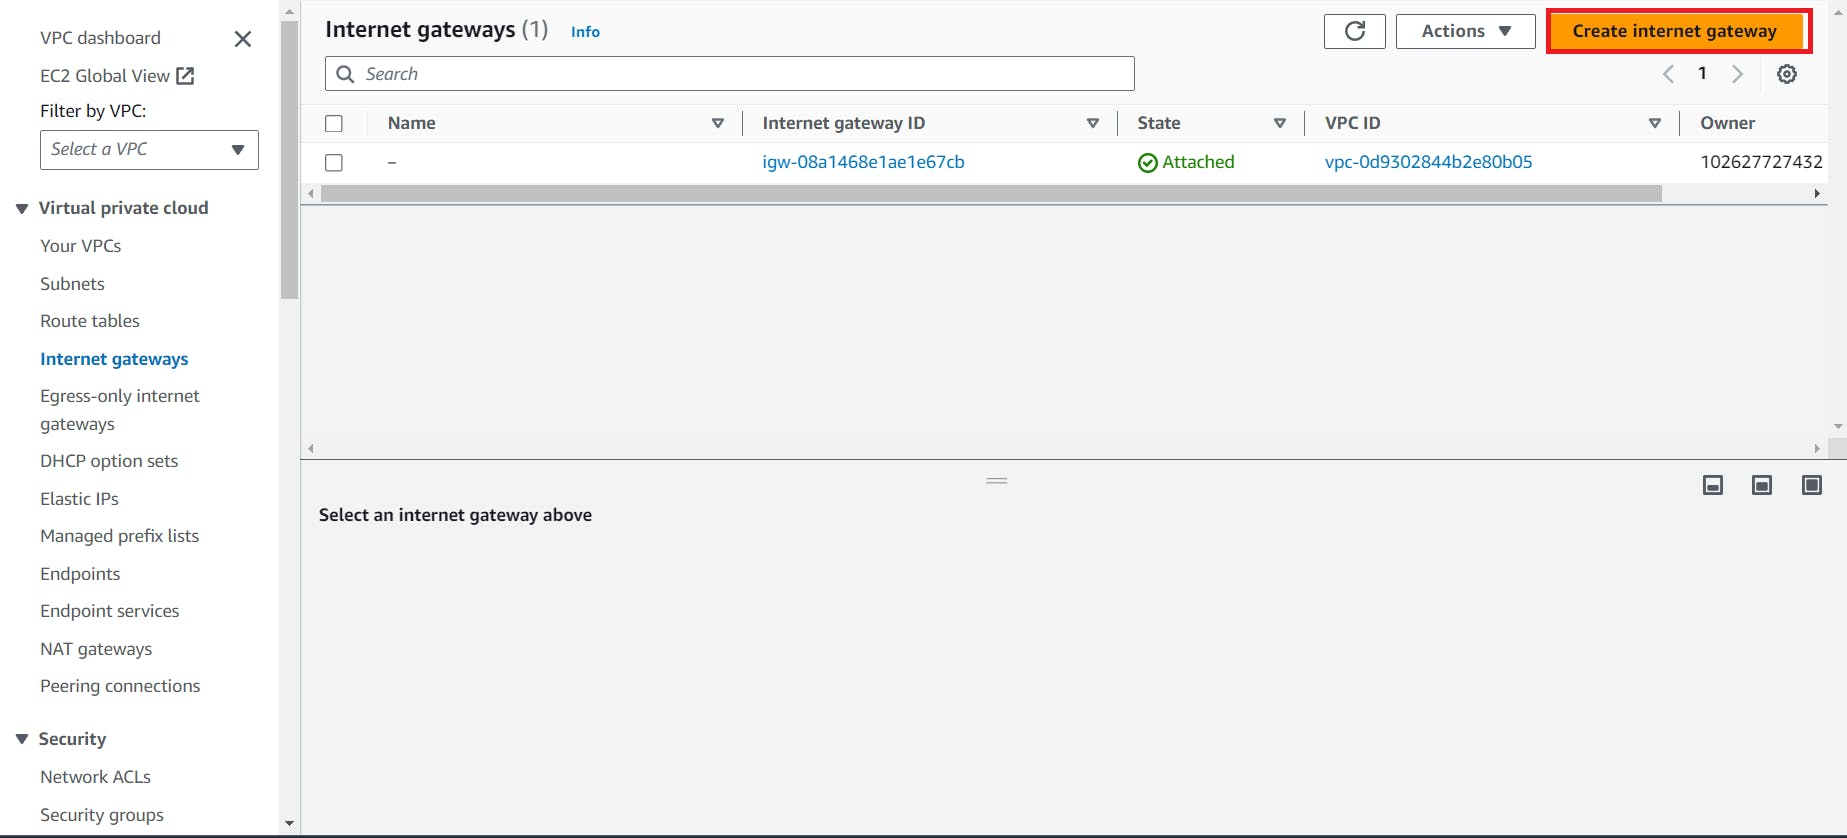
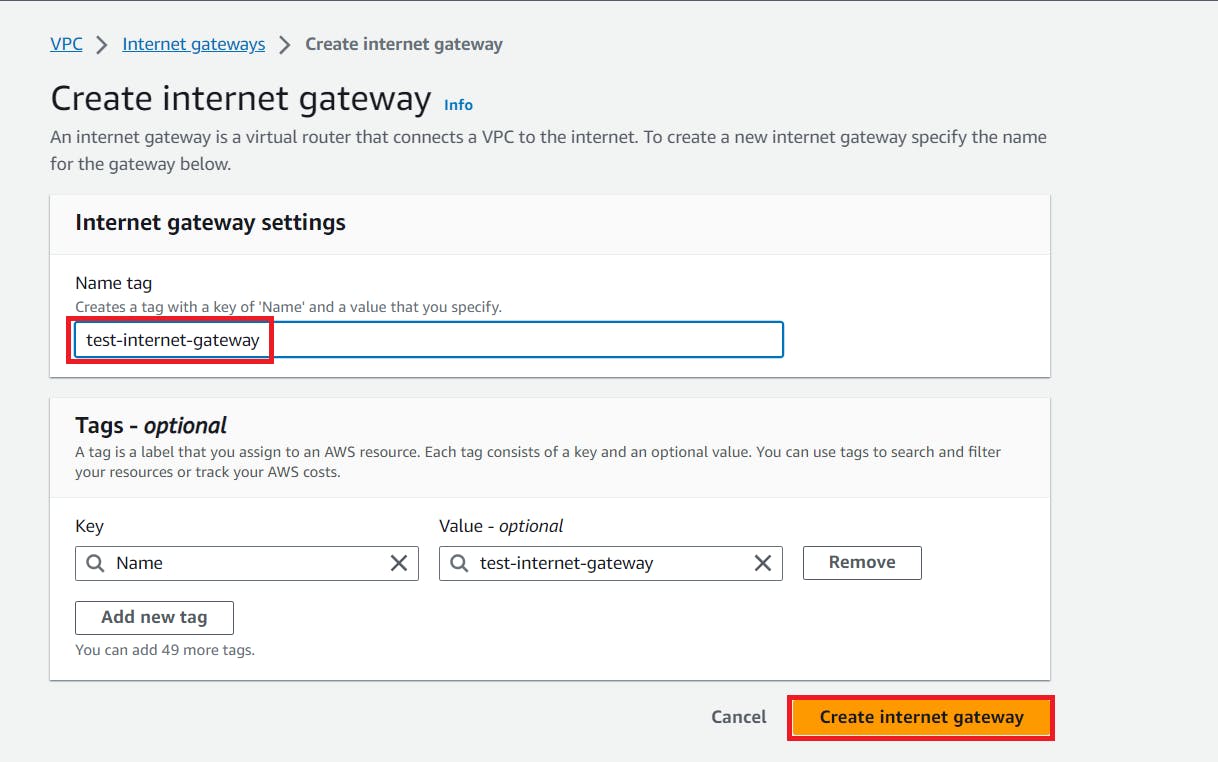
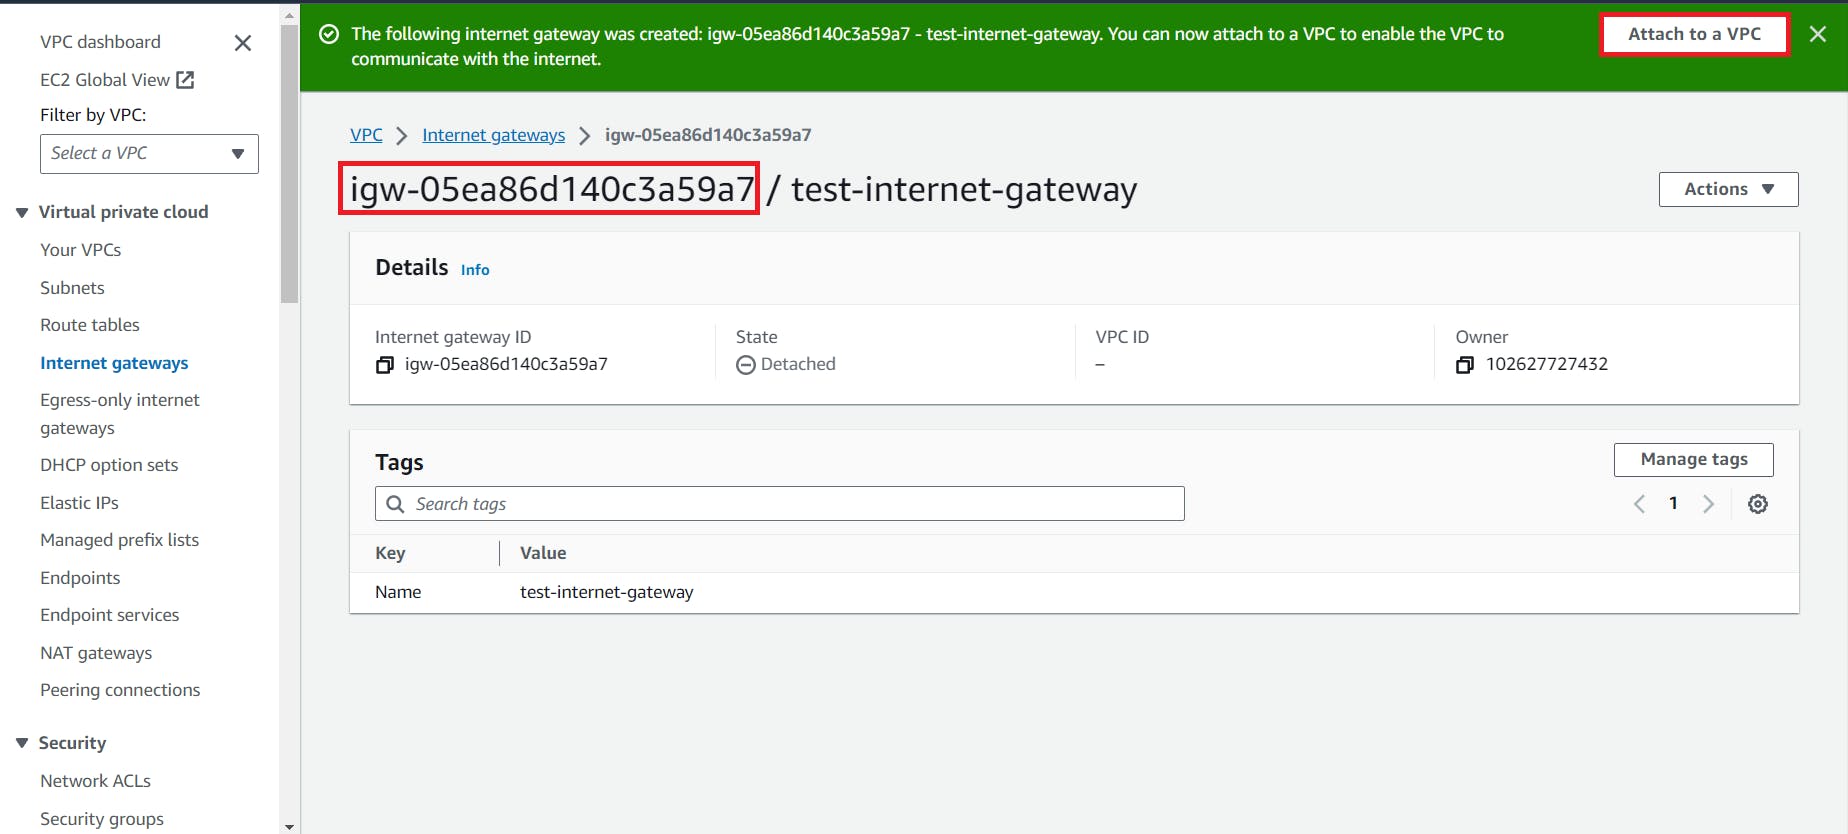
Follow the below steps to create and attach Internet Gateway to the VPC
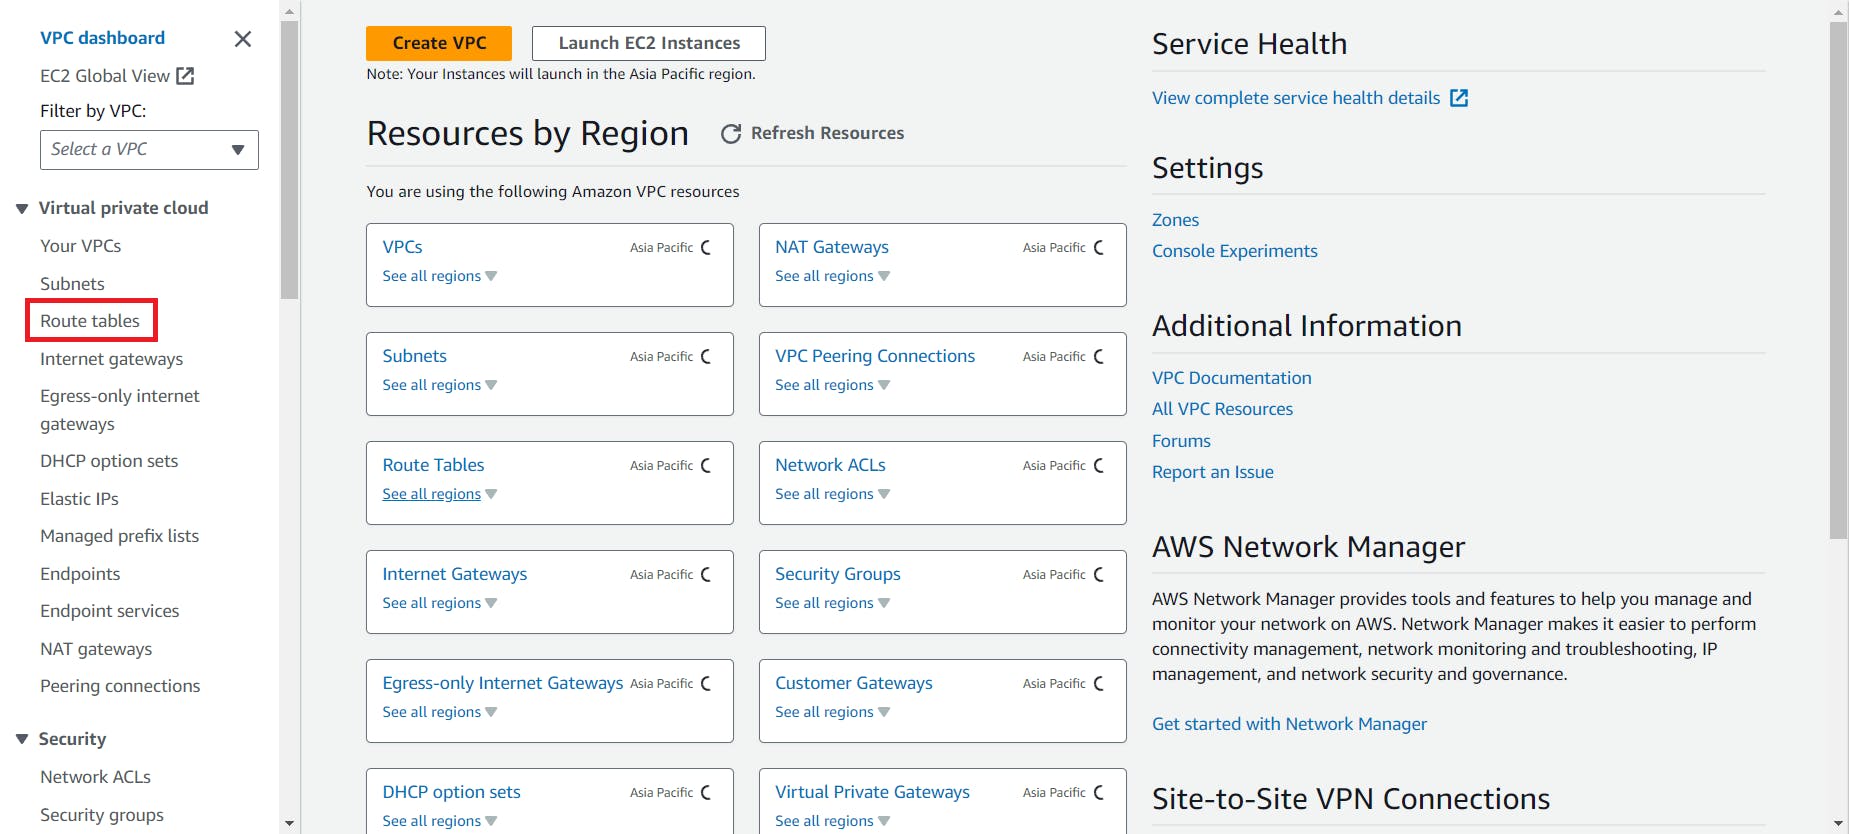
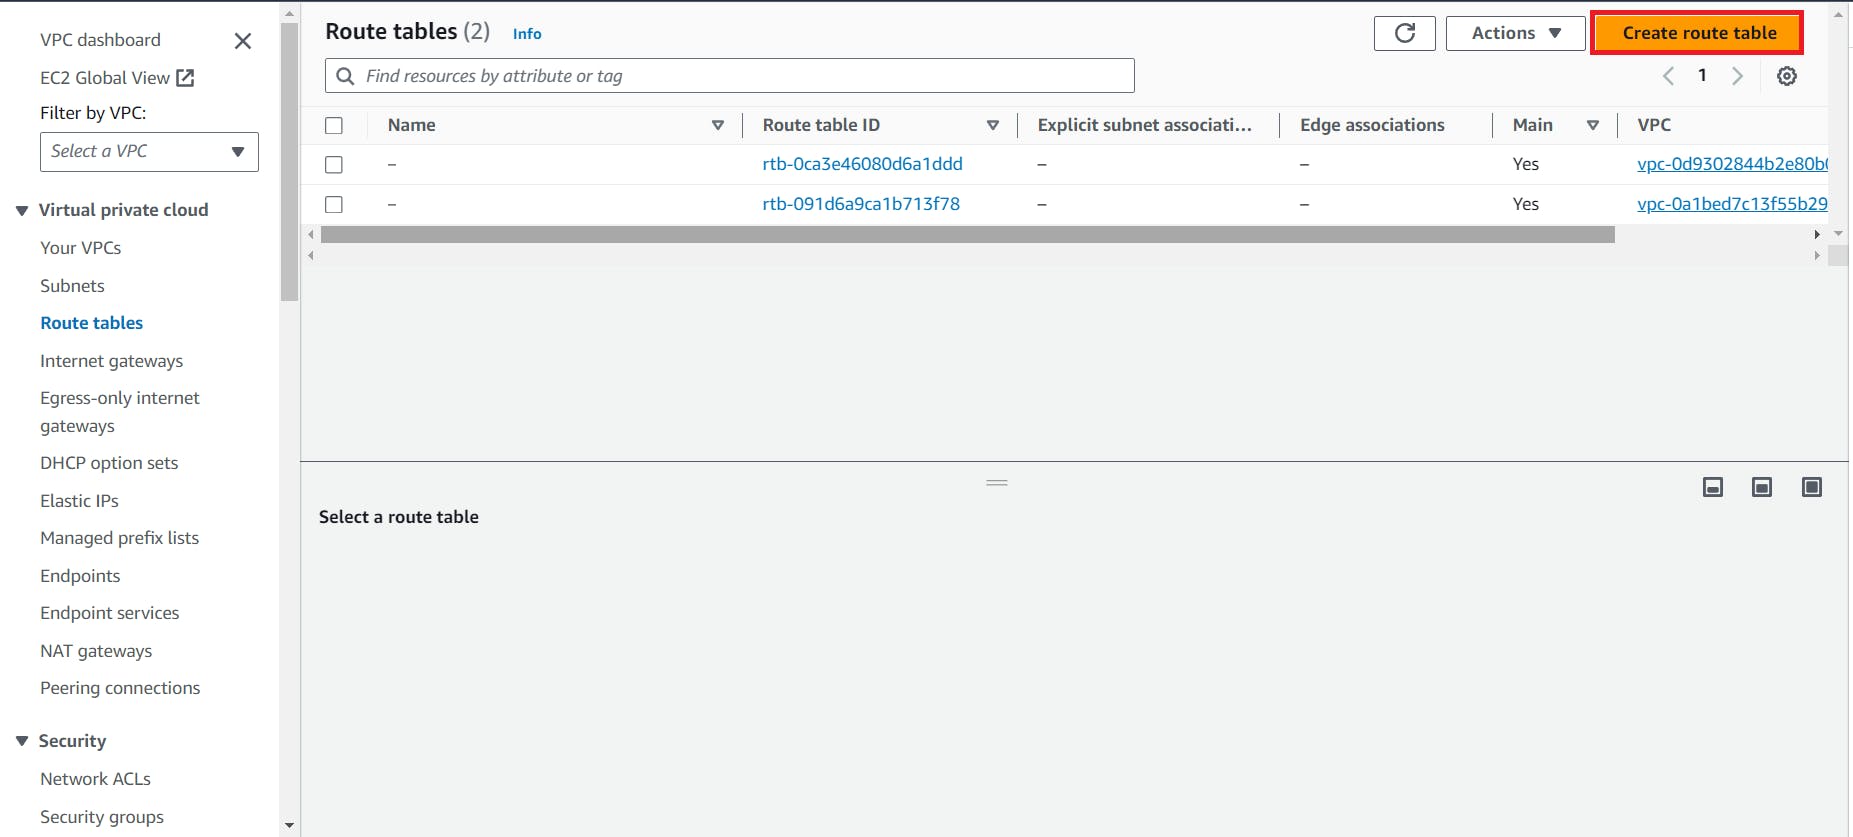
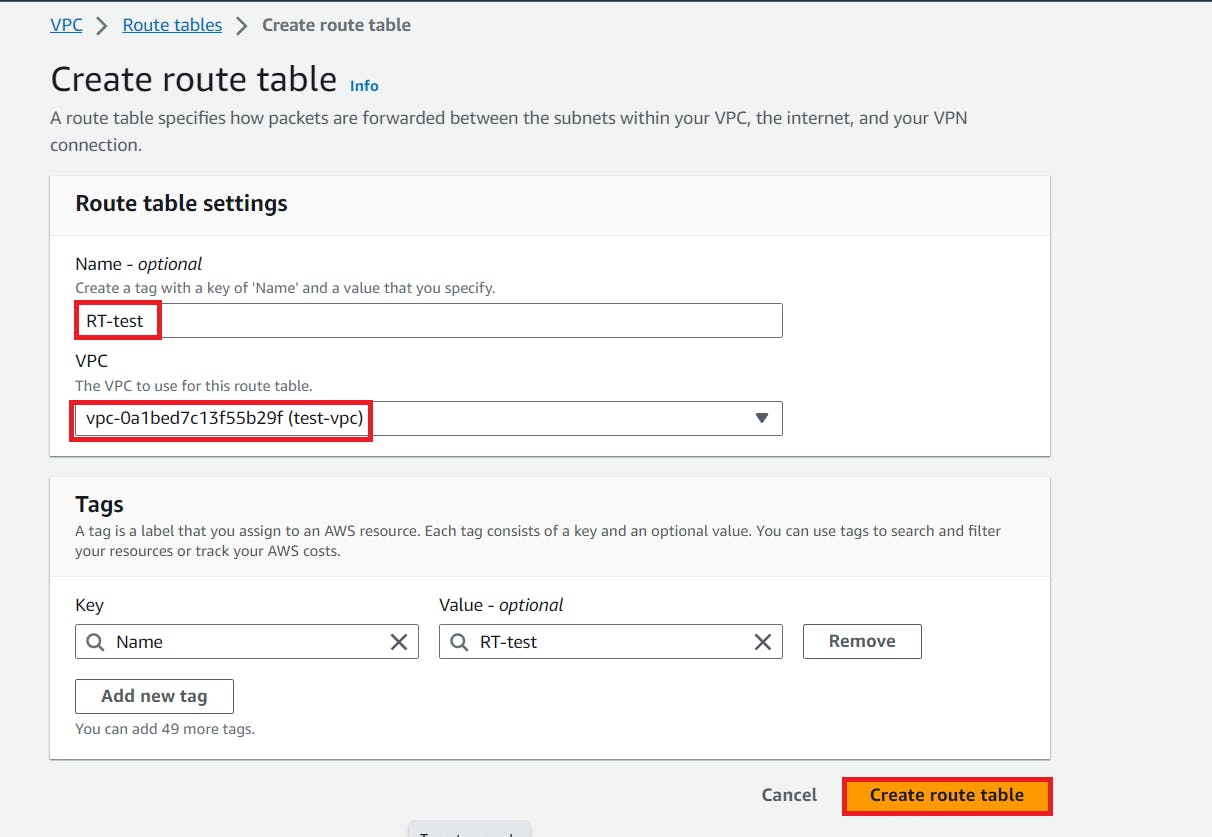
6. To connect Internet Gateway with the subnet we need route table so now create route table
Route Table: VPC's route table contains a set of rules, known as routes, that determine the paths for network traffic leaving the VPC. Each subnet in the VPC is associated with a route table, and the routes in the table define where the traffic should be sent.
Go to the VPC Dashboard again
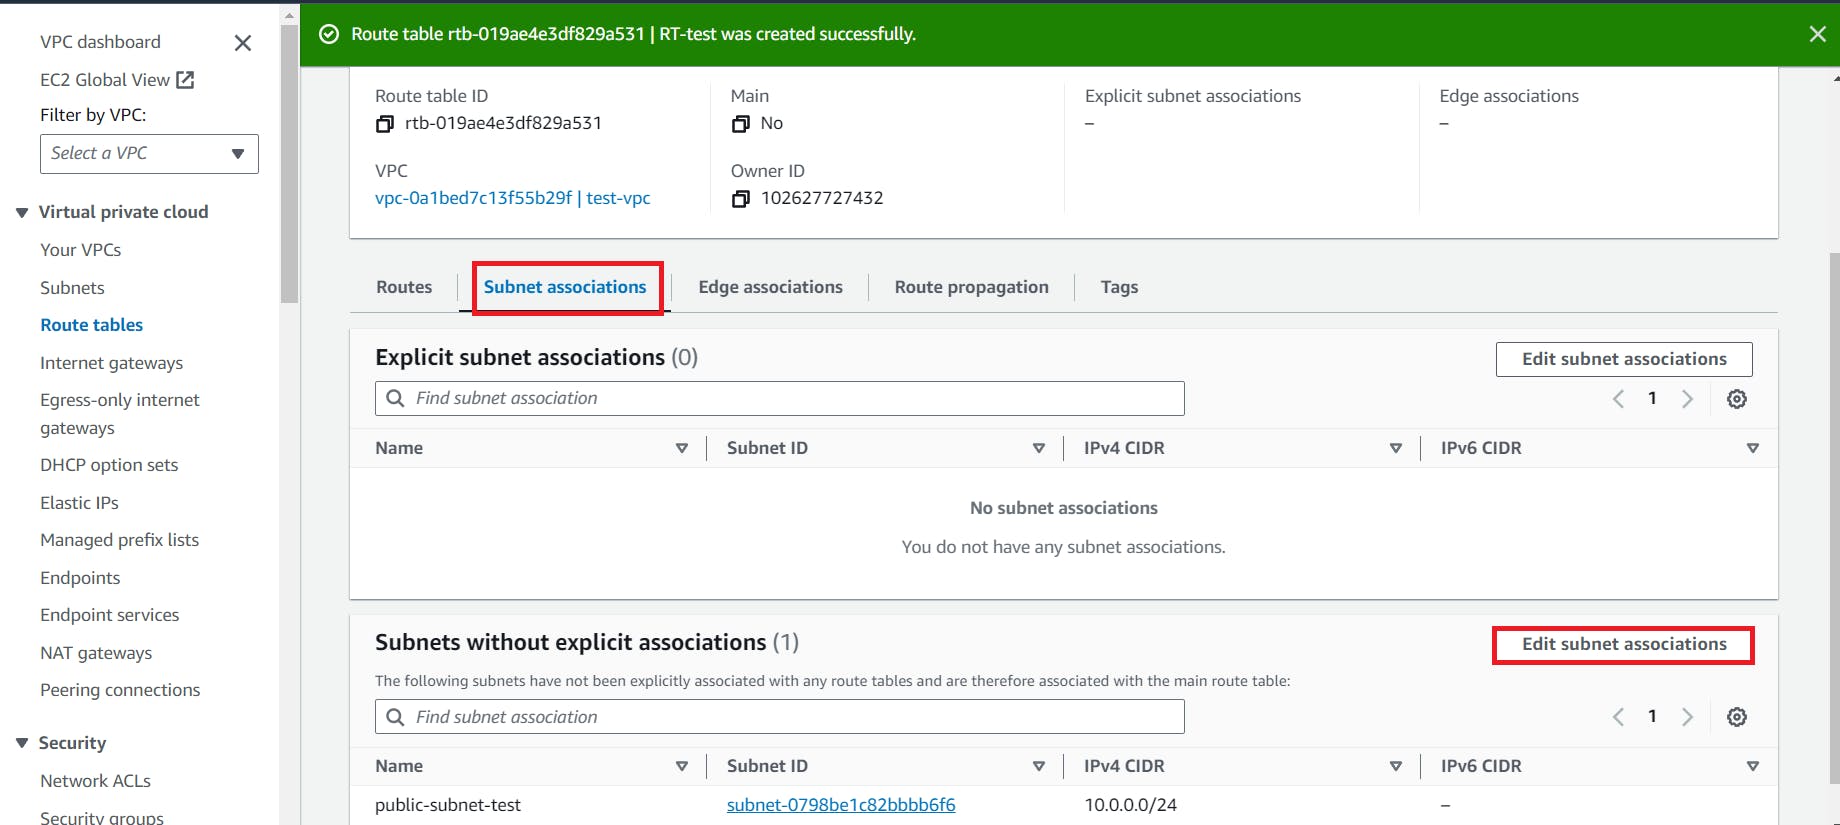
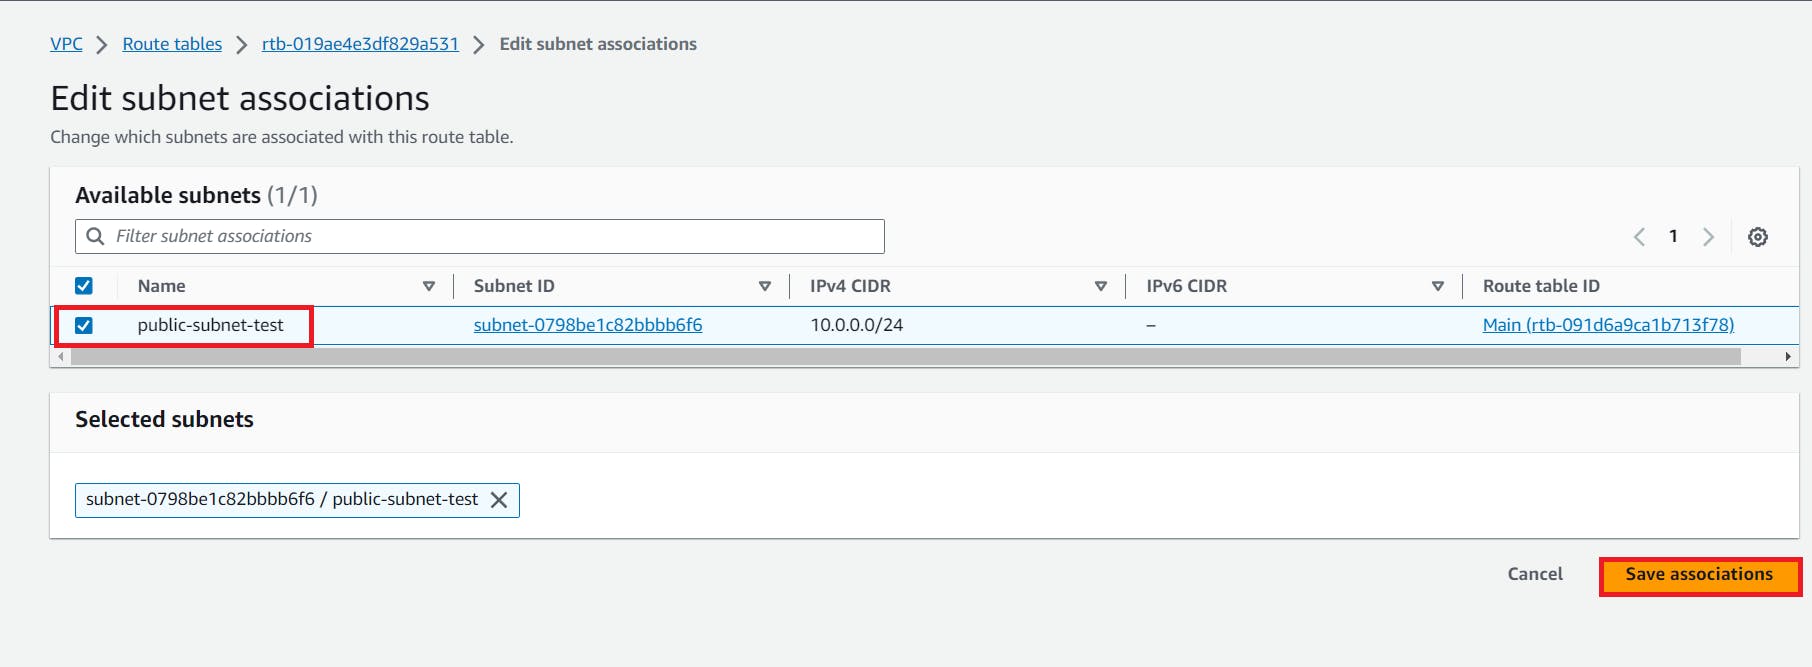
7. Now go to the subnet Association to edit
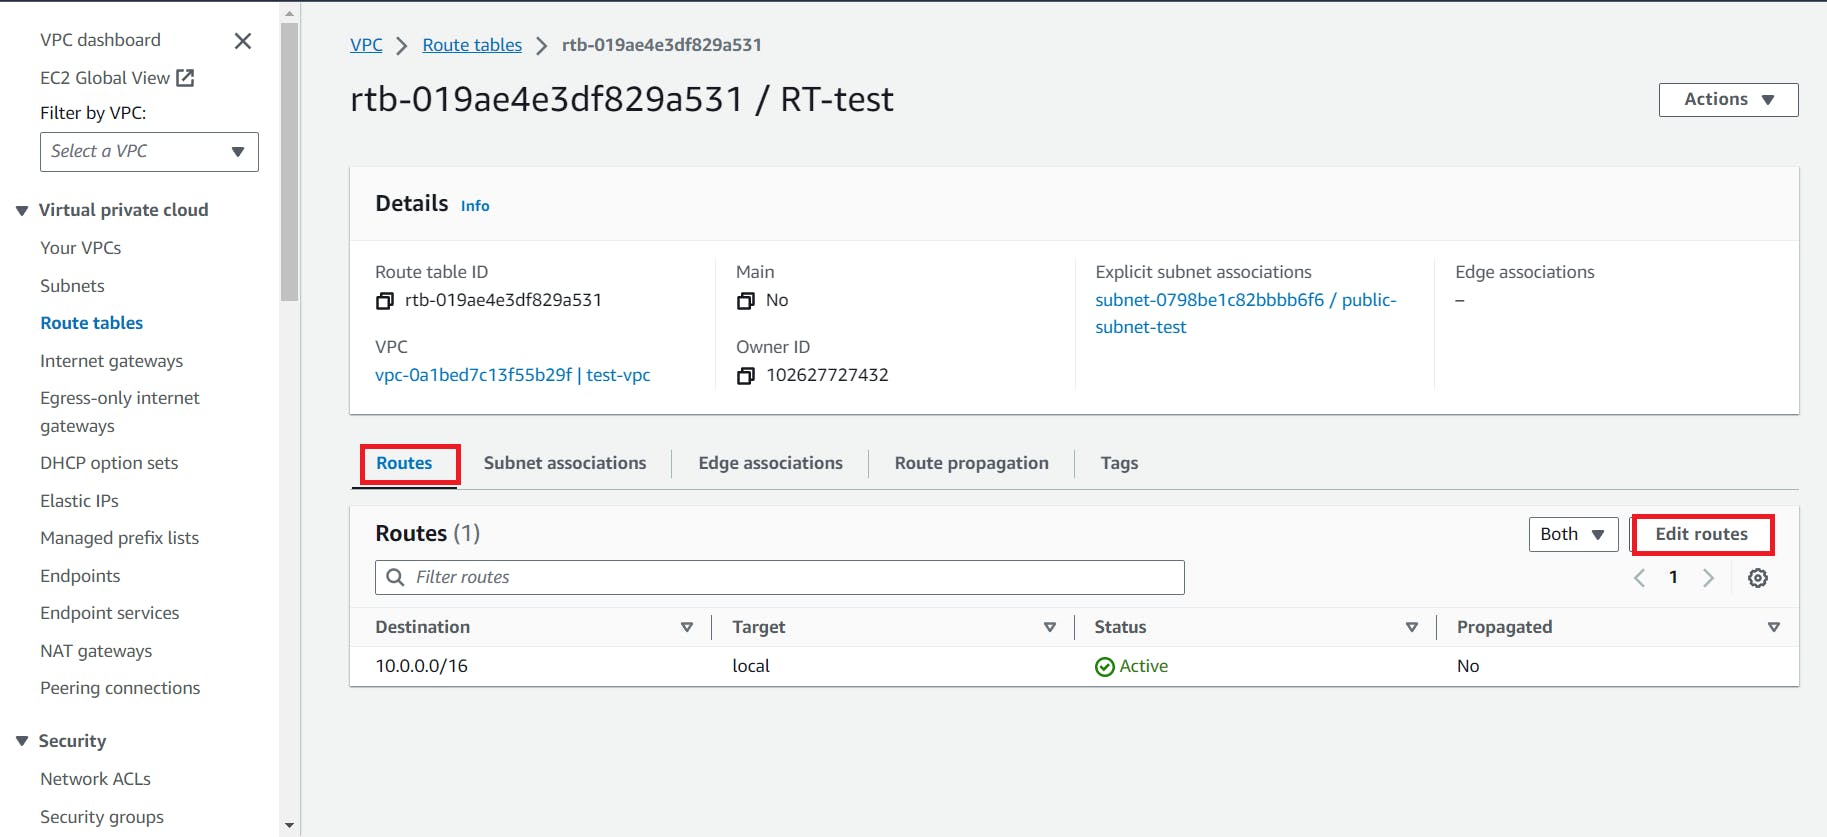
8. Now go to the Routes to edit routes
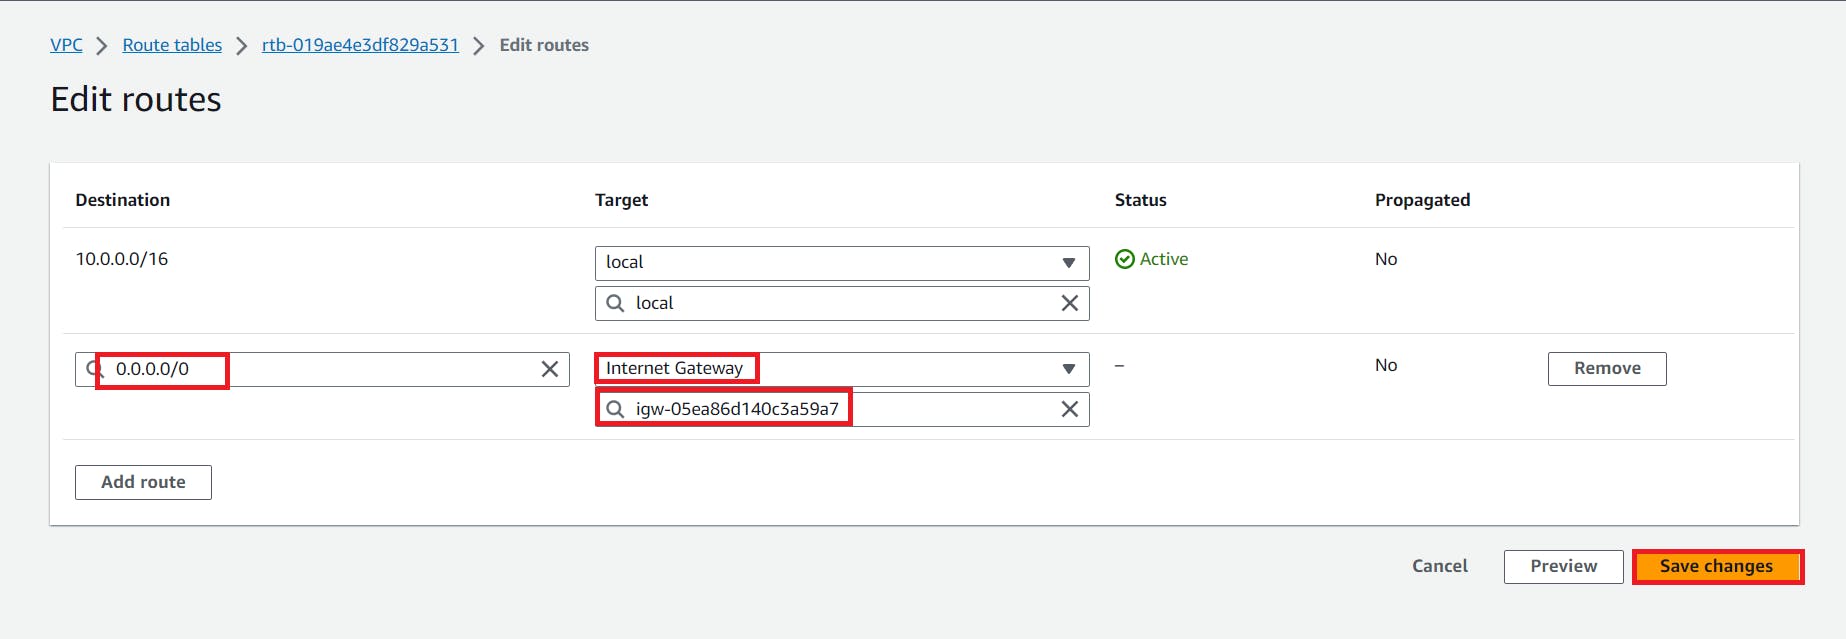
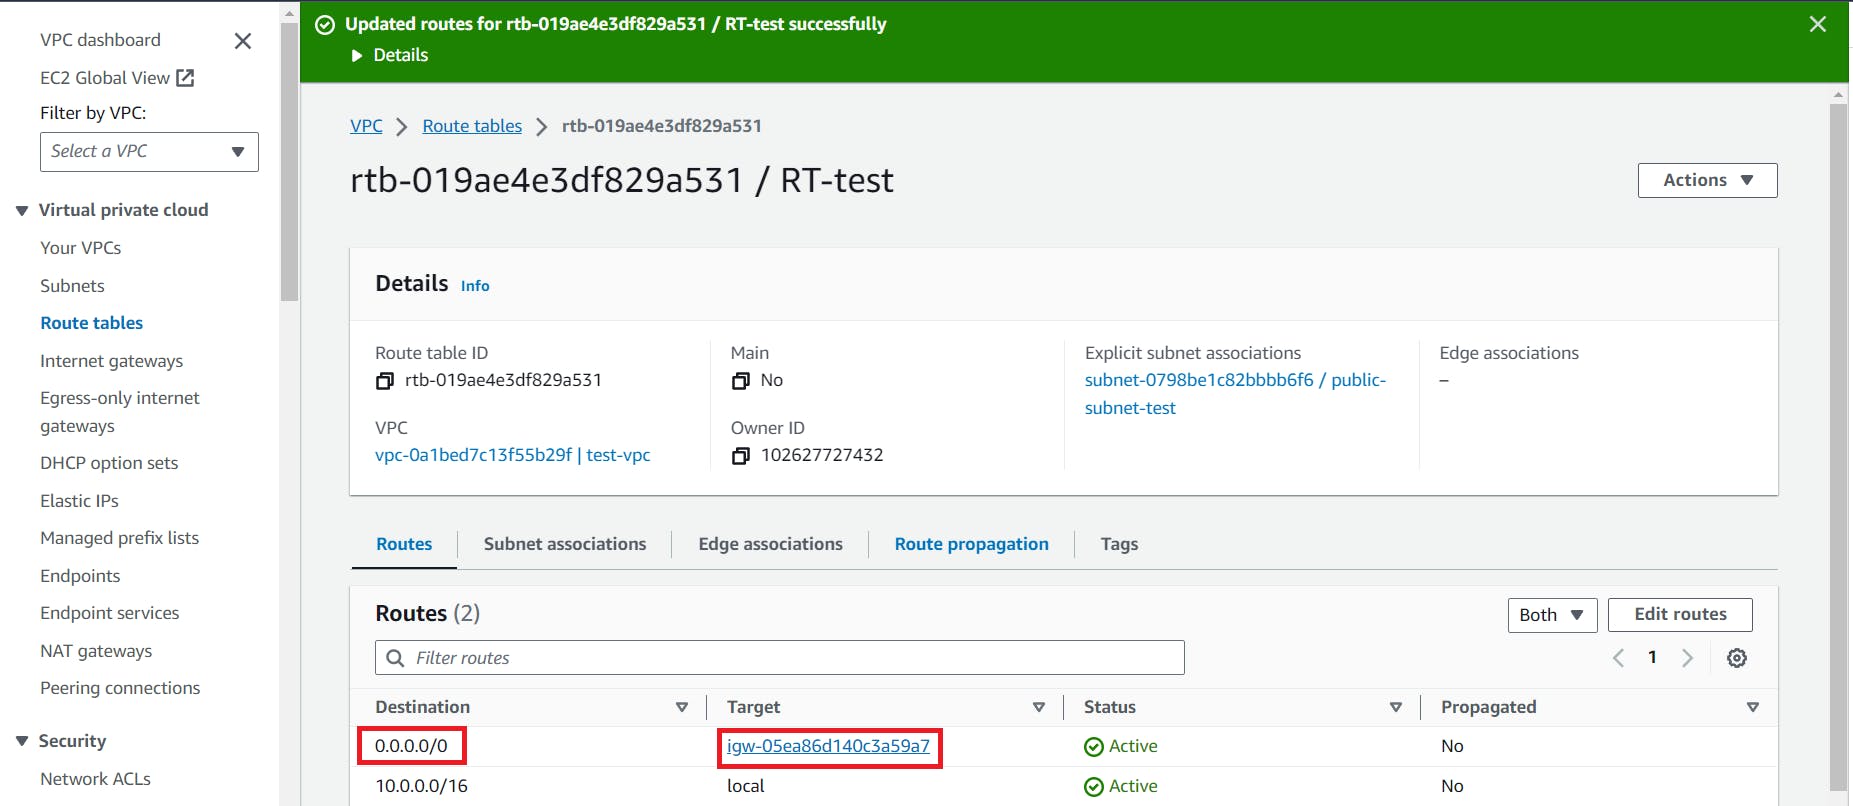
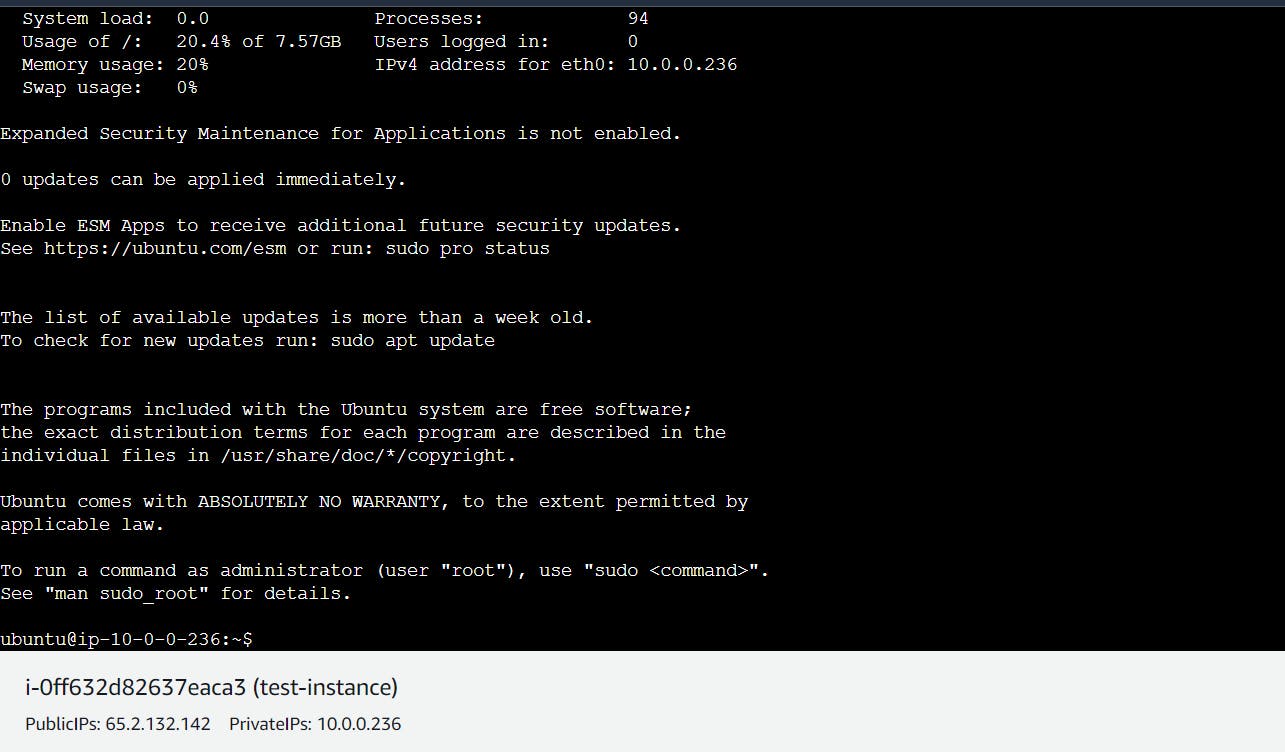
9. Now, If we connect our instance it will be connected successfully because in our VPC We have Internet gateway,route table,Public subnet and they are connected with each other
Step 2 : Create Second VPC prod-vpc
Just as we created the test-vpc and create and connected the subnet, route table, Internet gateways to each other in it, we want to do the same in the prod-vpc
1. so first we have to create prod-vpc
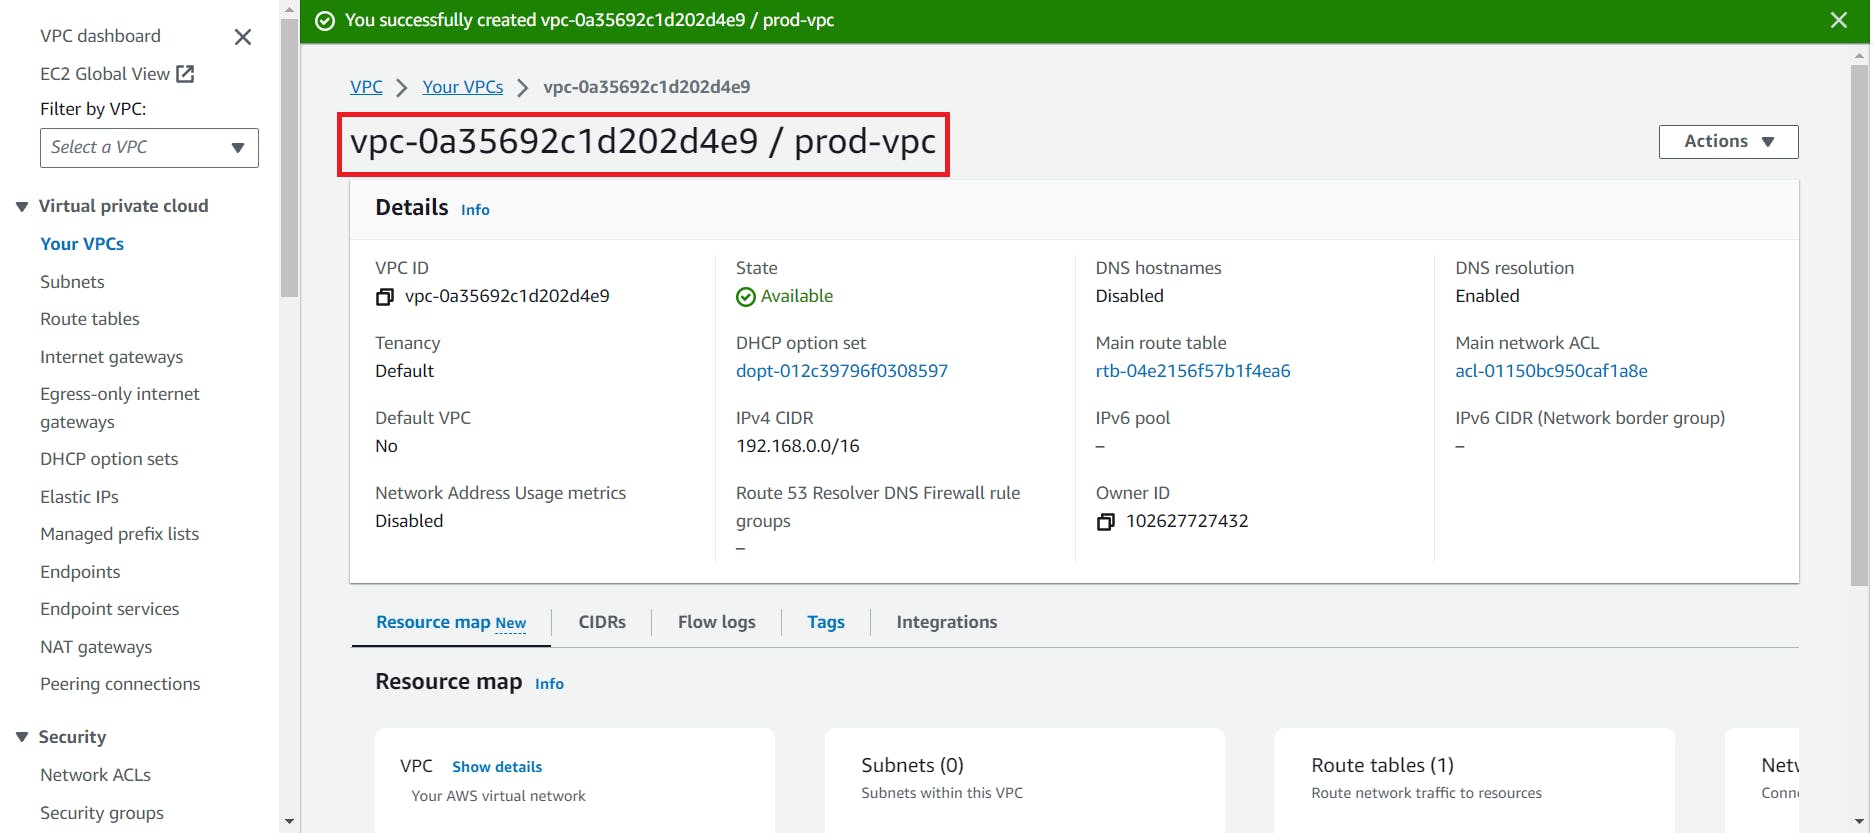
Here we created our VPC successfully
2. Now here we have to create a subnet inside prod-vpc

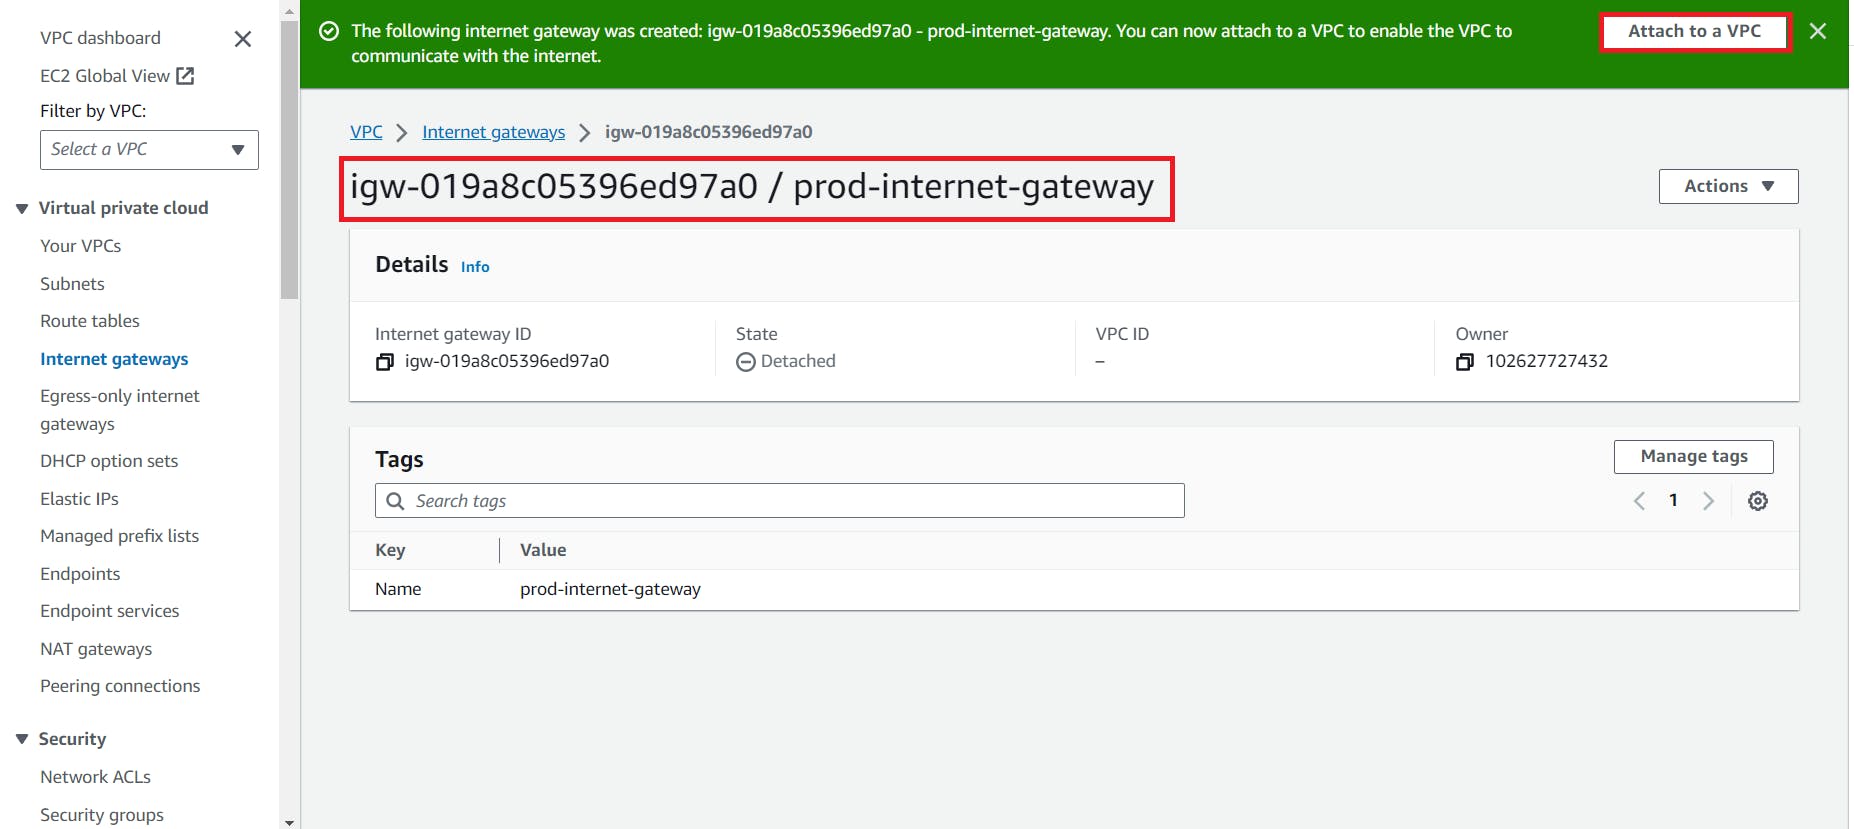
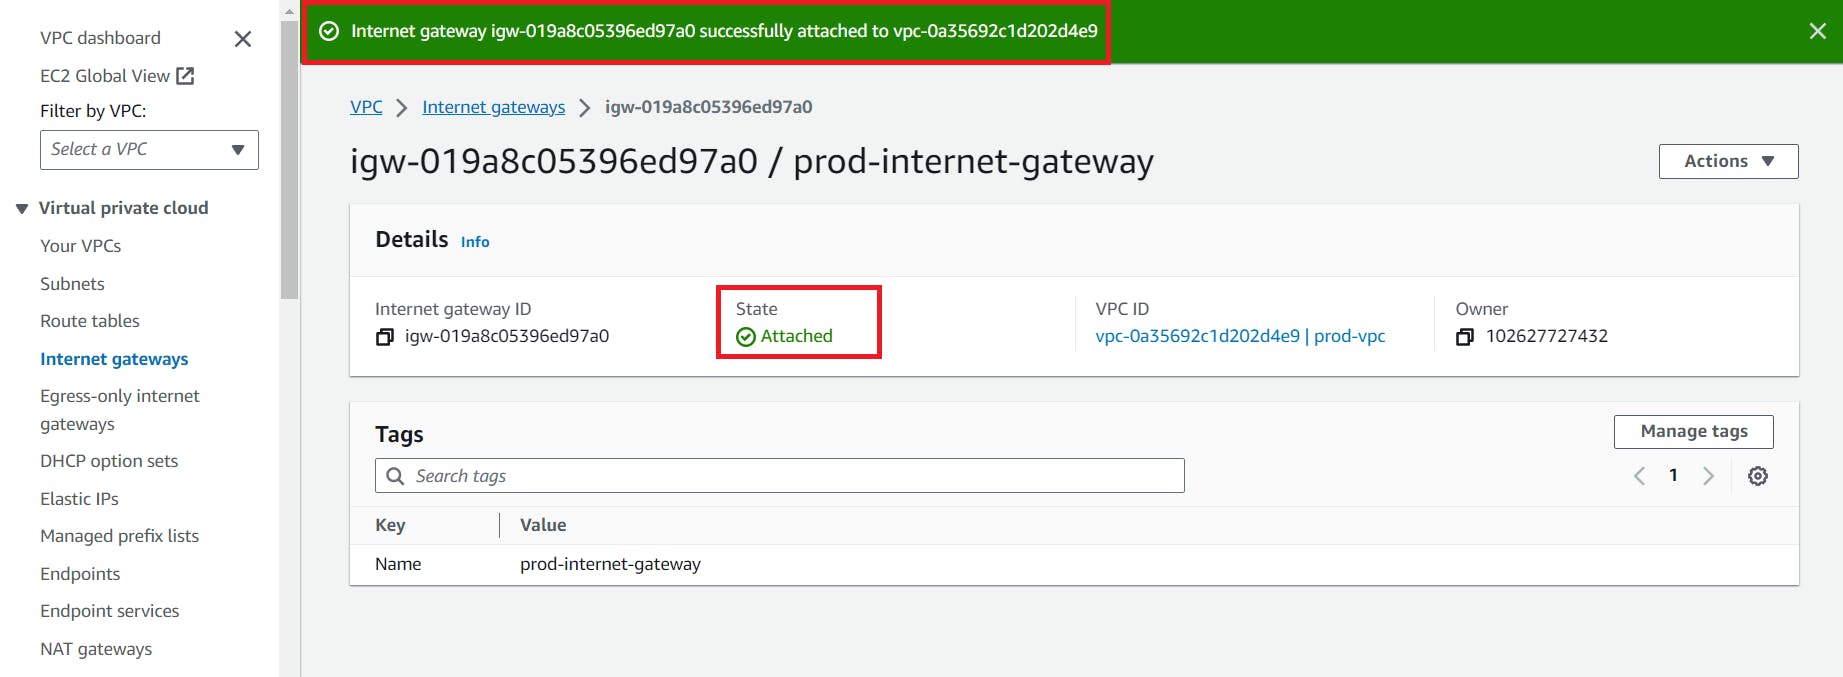
3. Create an Internet Gateway
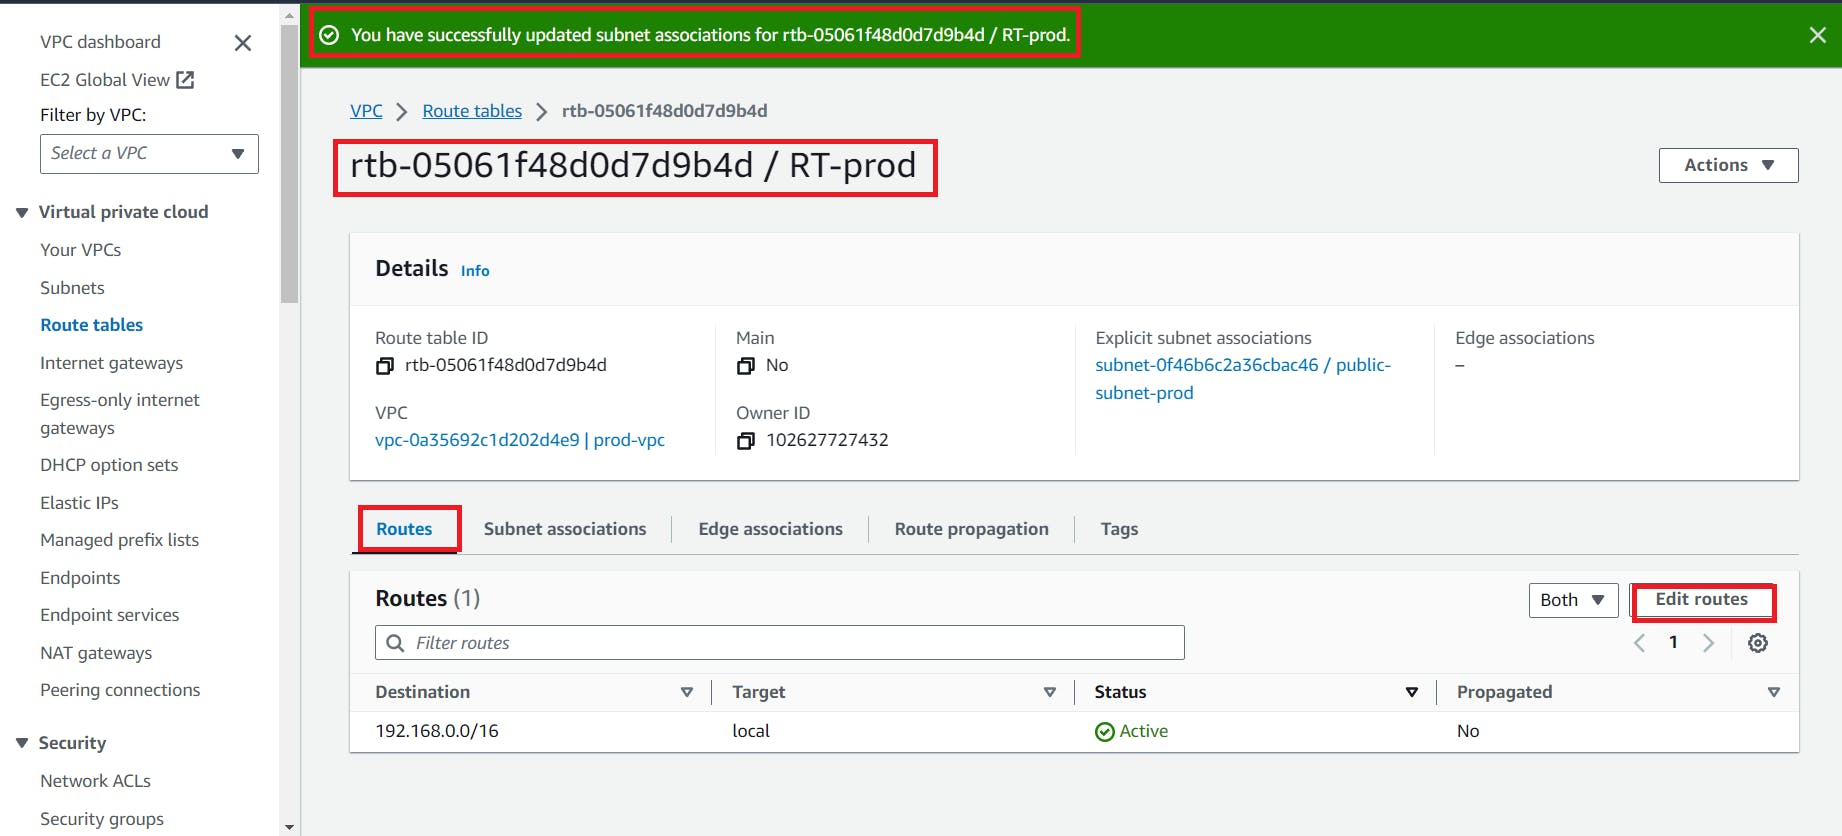
4. Create Route table
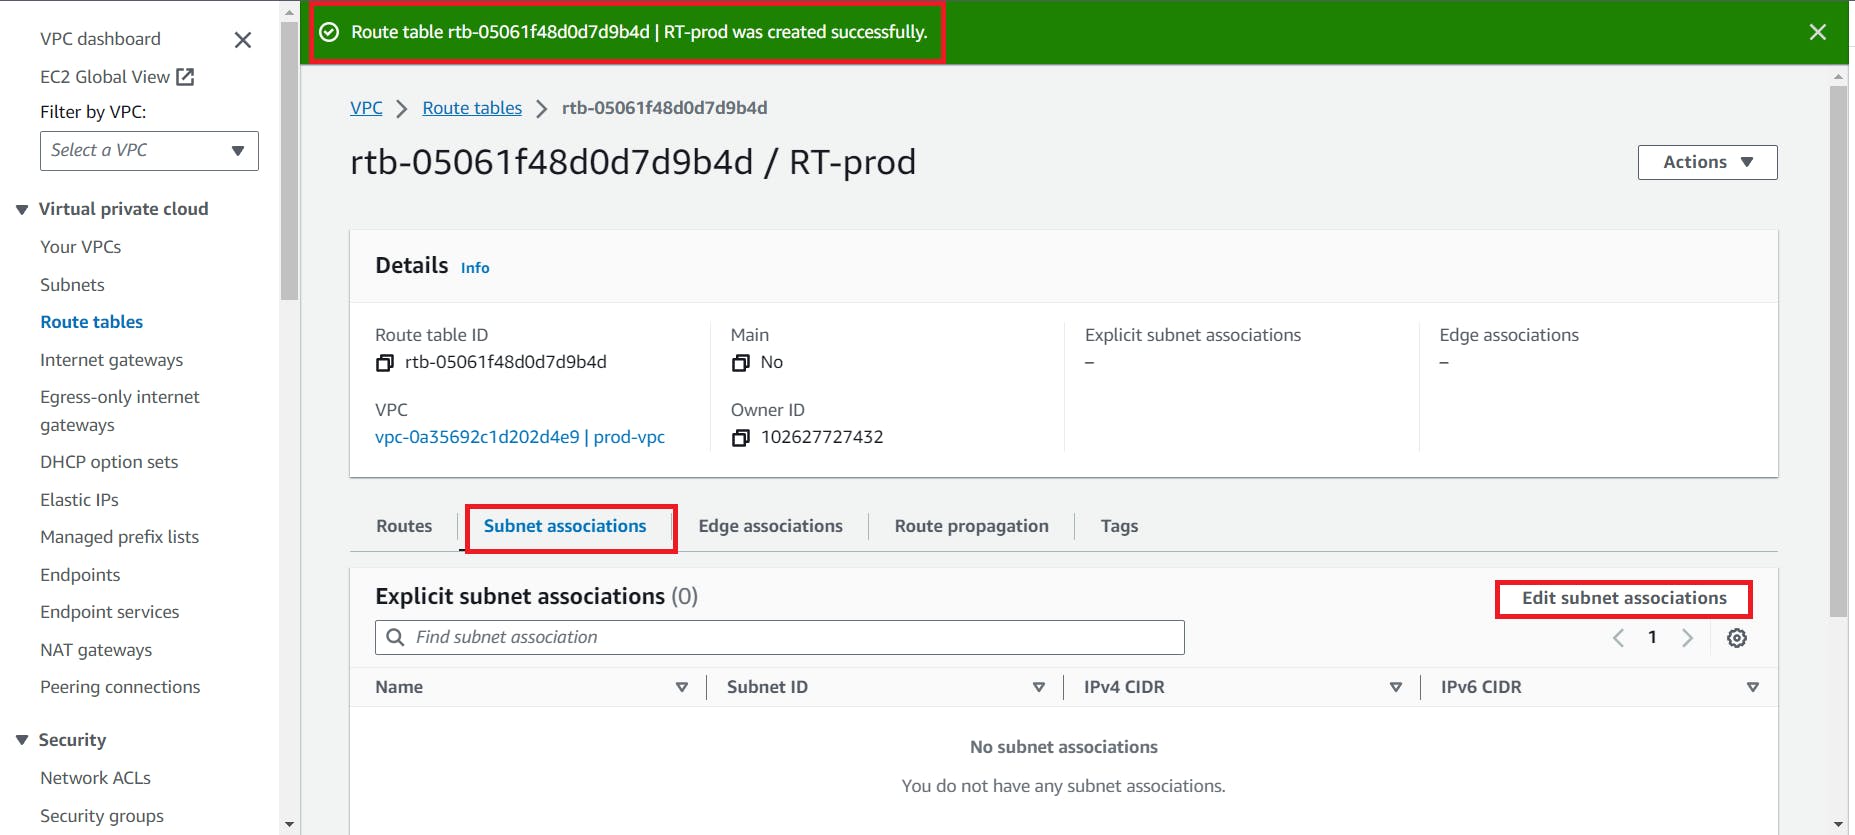
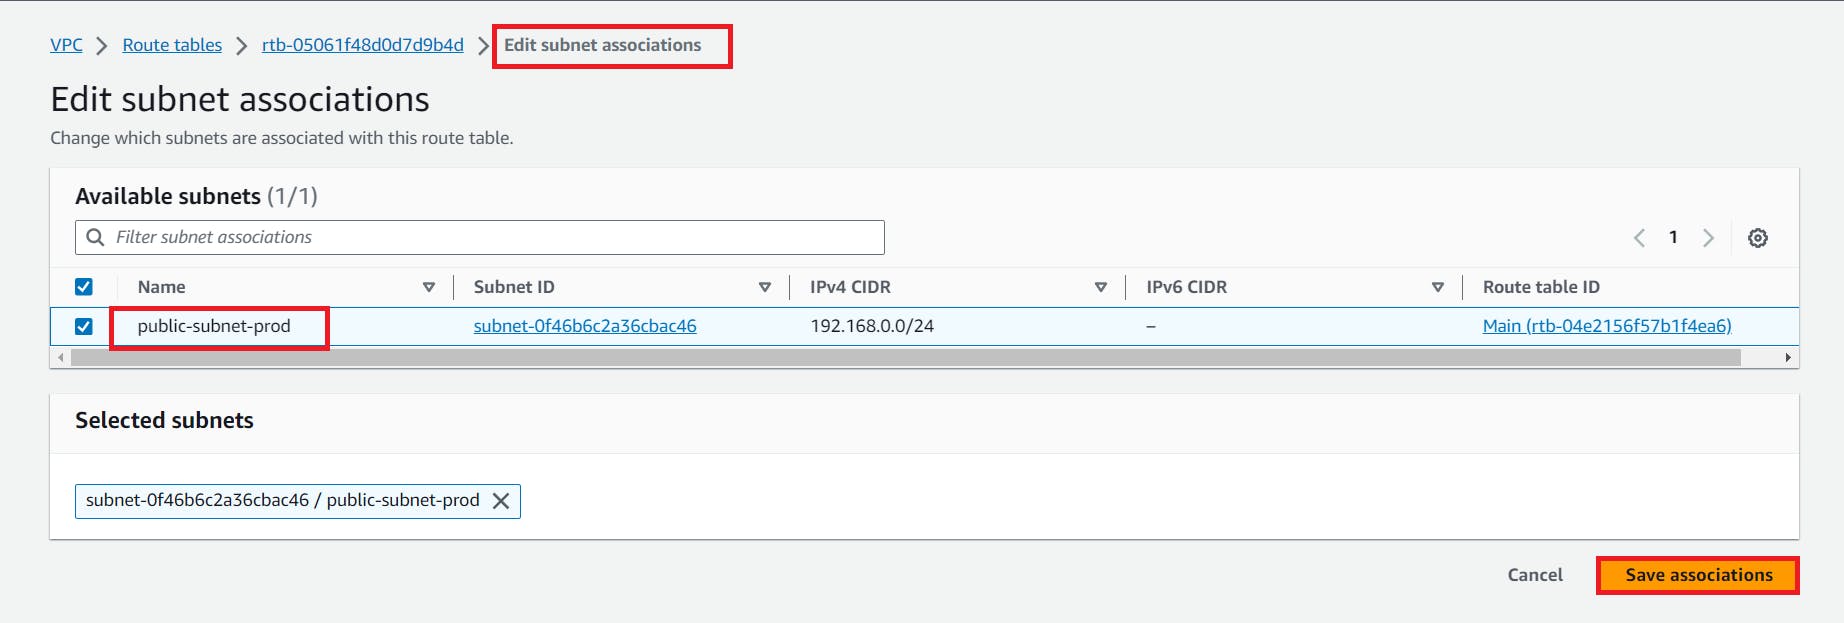
Here our route table has successfully created, go to the subnet association to edit
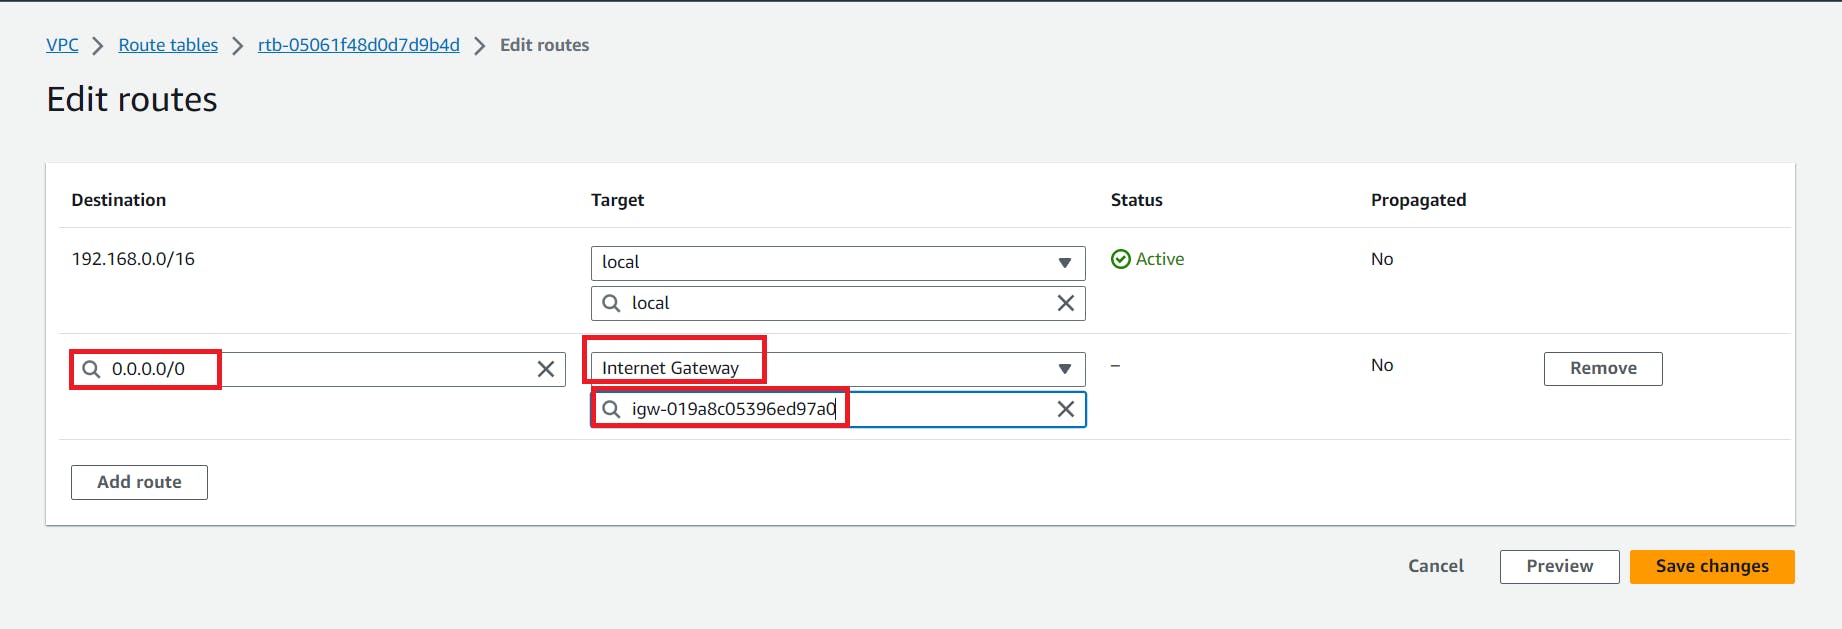
Edit routes
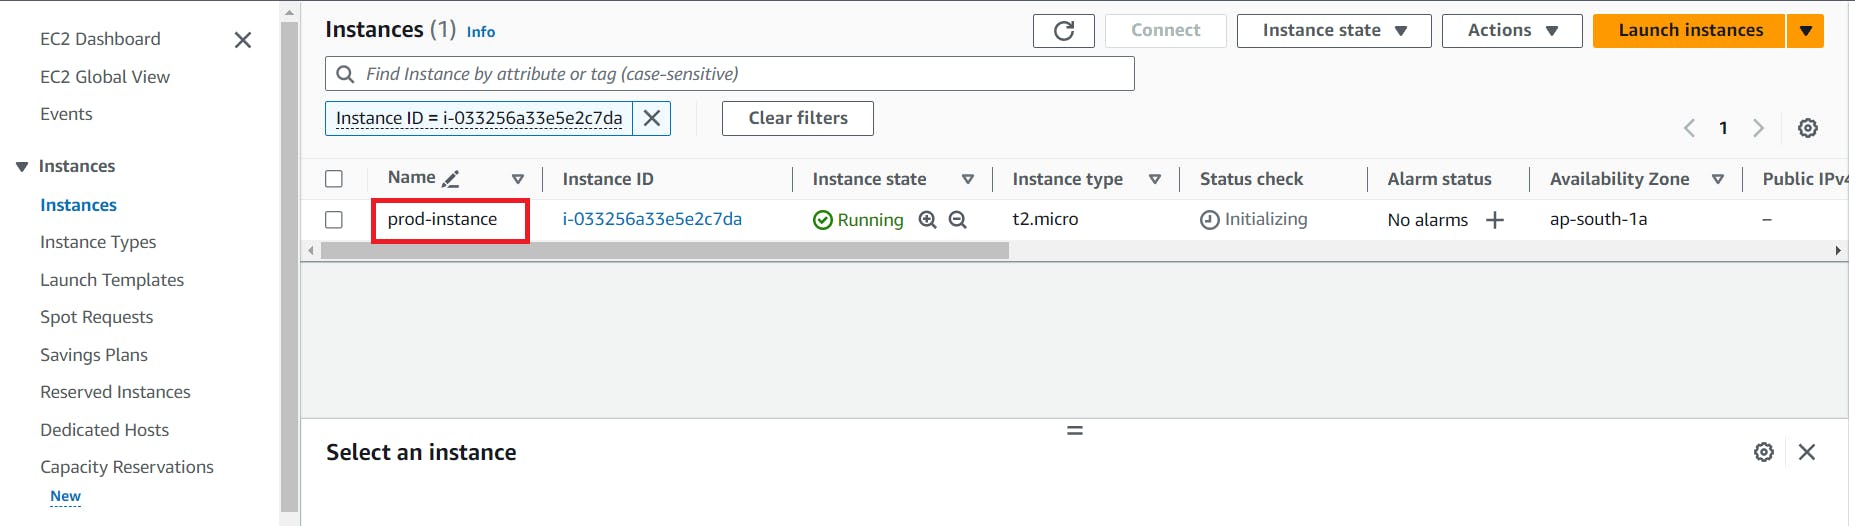
5. Create an EC2 Instance named prod-instance
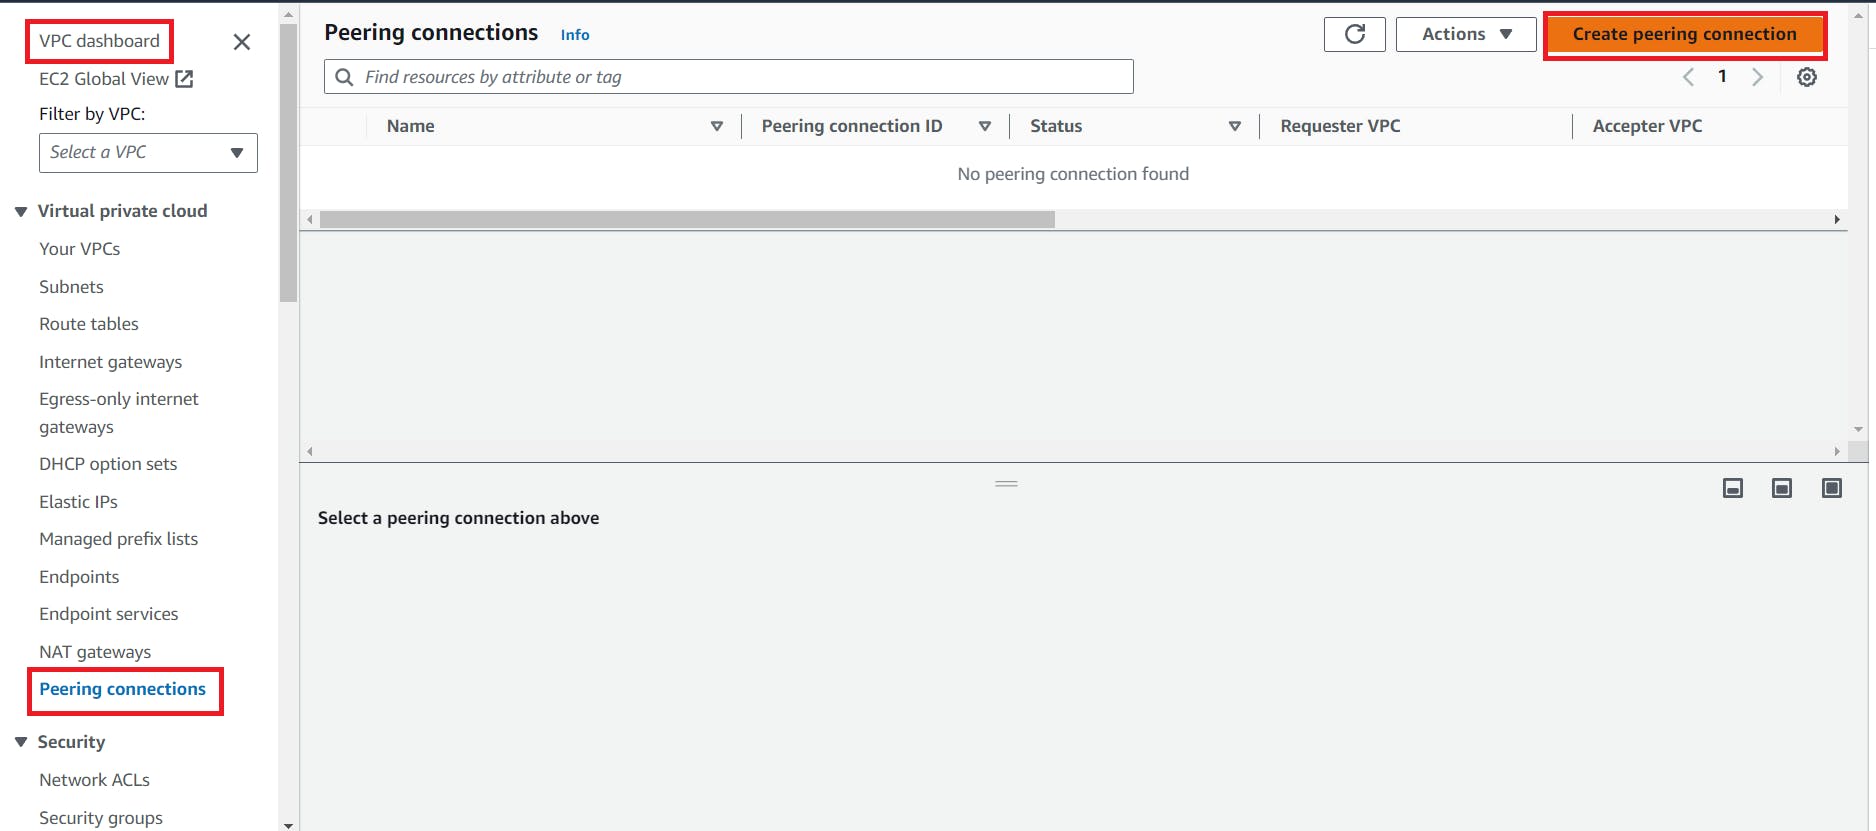
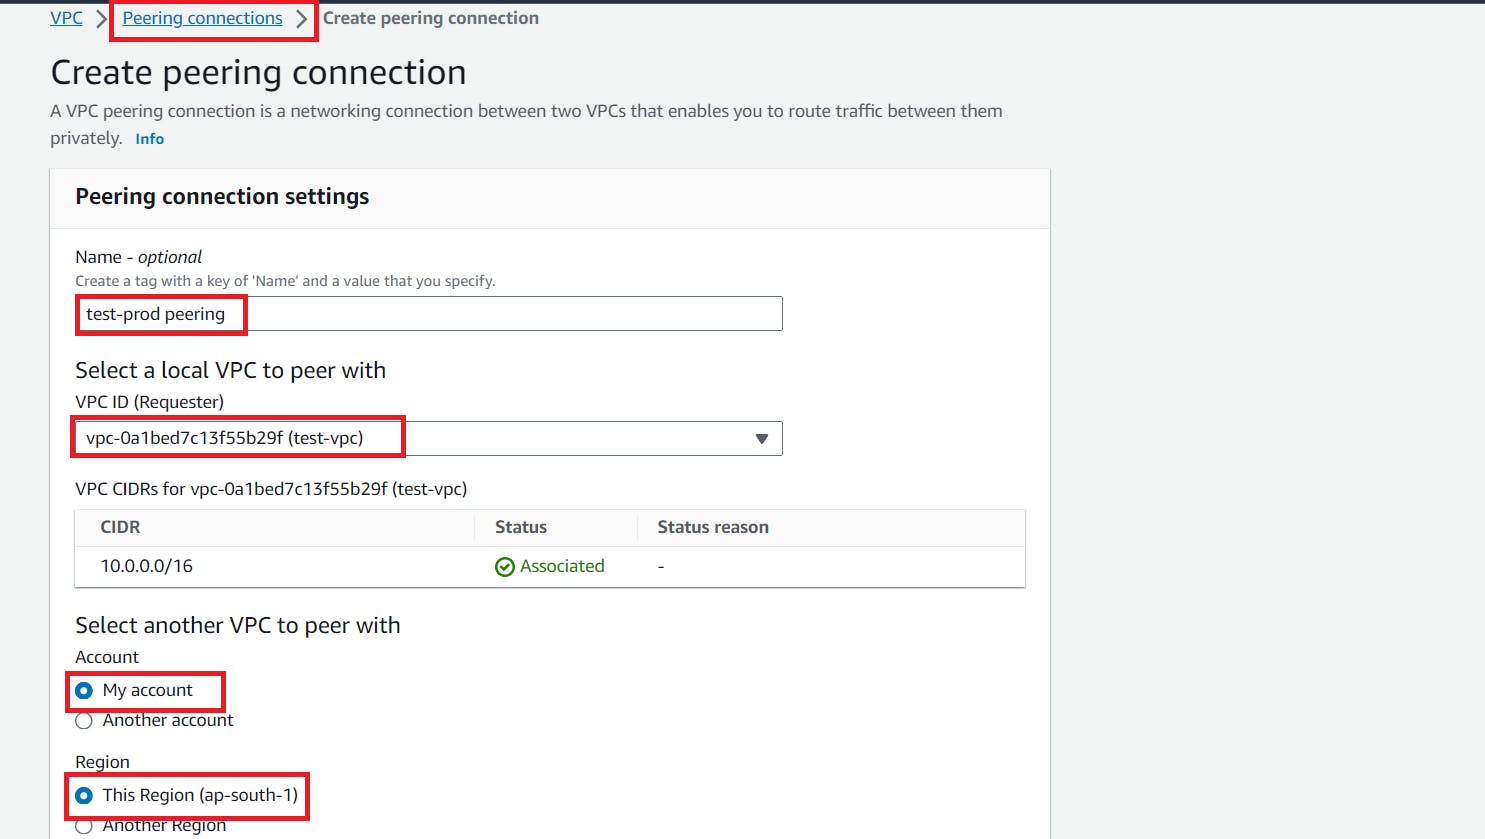
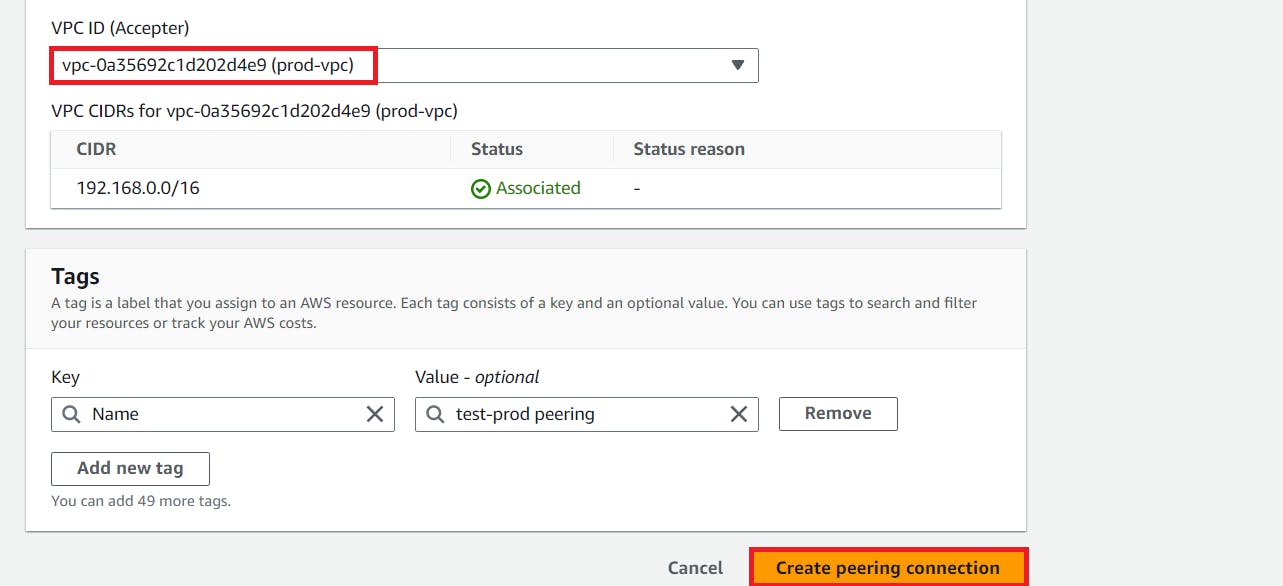
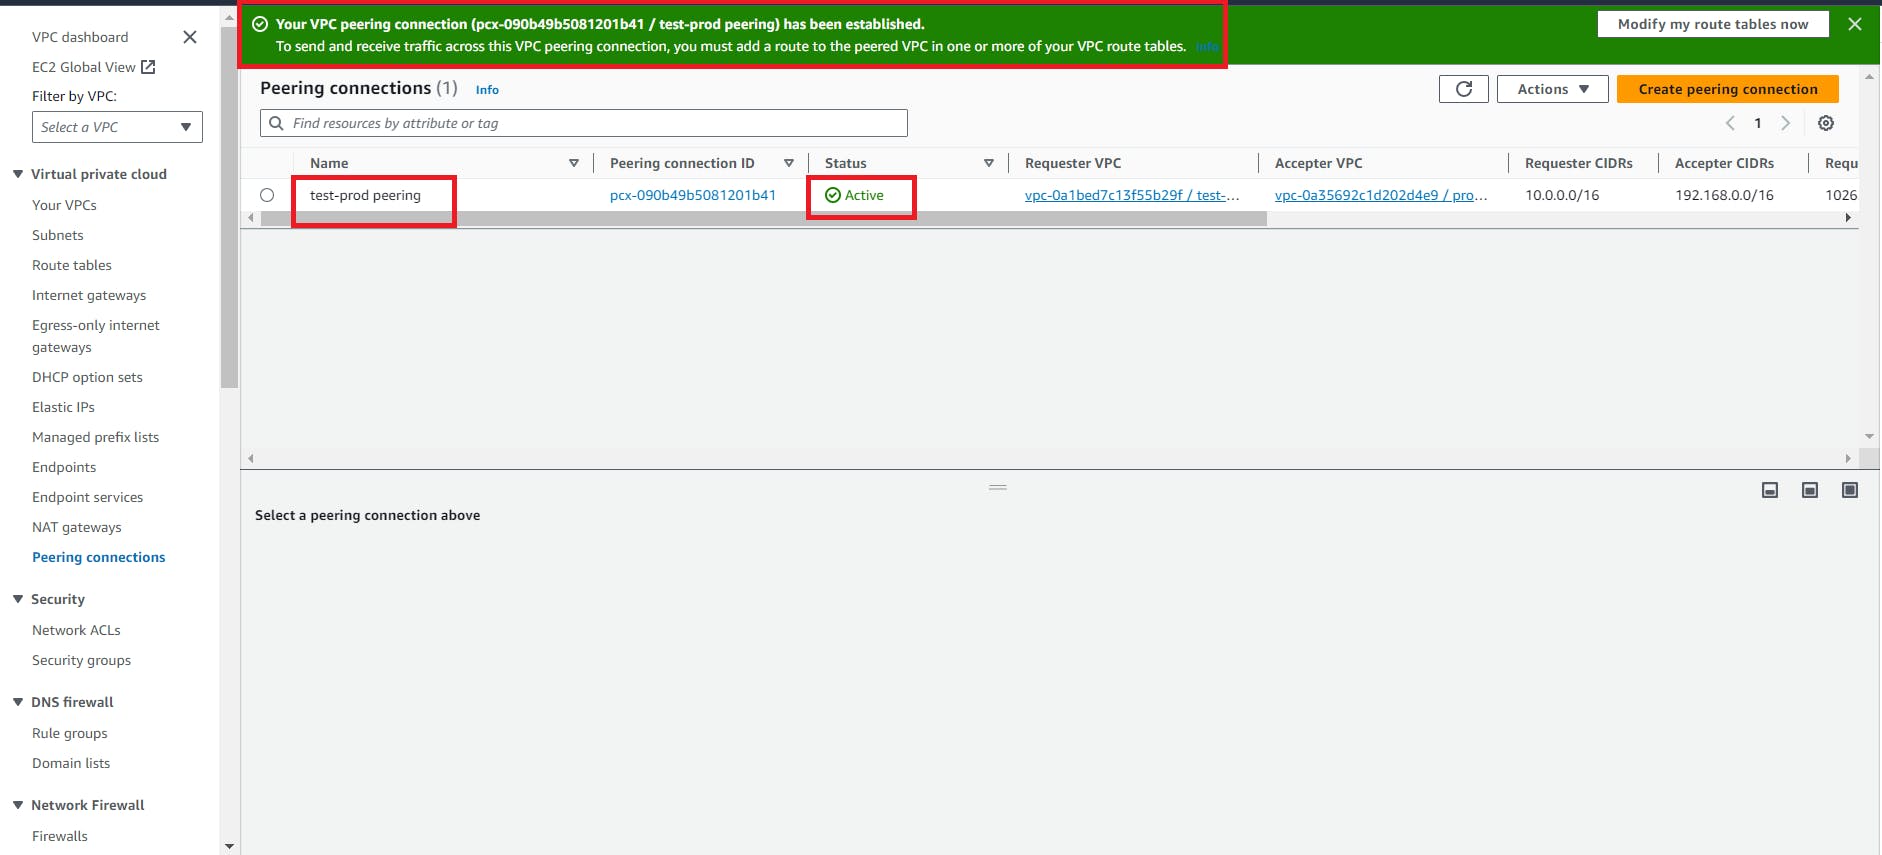
Step 3 : Create VPC Peering
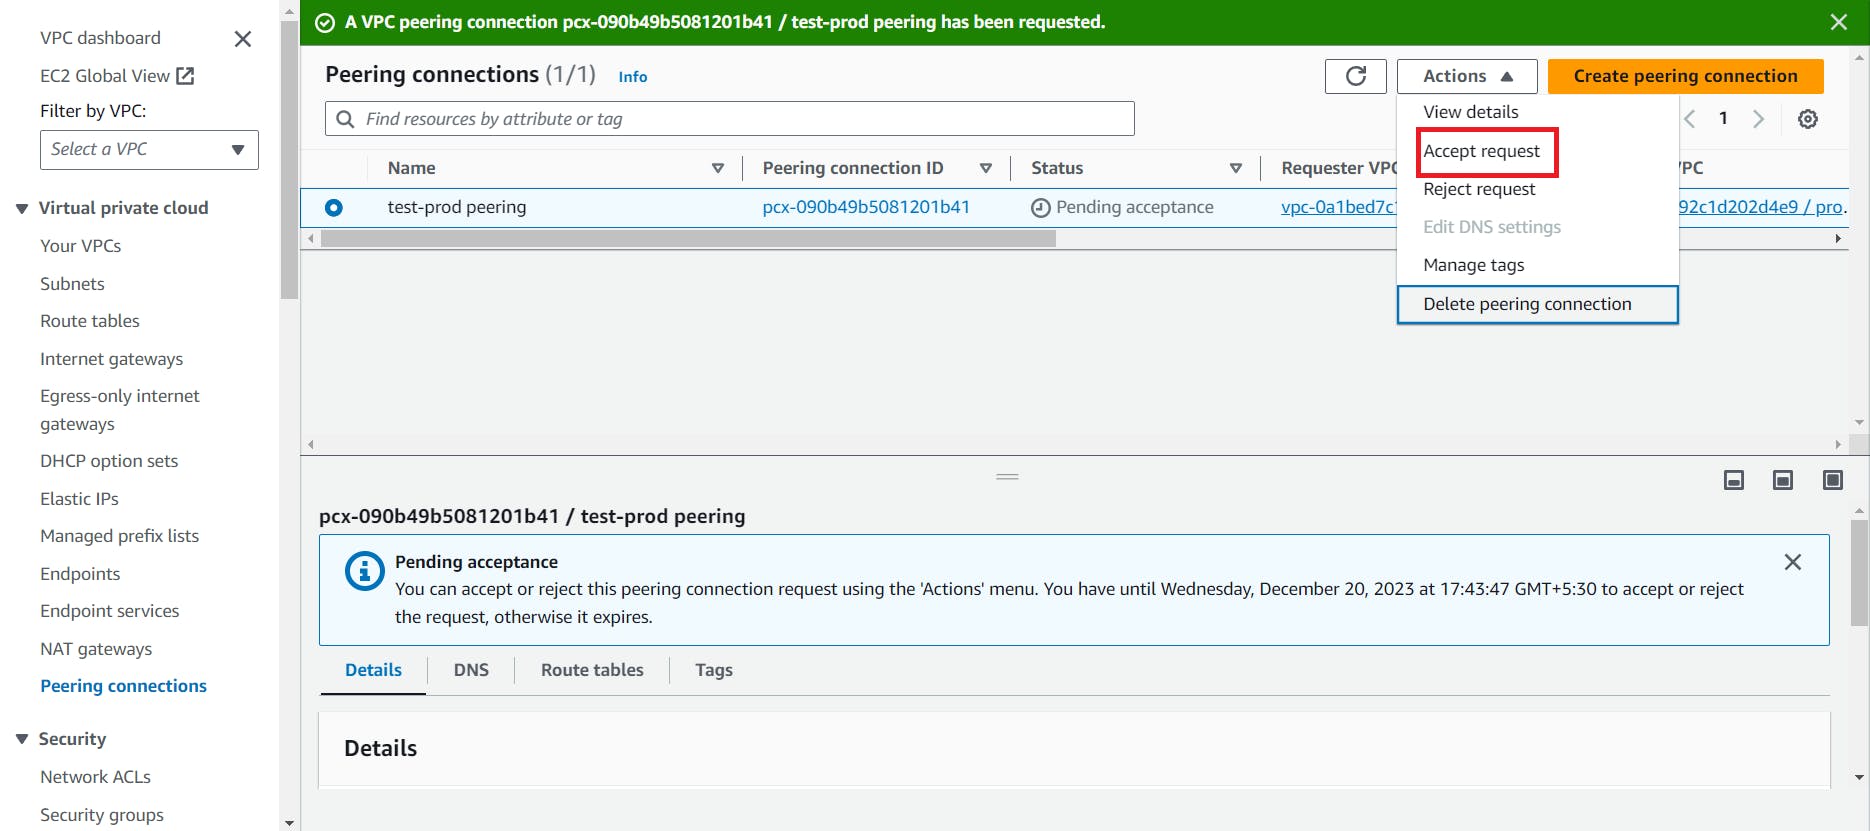
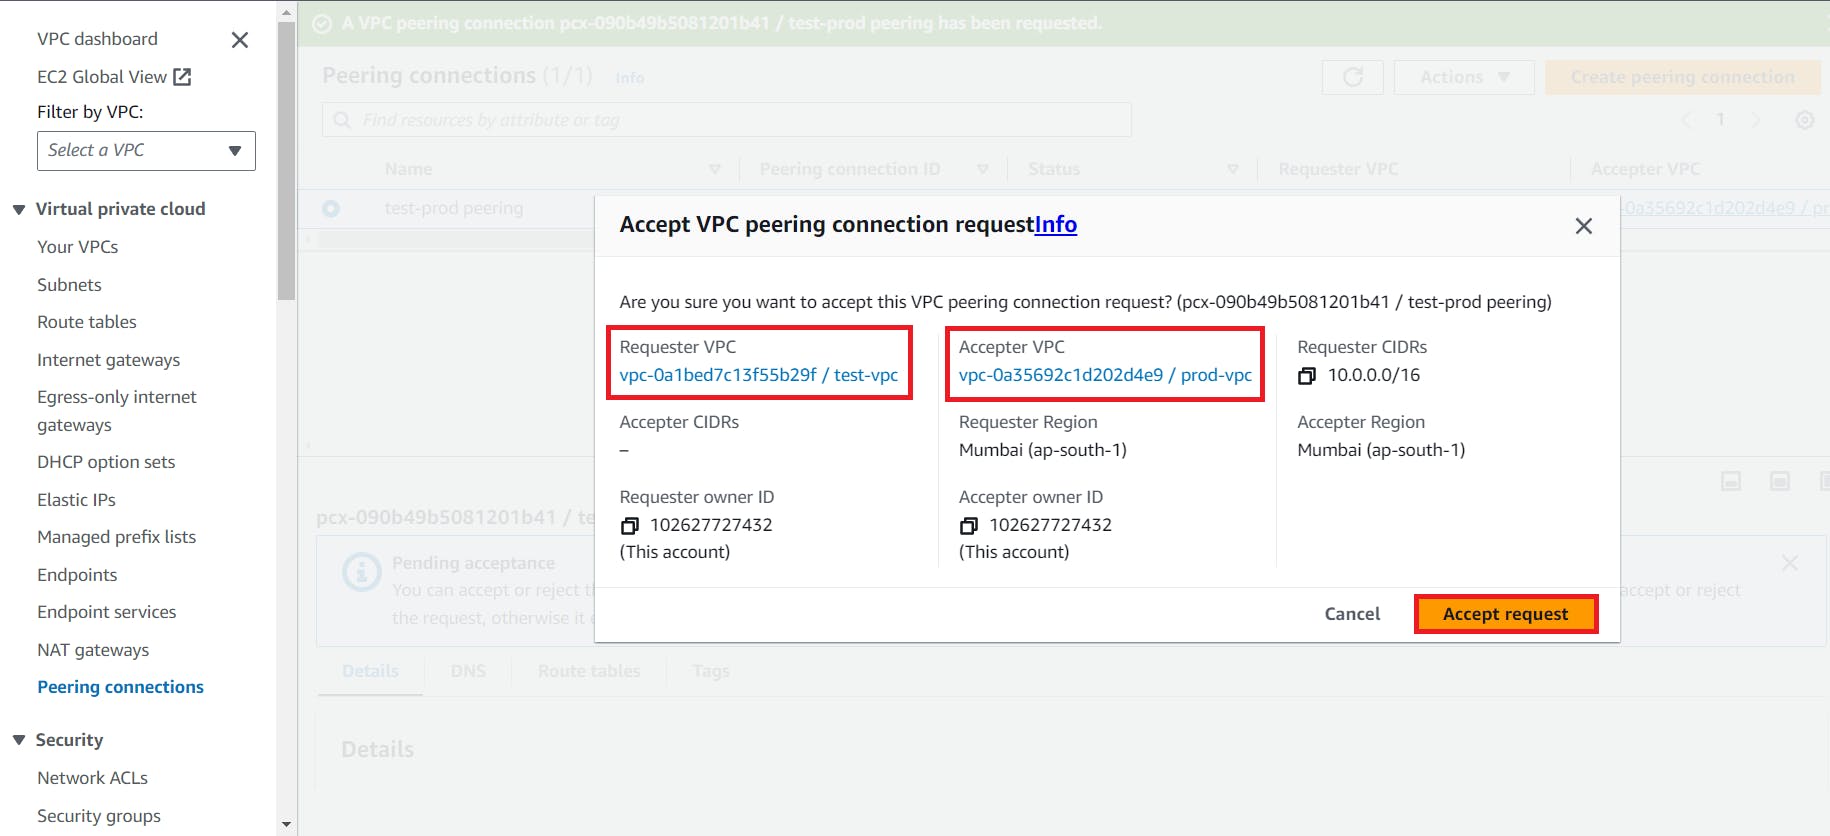
If we want a communication from one vpc to another vpc then we have to send a request from one vpc and another vpc have to accept that request.
Then go to the vpc dashboard and create a peering connection.

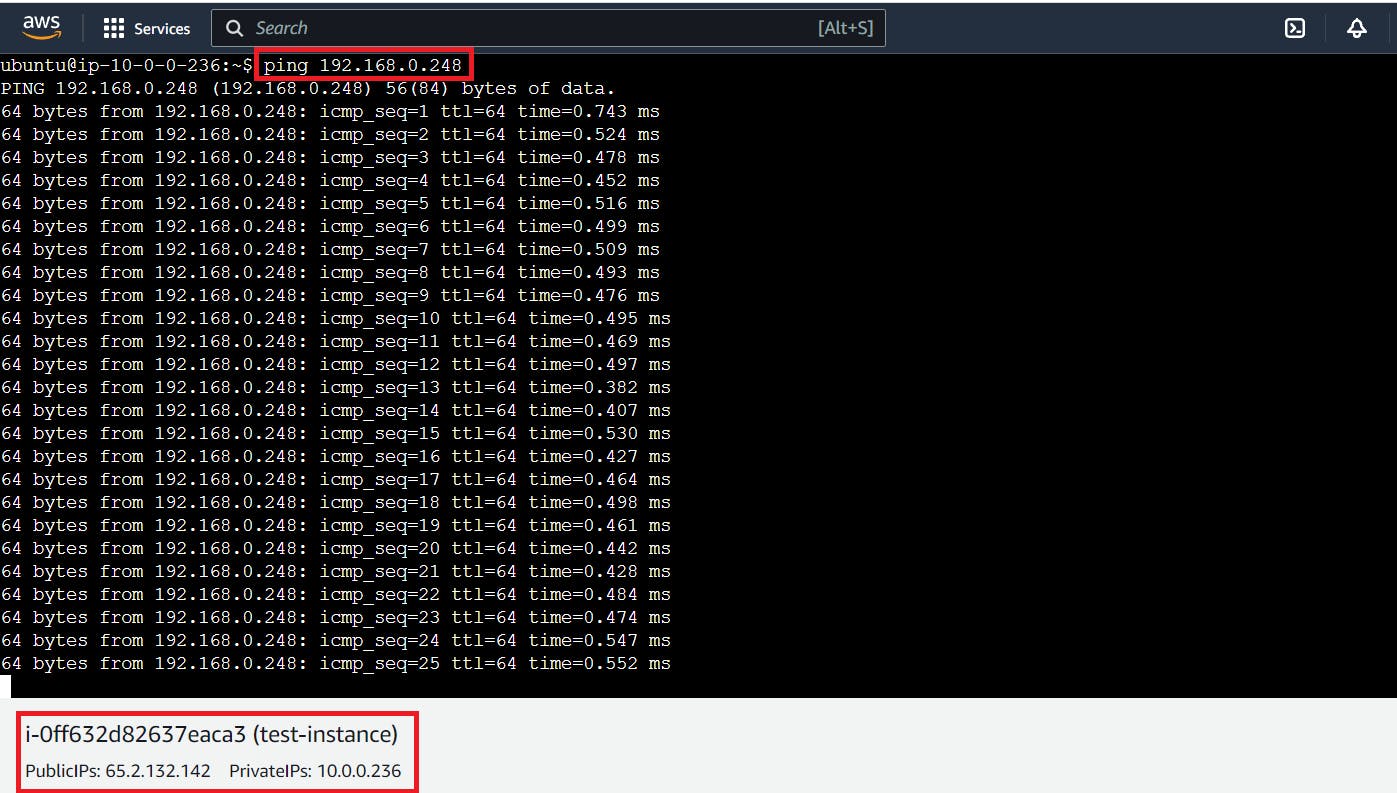
Step 4 : Ping from test instance to the prod instance
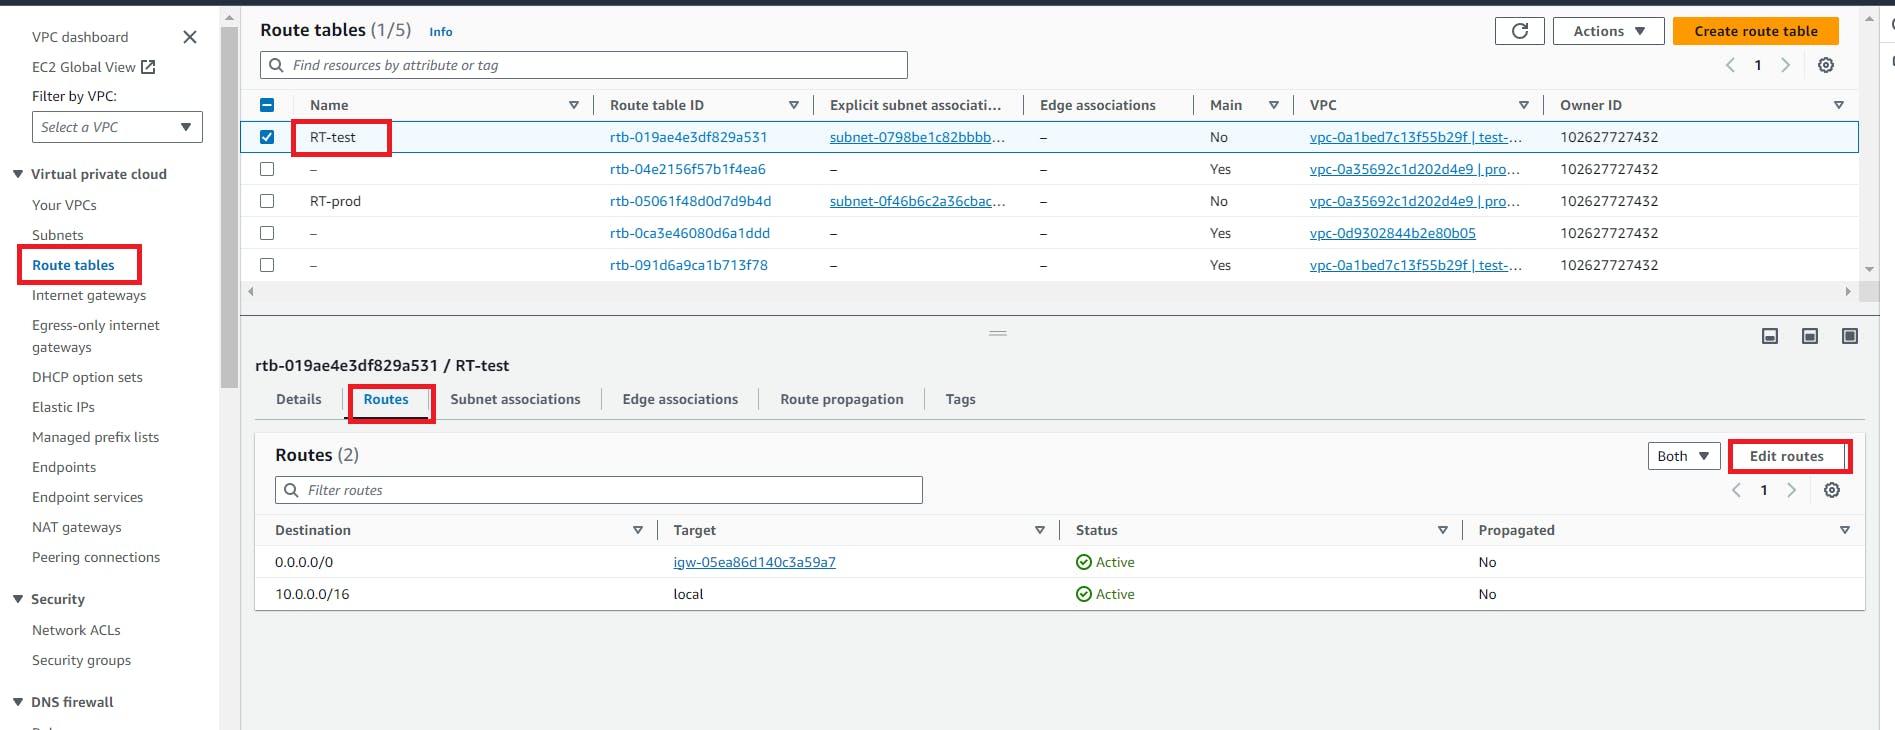
To establish a connection or data transfer between two instances from the different vpc we need a route table in between them.
1. so, go to the route table of test-vpc
if you want to go from test to prod then edit route table of test and add the cidr range for prod (192.168.0.0/16)

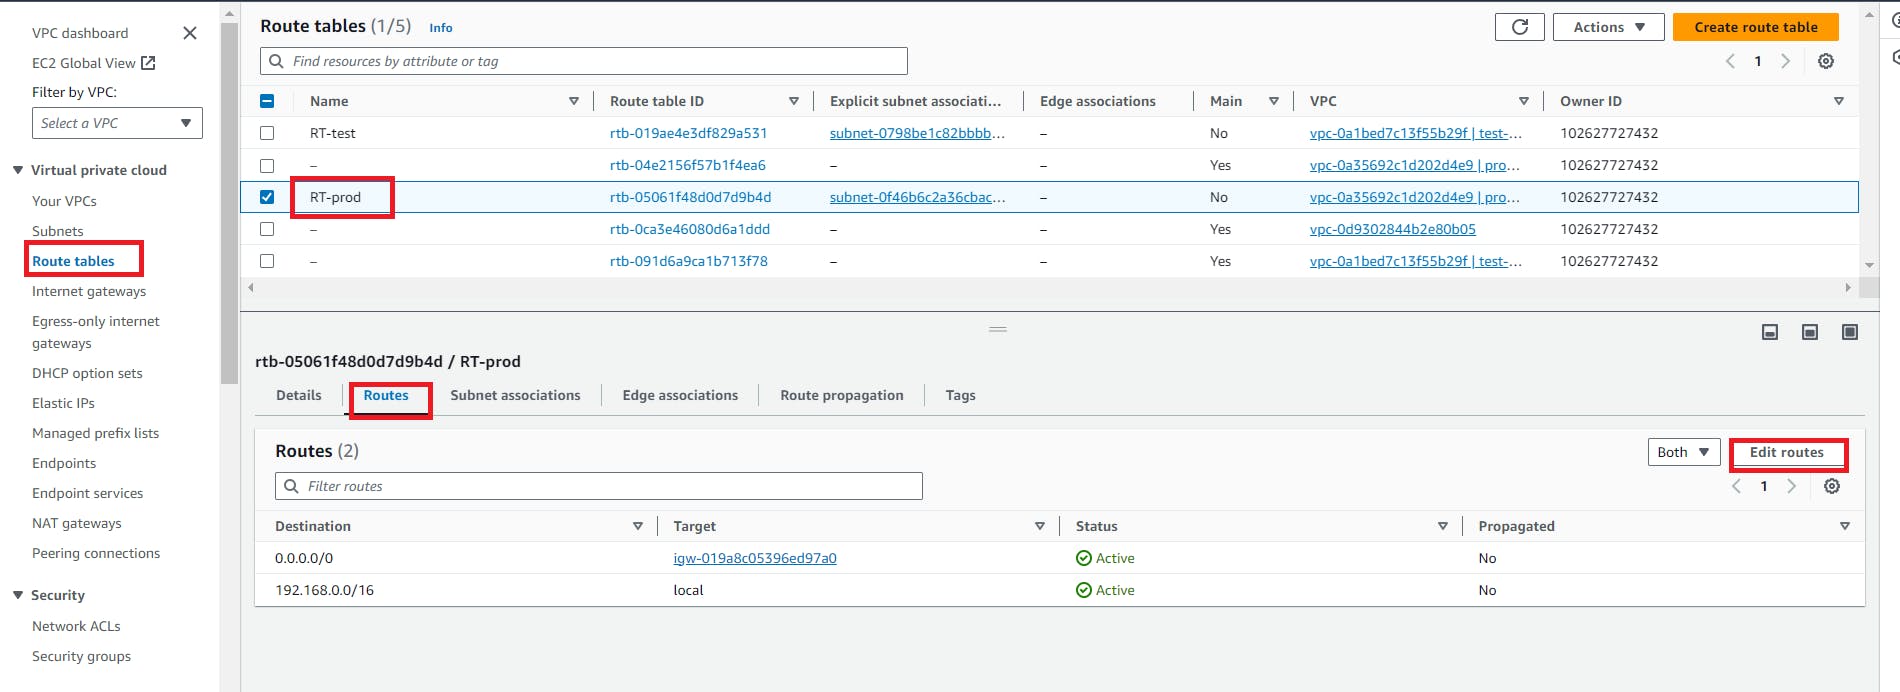
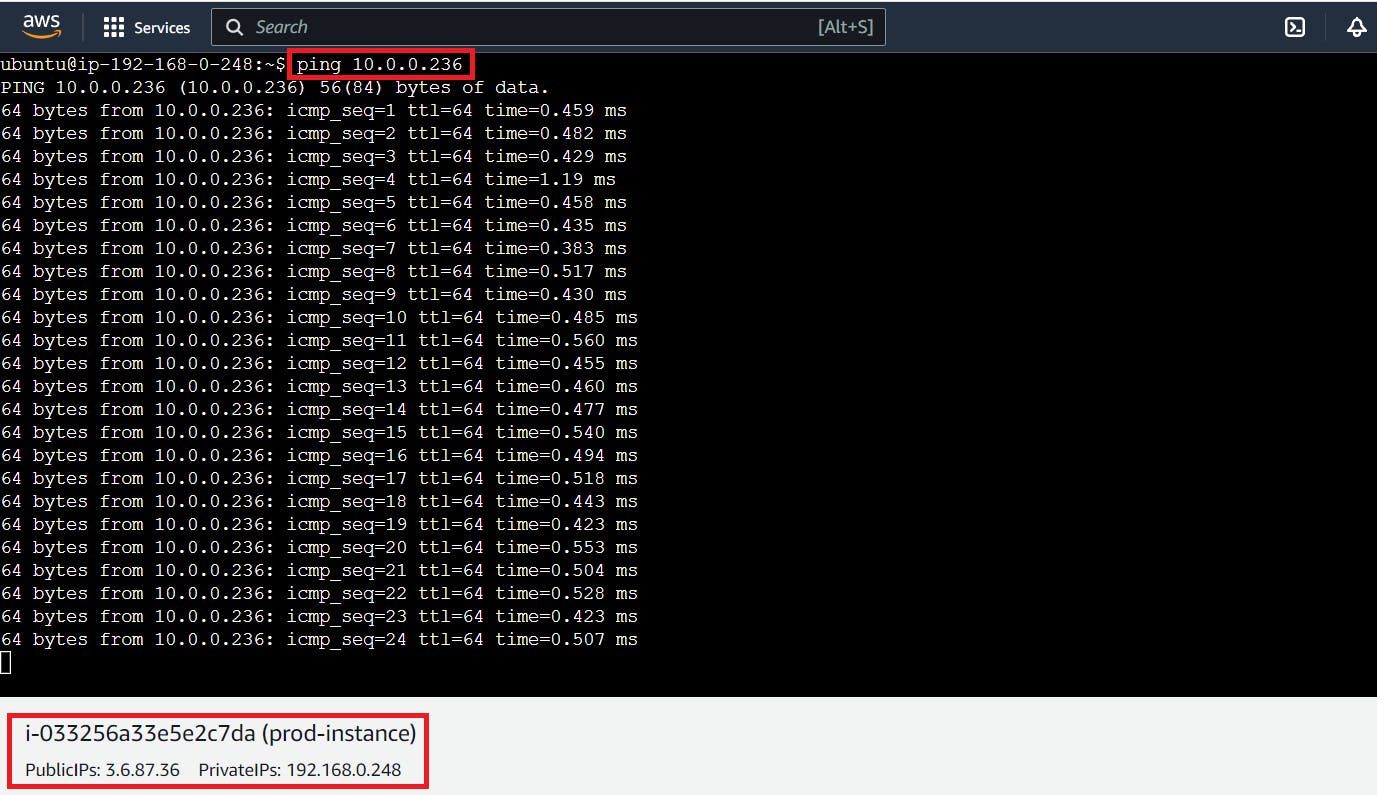
2. Similarly if you wanted to go from prod to test then edit the route table of prod and add the CIDR range for of test(10.0.0.0/16)
go to the route table of prod

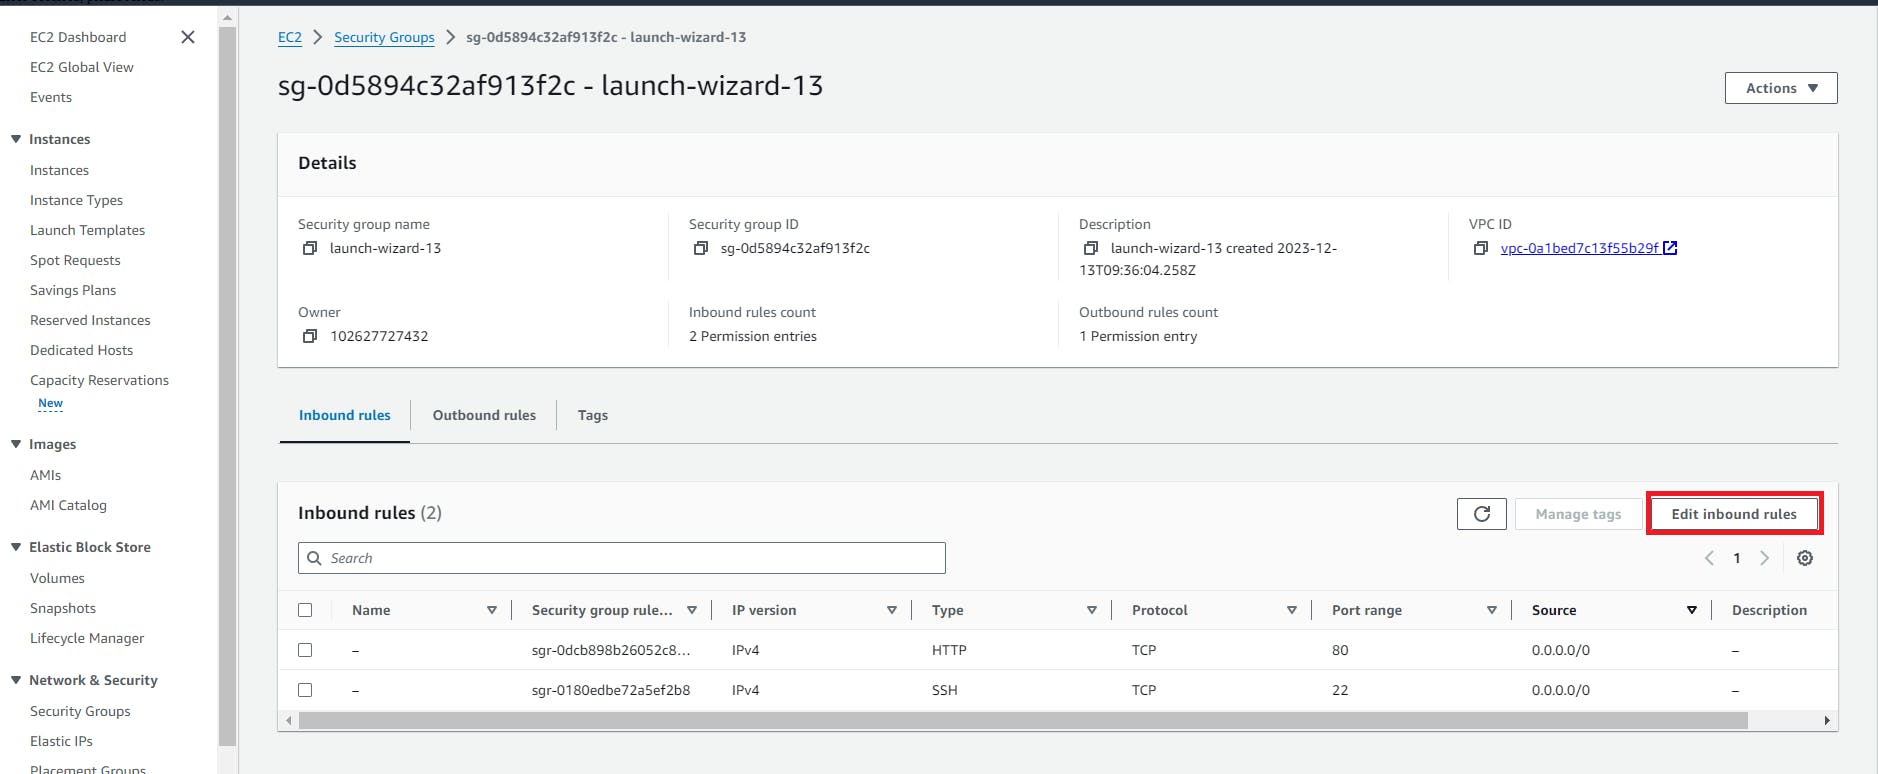
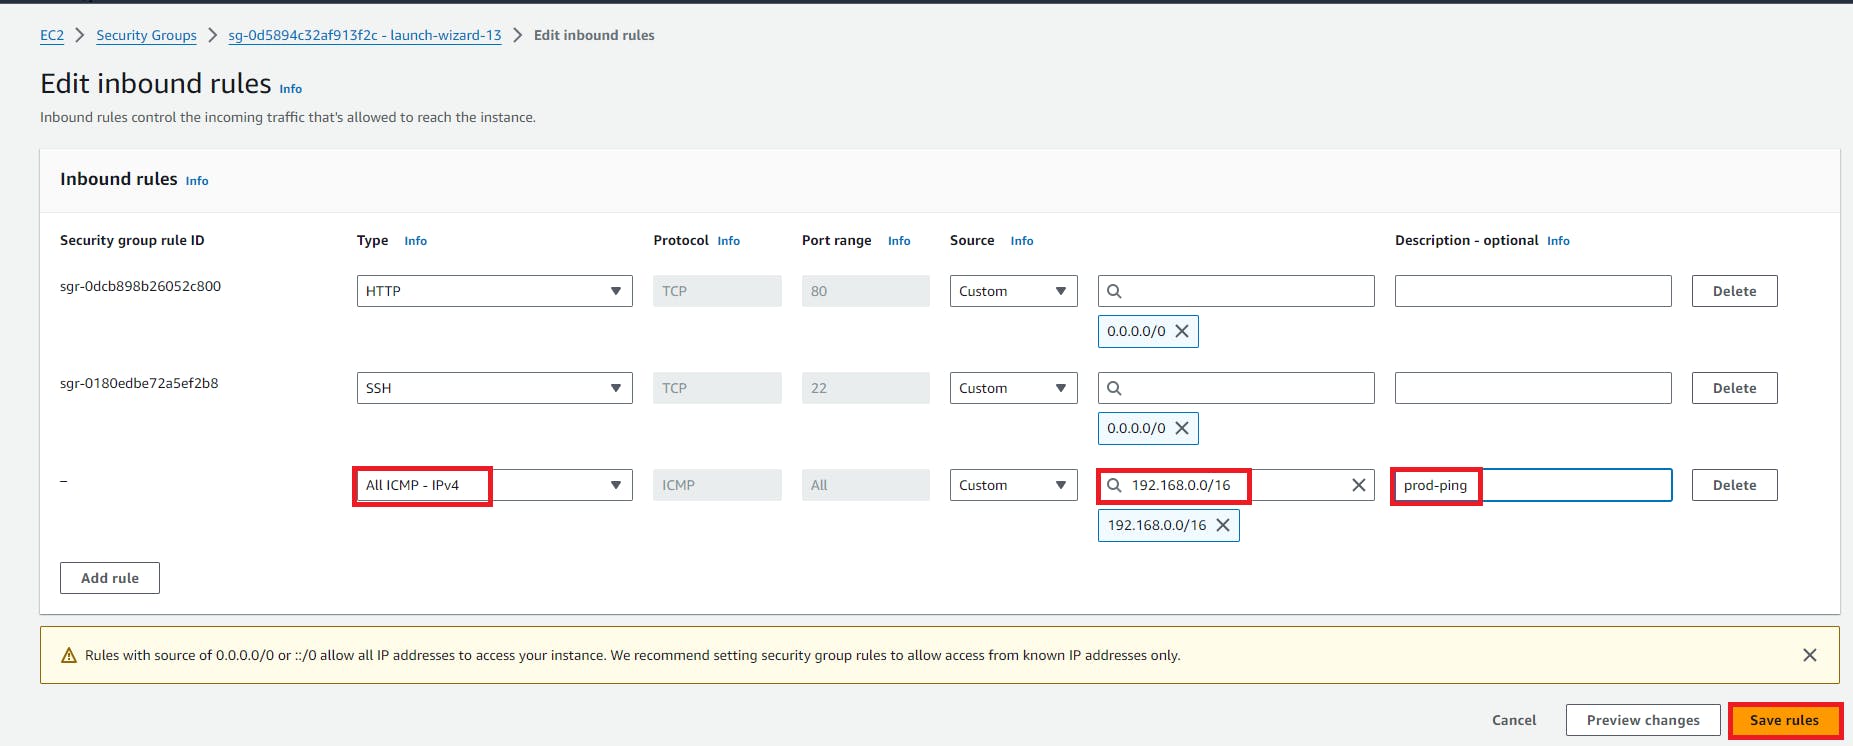
3. edit the security group of both the instances and add the ICMP protocol
Edit the security group for test-instance
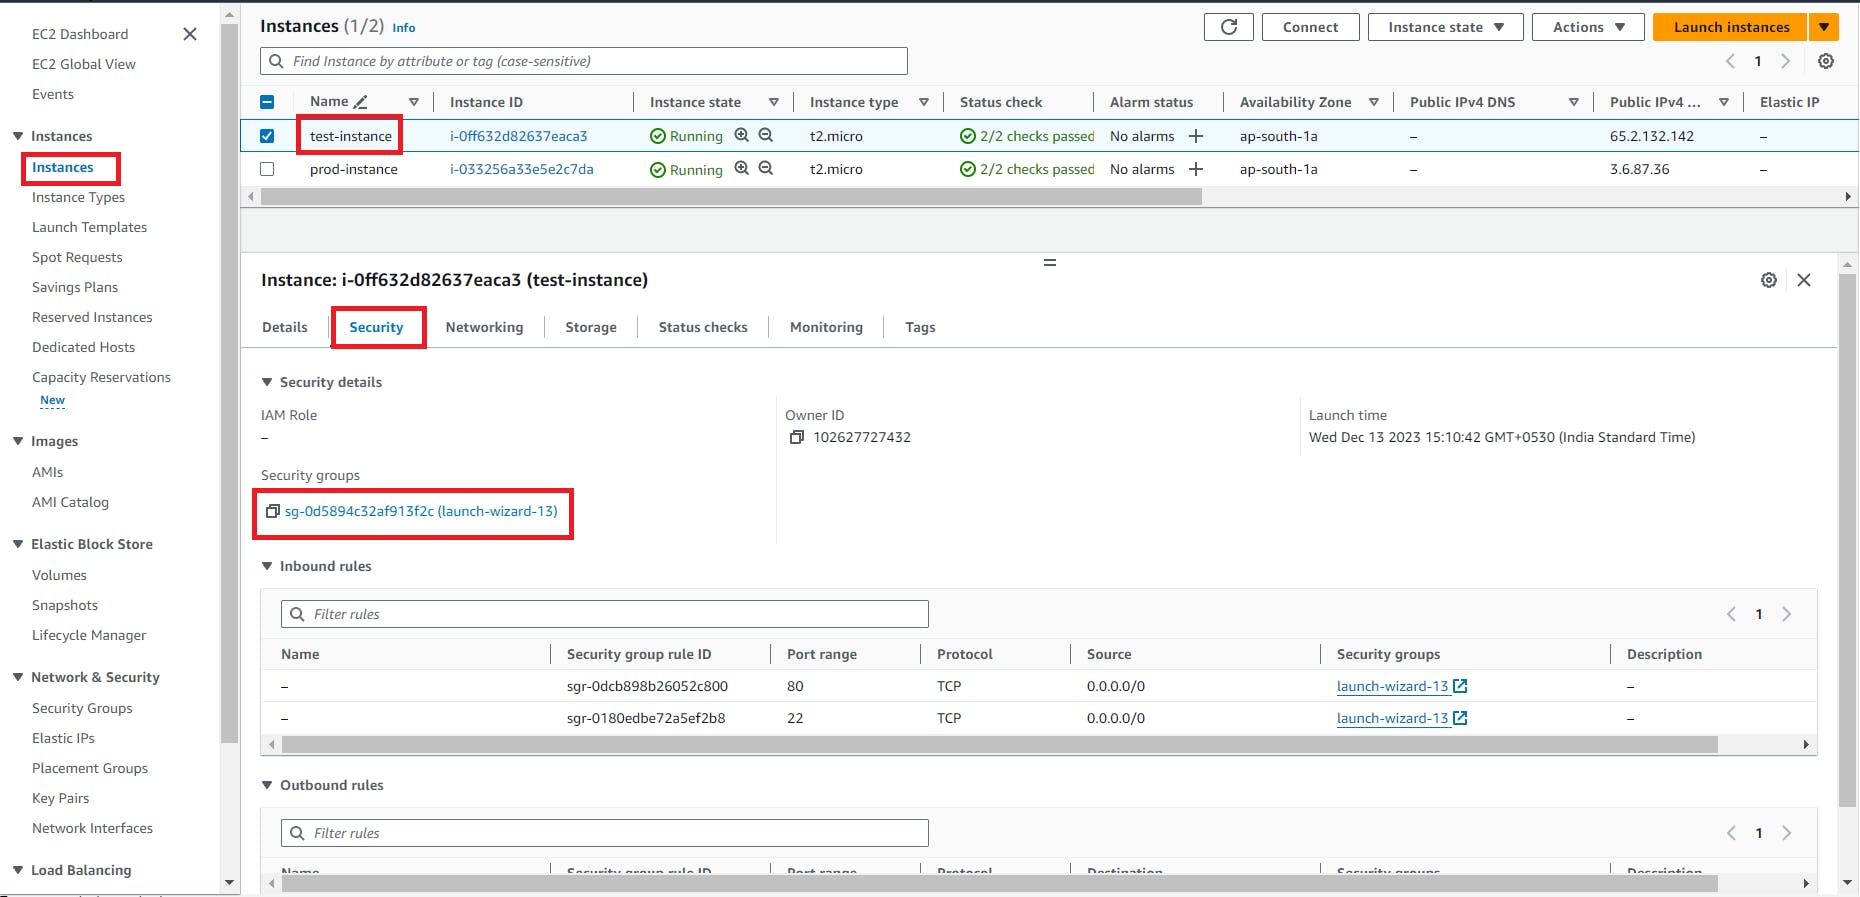
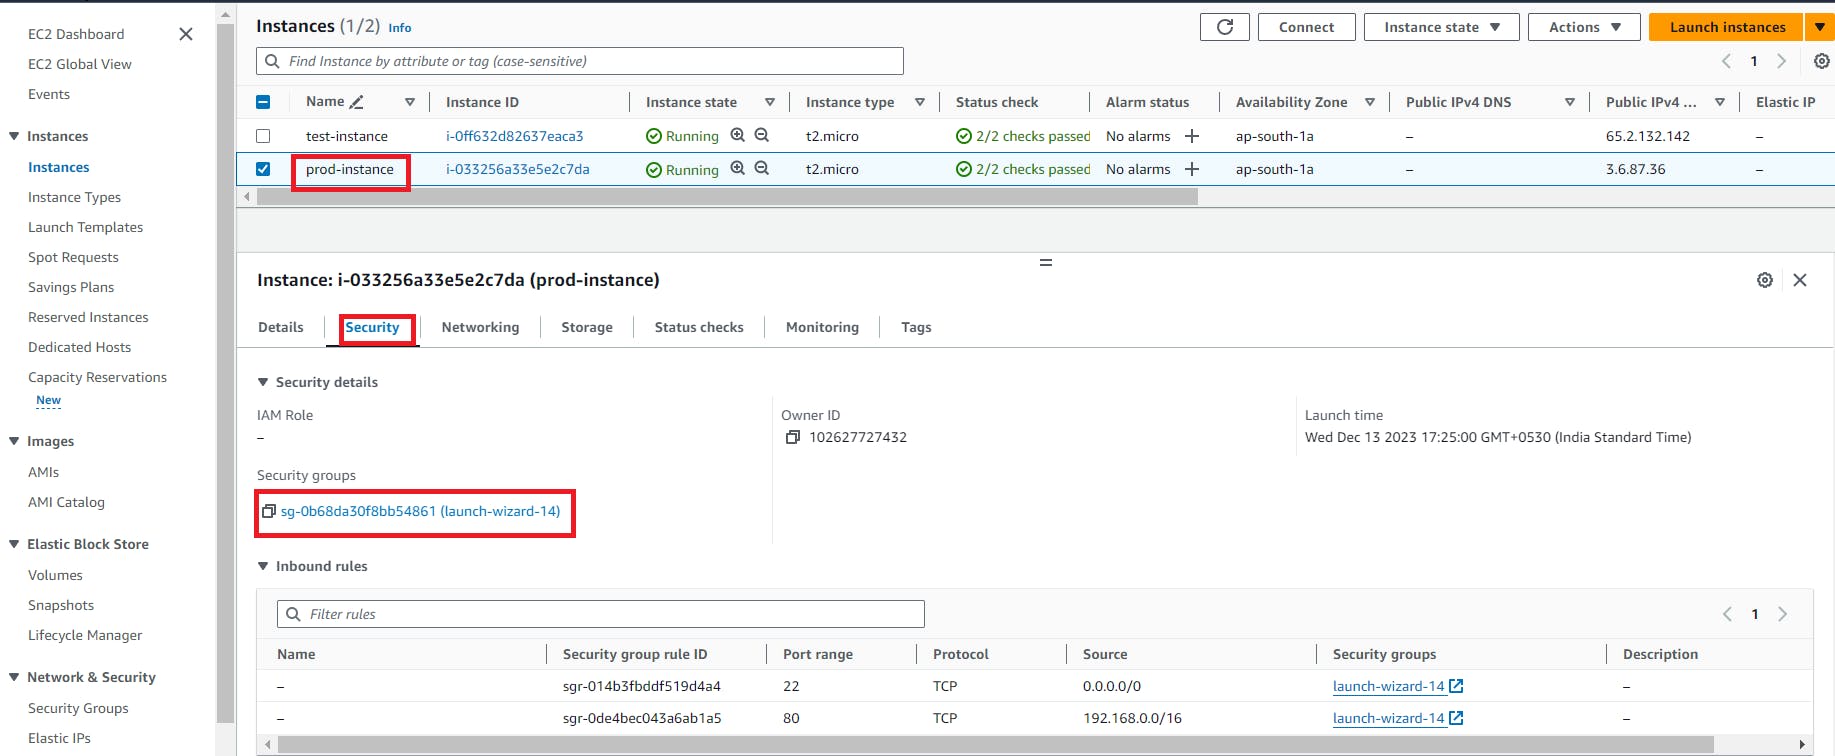
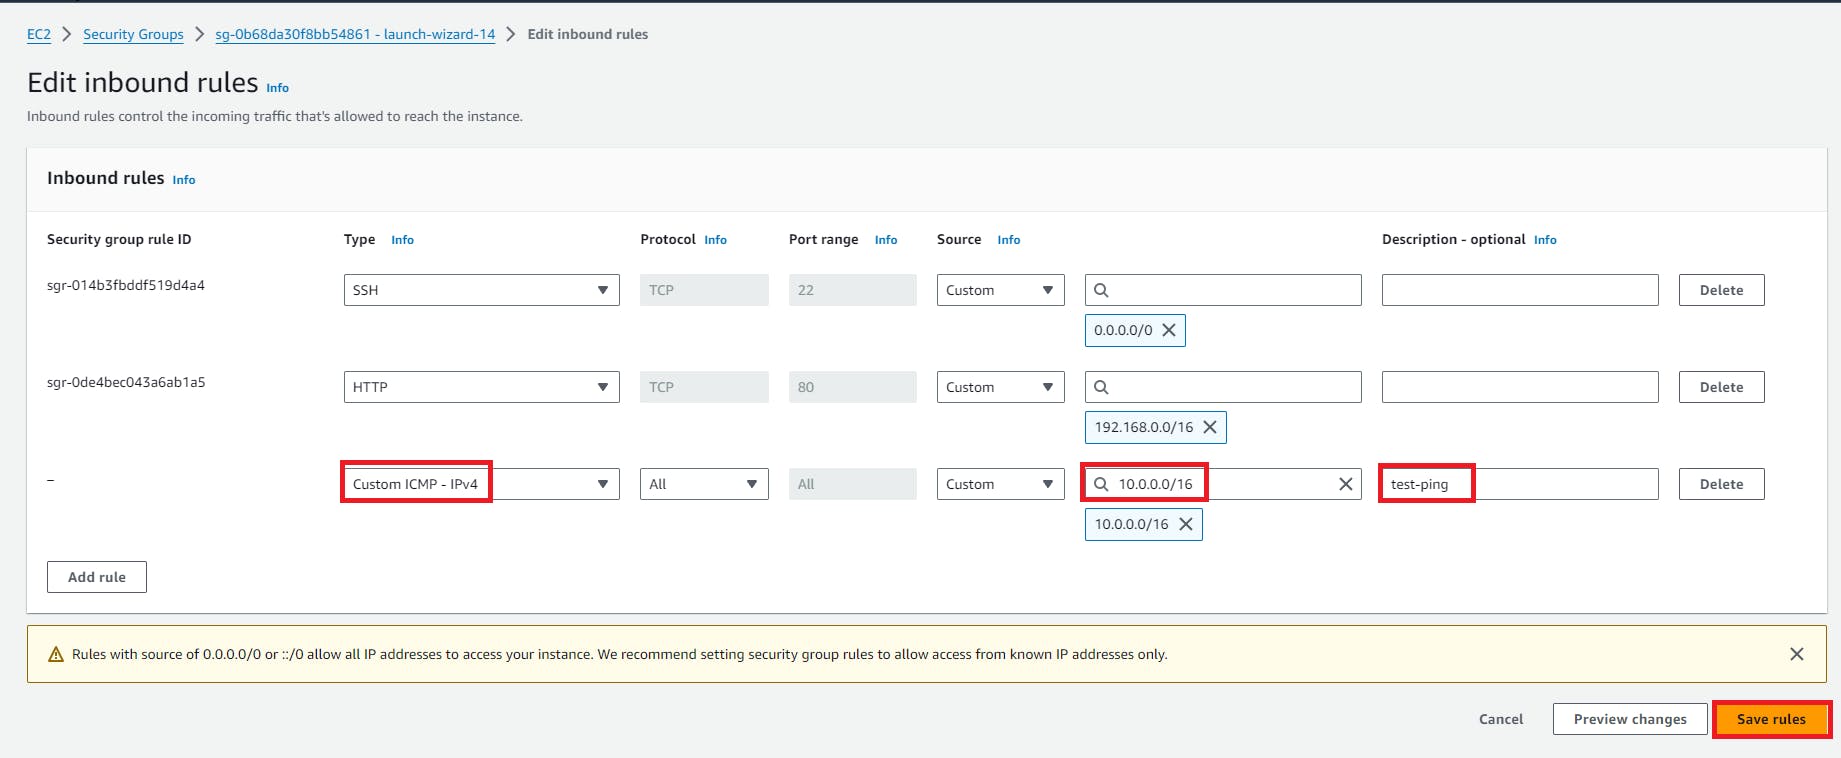
Edit the security group for prod-instance
Congratulations!
Here we Established a successful peering connection
hope this explanation helps you understand some of the important terminologies in VPC Peering

Stay tuned for my next blog. I will keep sharing my learnings and knowledge here with you.
Let's learn together! I appreciate any comments or suggestions you may have to improve my blog content.
Thank you,
Akshay Nazirkar