

Introduction
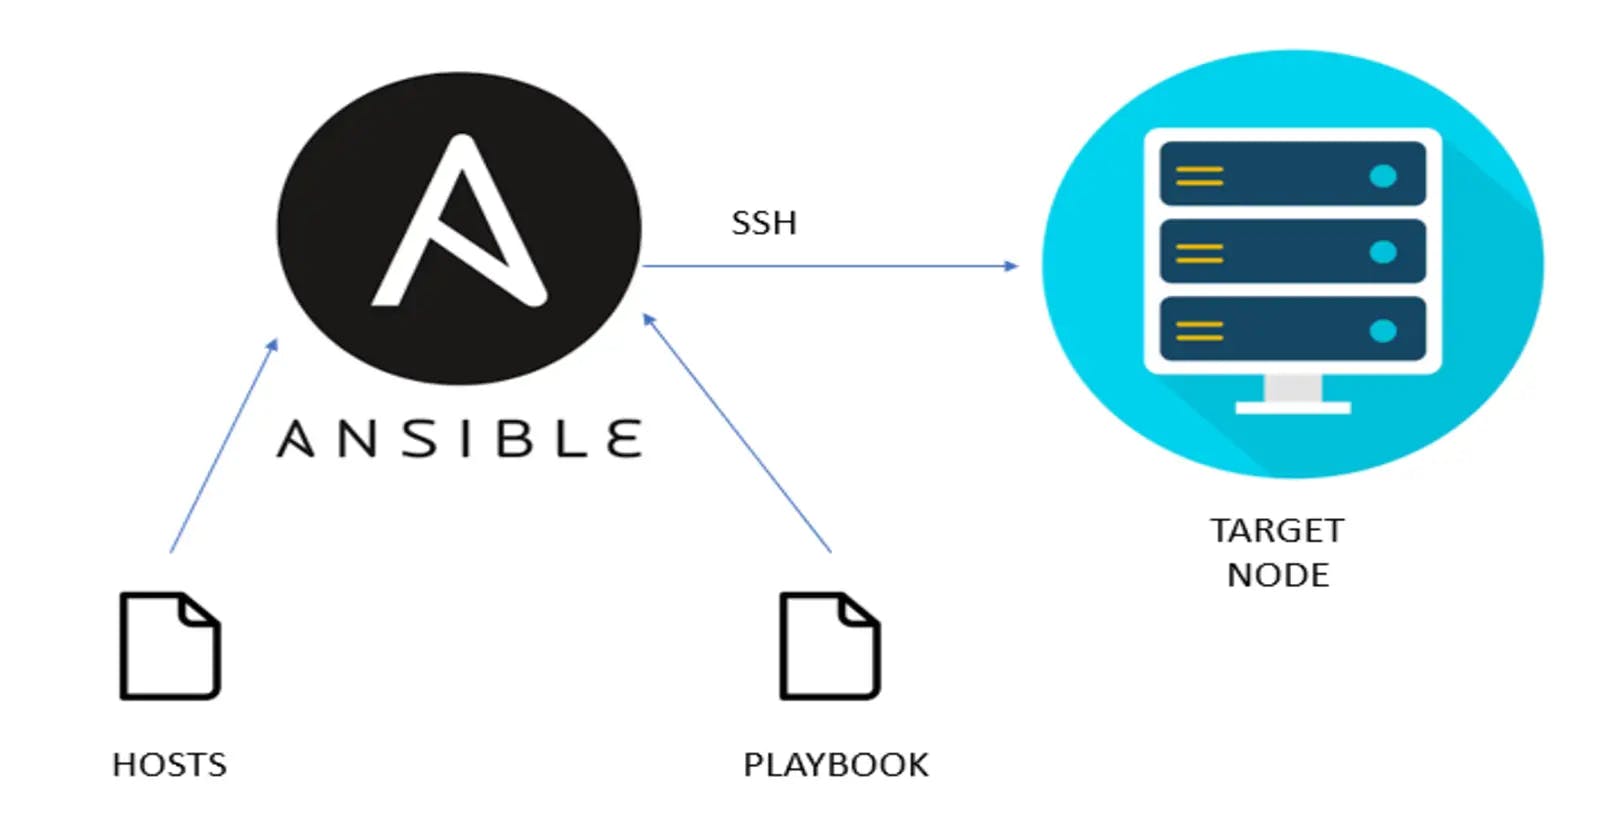
Nginx is a popular open-source web server known for its high performance, reliability, and scalability. Ansible, on the other hand, is a powerful automation tool that enables you to configure and manage infrastructure as code. In this tutorial, I’ll guide you through the process of installing Nginx using an Ansible playbook.
Prerequisites
1. Ec2 instances[4]
ansible-master, server-1, server-2, server-3
Ensure that the All EC2 instances having same key at the time of creation.
AMI-ubuntu, Type-t2.micro, port 22,80,443 should be enabled
2. Ansible Installed (only on ansible-master server)
Step 1: Launch an Ec2 instances and install Ansible only on the master server
1. successfully launch an ec2 instances. And connect them with either putty or ssh client.

2. By executing the following commands one by one we can install the ansible on our ansible master server
sudo apt-add repository ppa:ansible/ansible
sudo apt update
sudo apt install ansible
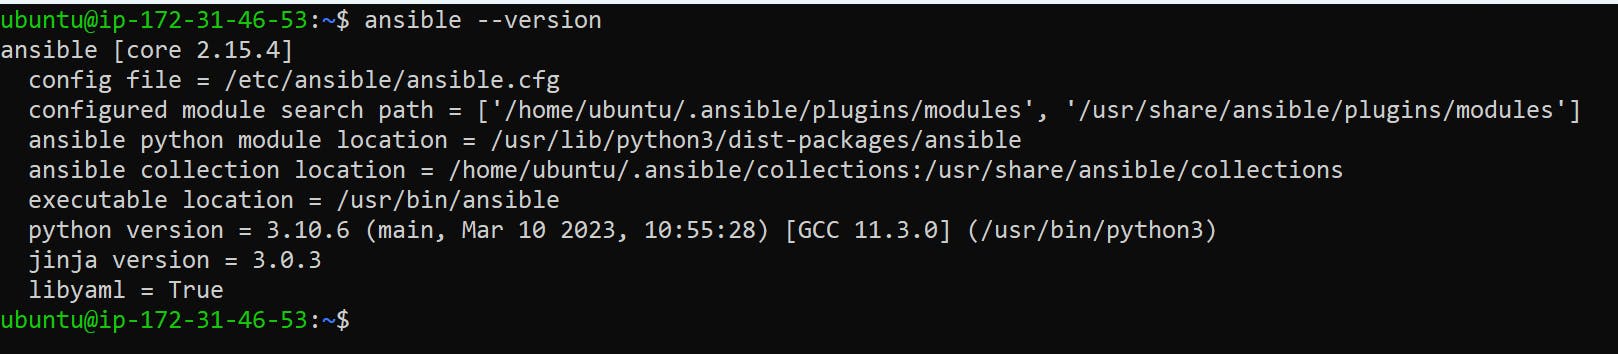
ansible --version
Step 2: Update Hosts file
Update hosts file
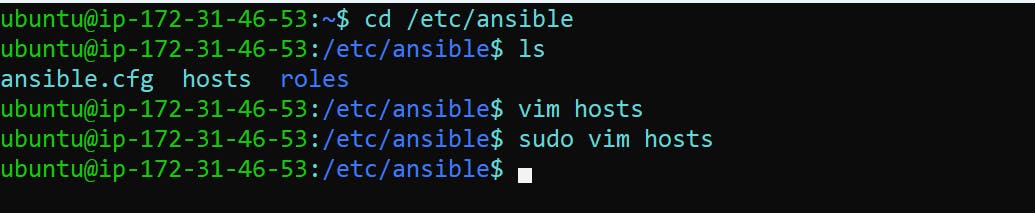
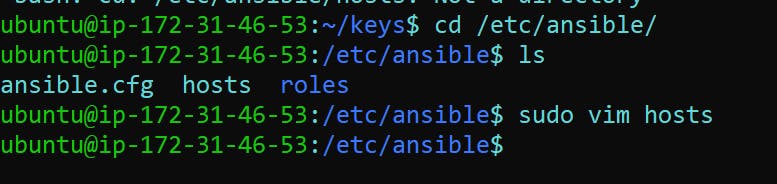
1. Go to the host file path as shown below cd /etc/ansible/ open that file in vim editor mode to update
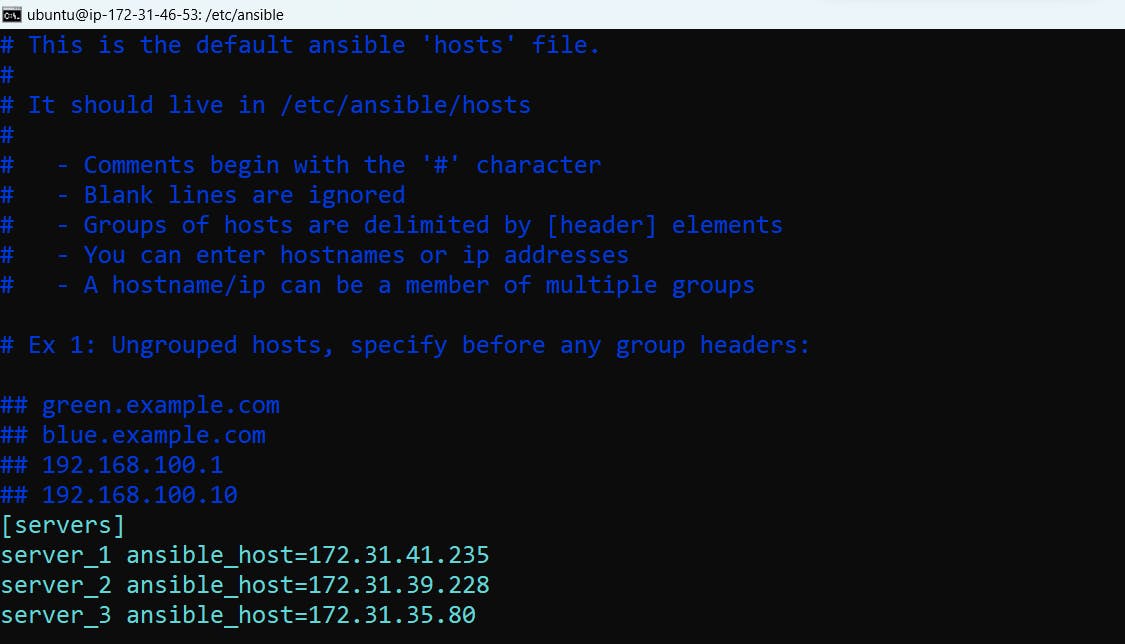
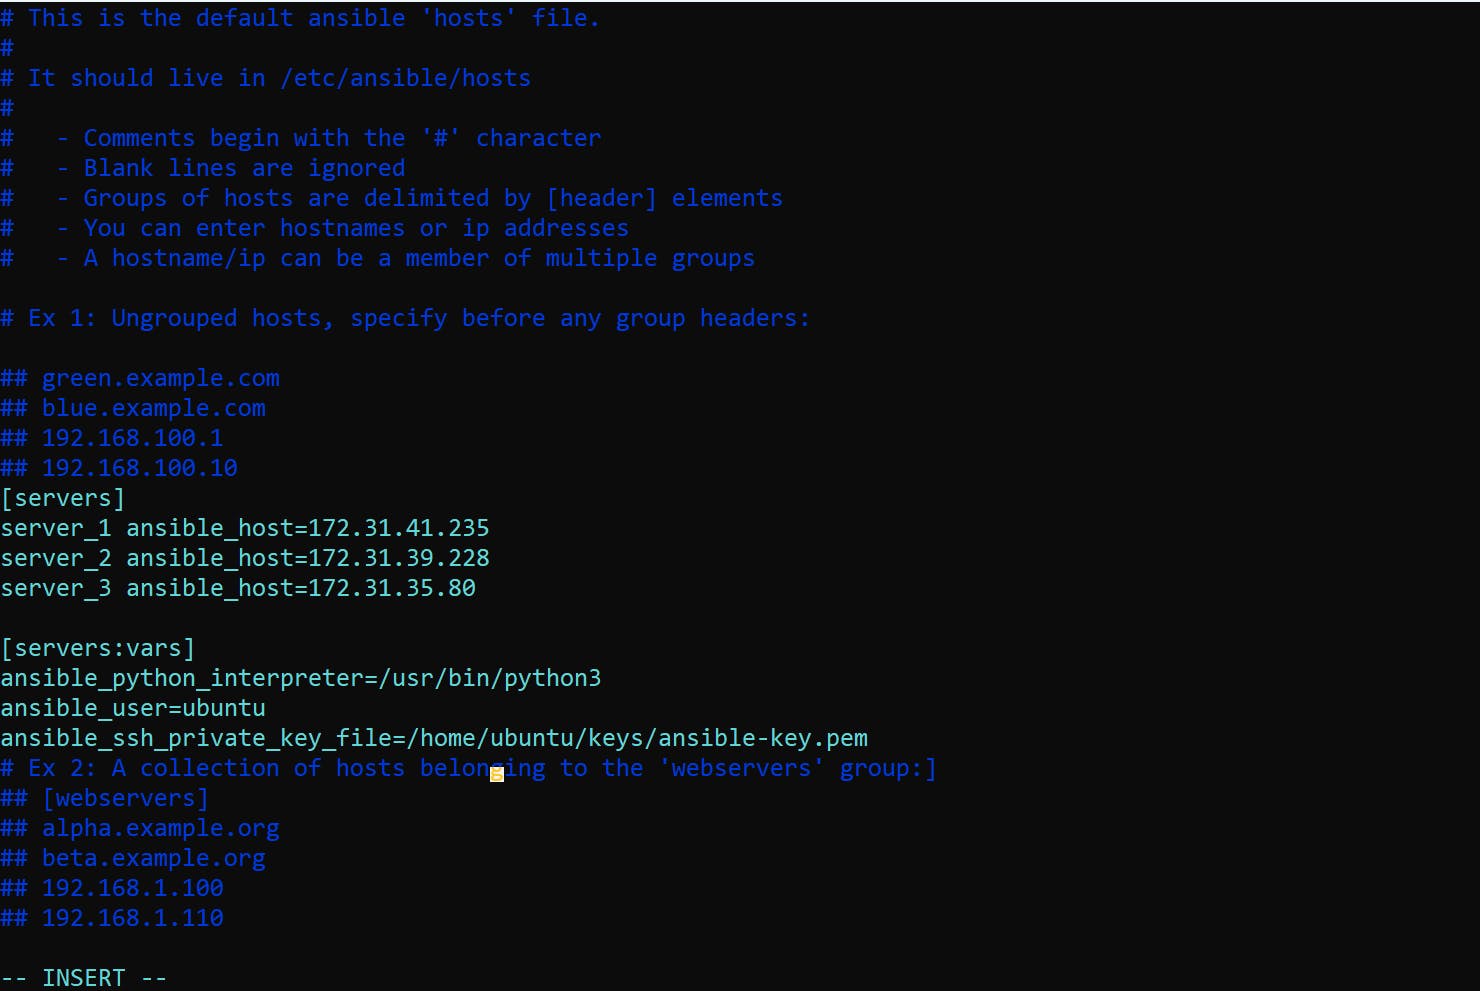
2. Add the private ip addresses of the all three servers and update the hosts file as shown below
3. save and exit the file
Step 3:Copying a .pem Key from Local to Server via SSH
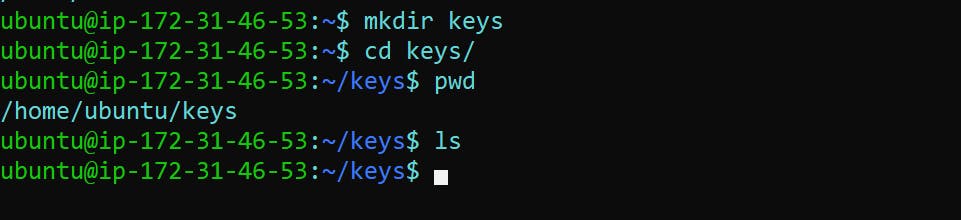
1. mkdir keys: This part creates a new directory named "keys" in your current location.
2. cd keys: This part changes the current working directory to the newly created "keys" directory.
3. Then go to your local machine command prompt where your .pem key is downloded ex- cd Downloads/and copy that .pem key on the ansible master server in the keys directory
4. For that we can simply use below scp command. My .pem key file name is ansible-key.pem so we have to copy that key to keys directory.
scp -i "key_name" <key_source_path> <Instance_host_name>:<key_destination_path>
scp -i "ansible-key.pem" Downloads\ansible-key.pem ubuntu@ec2-3-109-133-134.ap-south-1.compute.amazonaws.com:/home/ubuntu/keys/ansible-key.pem

5. We have successfully transferred the
.pem key to the 'keys' directory on the Ansible master server

Ok6. give the permision to ansible-key.pem file
sudo chmod 400 ansible-key.pem

7. Again go to the hosts file and add the variable in the hosts file.as shown below image.
8. Here, add the user name and your ssh private key file pathin the group [servers:vars]
9. Save and Exit the file
Step 4: Update Configuration file
1. Now update the ansible.cfg file present on path cd /etc/ansible/
2. Run the "ls" command to list files and directories.
3. Verify the "ansible.cfg" file is present in the current directory.
4. Add the below content that ansible.cfg file

[defaults]
host_key_checking = false
remote_user = ubuntu
ask_pass = false
private_key_file = /home/ubuntu/keys/ansible/ansible-key.pem
roles_path = /etc/ansible/roles
[privilege_escalation]
become = true
become_method = sudo
become_user = root
become_ask_pass = false
# Location where ansible look for hosts
inventory = /etc/ansible/hosts
save and exit that file
Step 5 :Confirm Server Connectivity
Validate the connectivity status of our servers with the Ansible master.
ansible servers -m ping all
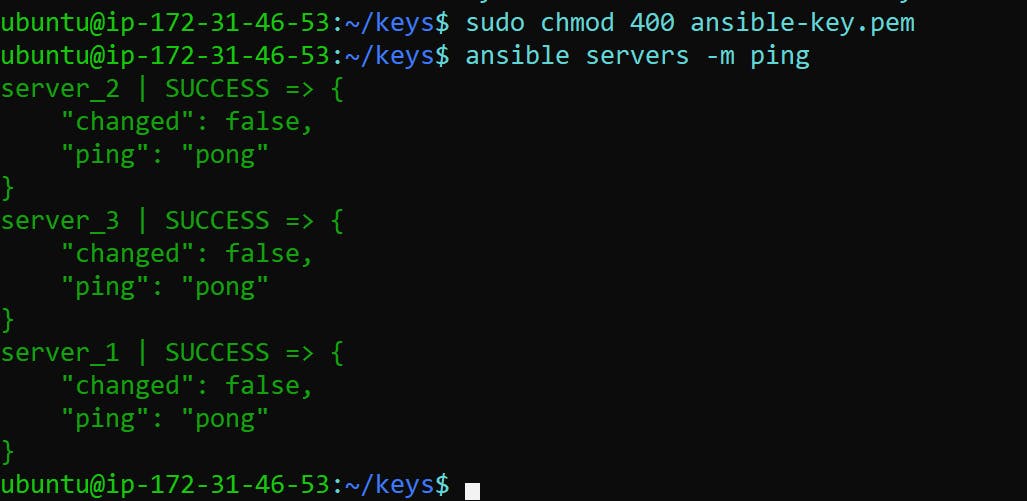
The Ansible master server and other servers have established successful connections.
Step 6 :Creating Ansible Playbook on the Master Server
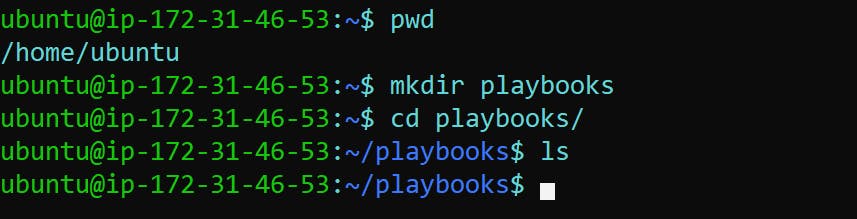
1. Now create a directory playbooks by executing below commands
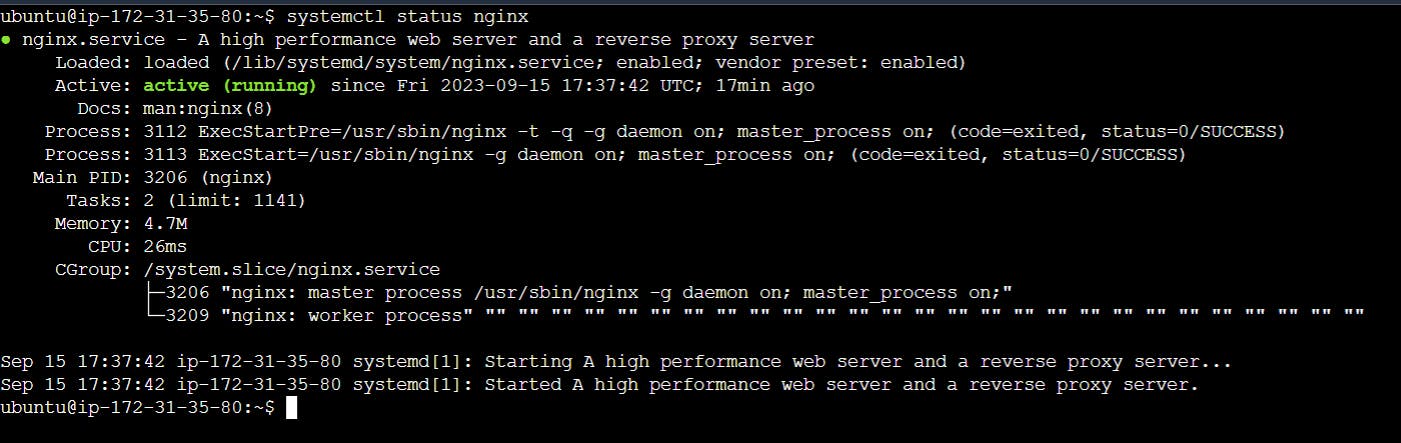
2. Here we are writing a playbook to install nginx on our servers.before that we have to check the status of nginx on our servers by executing below command
systemctl status nginx


3. write a playbook to install nginx and started it install_nginx.yml
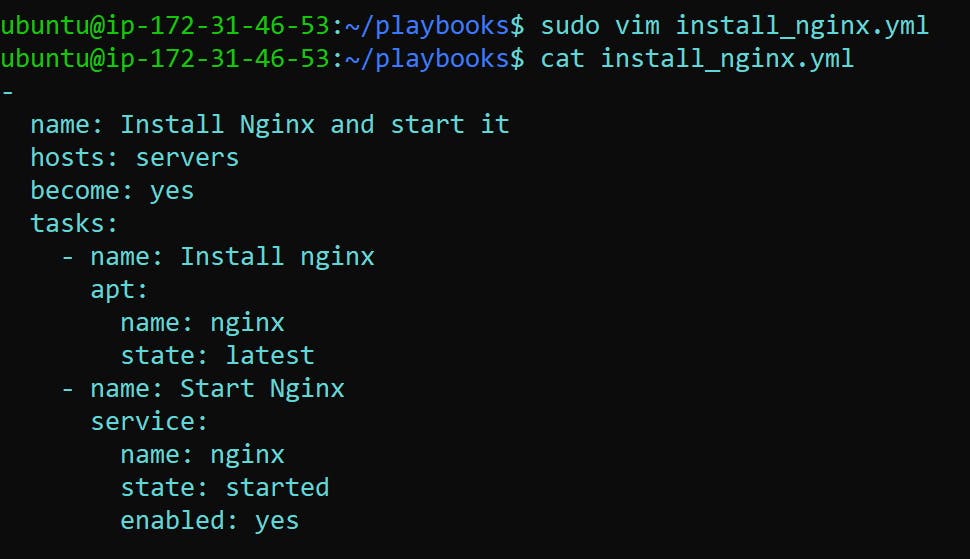
-
  name: Install Nginx and start it
  hosts: servers
  become: yes
  tasks:
    - name: Install nginx
      apt:
        name: nginx
        state: latest
    - name: Start Nginx
      service:
        name: nginx
        state: started
        enabled: yes
4. save and exit that file
5. Now run the playbook by executing command ansible-playbook install_nginx.yml
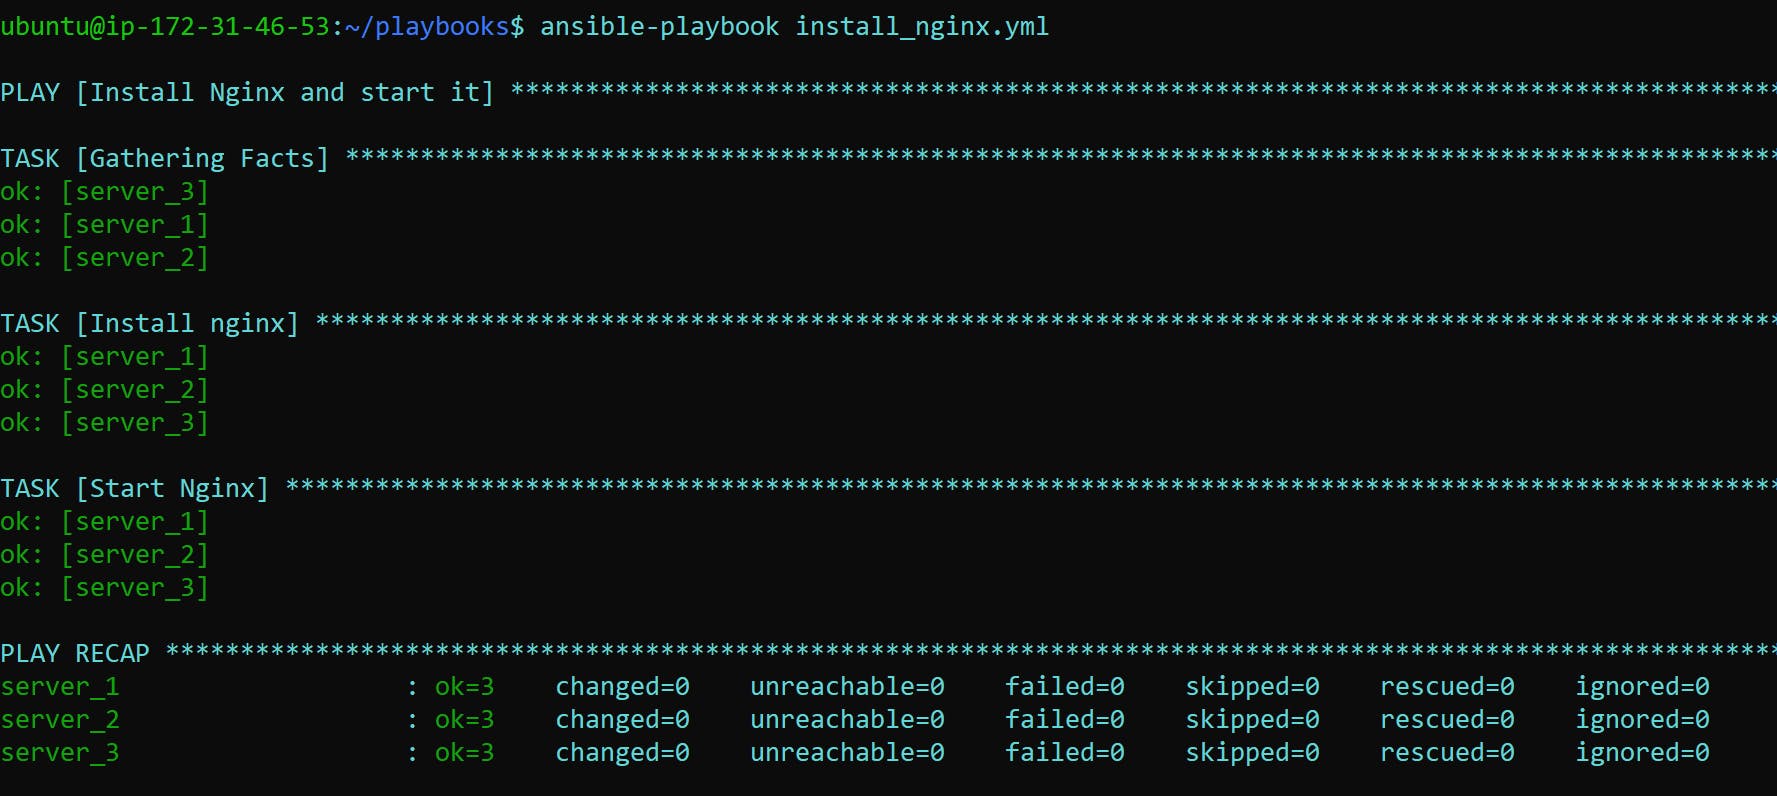
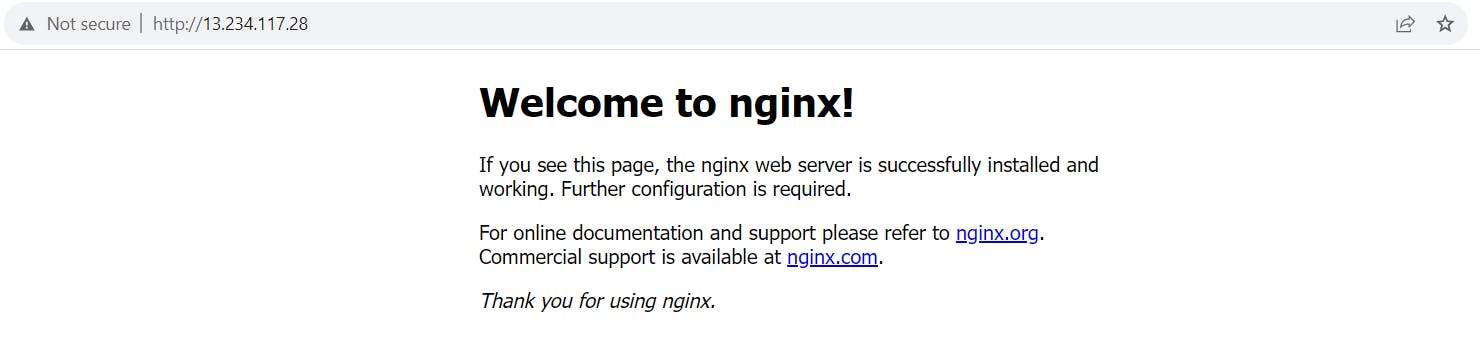
- Here the nginx installed and started successfully
8. Validate locally using [target_server_ec2_instance_public_ip]
Step 7:Deploying a Simple Webpage with Ansible Playbook
In this scenario, I am conducting the automation of a basic HTML website using Ansible playbooks for Nginx configuration and deploying it across multiple servers
1. create a playbook named deploy_static_page.yml
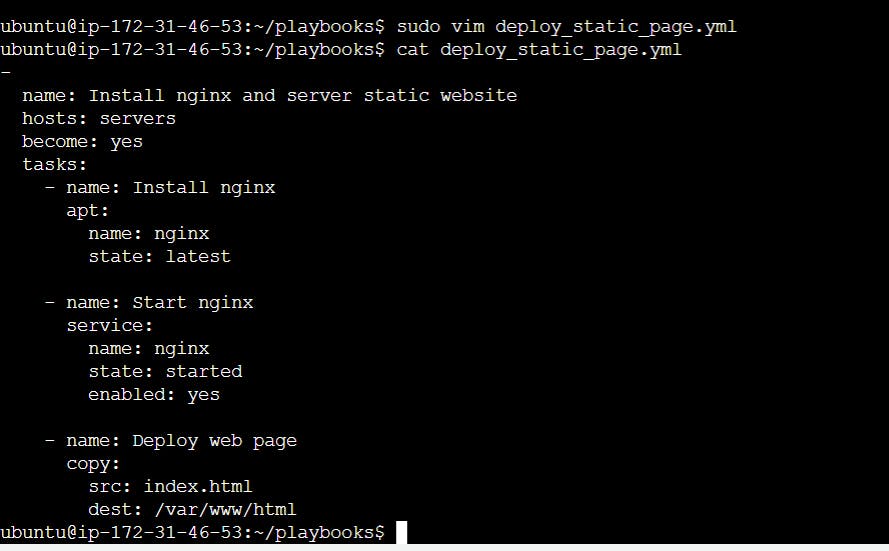
-
  name: Install nginx and server static website
  hosts: servers
  become: yes
  tasks:
    - name: Install nginx
      apt:
        name: nginx
        state: latest

    - name: Start nginx
      service:
        name: nginx
        state: started
        enabled: yes

    - name: Deploy web page
      copy:
        src: index.html
        dest: /var/www/html
2. Place your index.html file in the same directory as your playbook (deploy-ststic_page.yml) .
The index.html file is the main content of your website and serves as the default landing page when visitors access your site. Deploying it using Ansible ensures your website's content is consistent and easily maintained on target servers.
3. Now create index.html file
vim index.html
<!DOCTYPE html>
<html lang="en">
<head>
    <meta charset="UTF-8">
    <meta name="viewport" content="width=device-width, initial-scale=1.0">
    <title>Cool Static Page</title>
    <style>
        body {
            font-family: Arial, sans-serif;
            background-color: #f0f0f0;
            margin: 0;
            padding: 0;
            text-align: center;
        }

        header {
            background-color: #333;
            color: #fff;
            padding: 20px;
        }

        h1 {
            font-size: 36px;
        }

        .container {
            max-width: 800px;
            margin: 20px auto;
            padding: 20px;
            background-color: #fff;
            border-radius: 5px;
            box-shadow: 0 0 10px rgba(0, 0, 0, 0.2);
        }

        p {
            font-size: 18px;
            line-height: 1.6;
        }

        .button {
            display: inline-block;
            padding: 10px 20px;
            background-color: #007bff;
            color: #fff;
            text-decoration: none;
            border-radius: 5px;
        }

        .button:hover {
            background-color: #0056b3;
        }
    </style>
</head>
<body>
    <header>
        <h1>Welcome to My Cool Static Page</h1>
    </header>
    <div class="container">
        <p>Congratulations!!! You Have Deployed It.</p>
        <a href="#" class="button">Learn More</a>
    </div>
</body>
</html>
4. Now run the playbook deploy_static_page.yml

5. now validate the static page with one of the servers public ip on browser
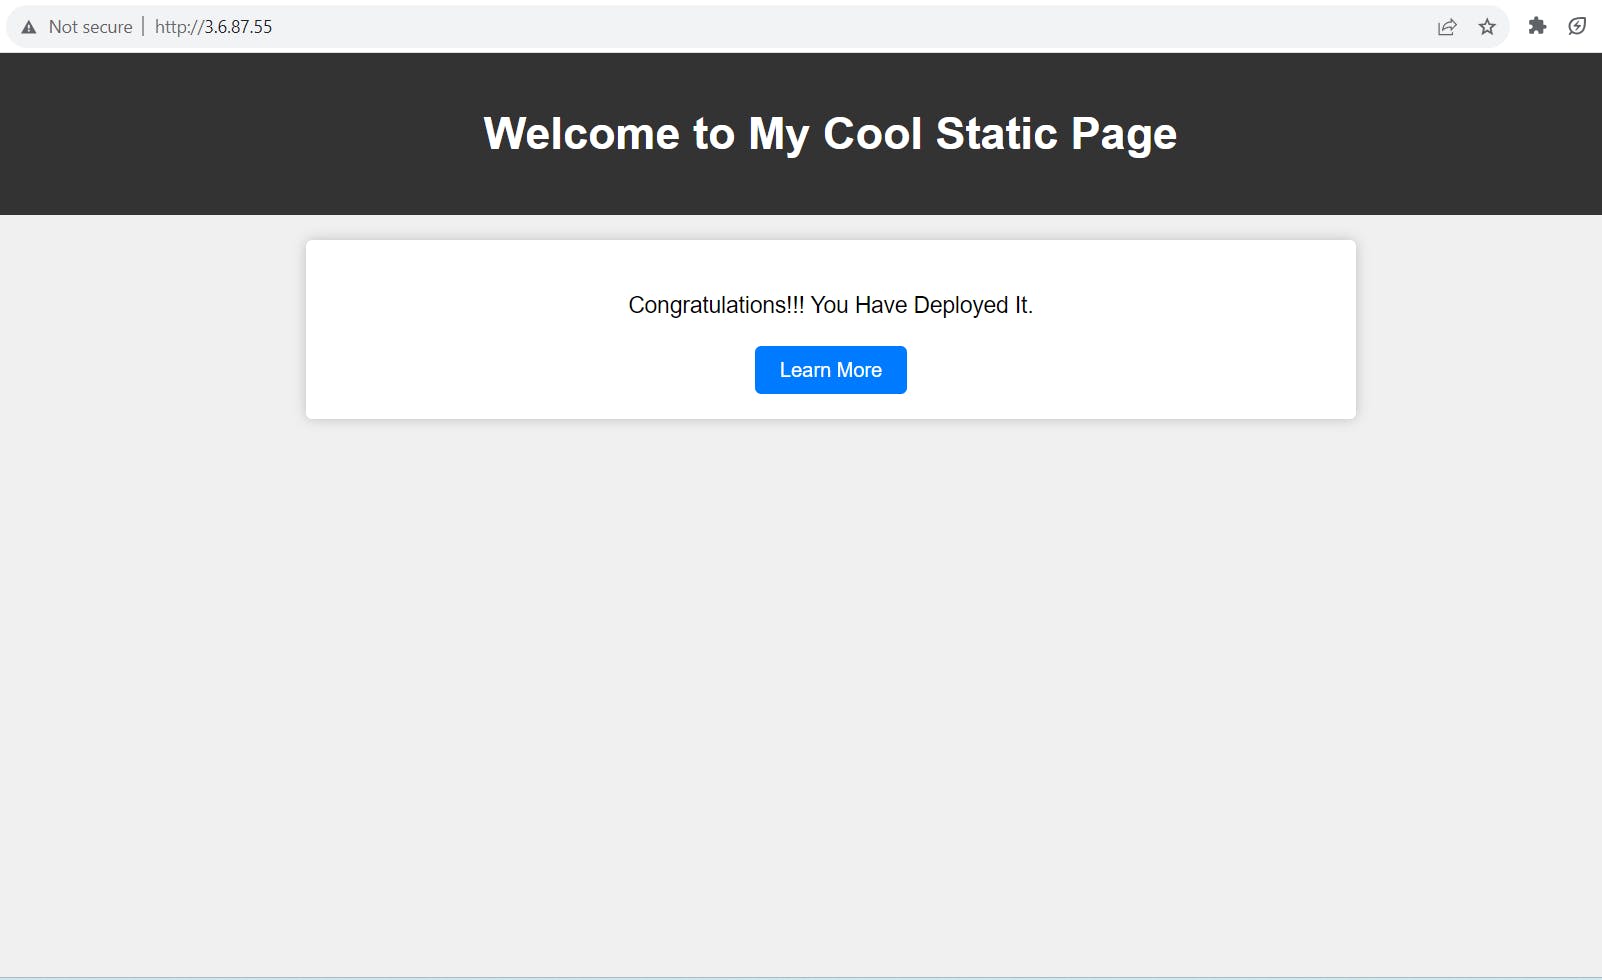
The static website has been deployed successfully using Ansible Playbooks and Nginx, and it is now accessible on the designated servers.
Conclusion
This project involves setting up an Ansible automation environment on the master server, which includes updating the host and configuration files to ensure seamless communication with target servers. Additionally, Ansible playbooks are created to streamline the installation of Nginx, a widely-used web server, and to deploy a static webpage across multiple servers. This automation process enhances efficiency and consistency in web server management, making it easier to deploy and manage web applications.